Advanced Usage
This section will cover some advanced usages of Postman and Newman, including testing data, testing scripts, testing reports, and report integration. It will also explain how to integrate Postman and Newman into the CI/CD process for automated testing.
Generating HTML Test Reports
Using the newman-reporter-htmlextra as an example, the demo will illustrate how to generate HTML test reports.
Installing the newman-reporter-htmlextra Dependency
npm install newman-reporter-htmlextra --save-dev
Note: Currently, there are compatibility issues with some packages in the latest version (V6) of Newman regarding HTML test reports. Therefore, version 5.1.2 is used here.
Adjusting package.json
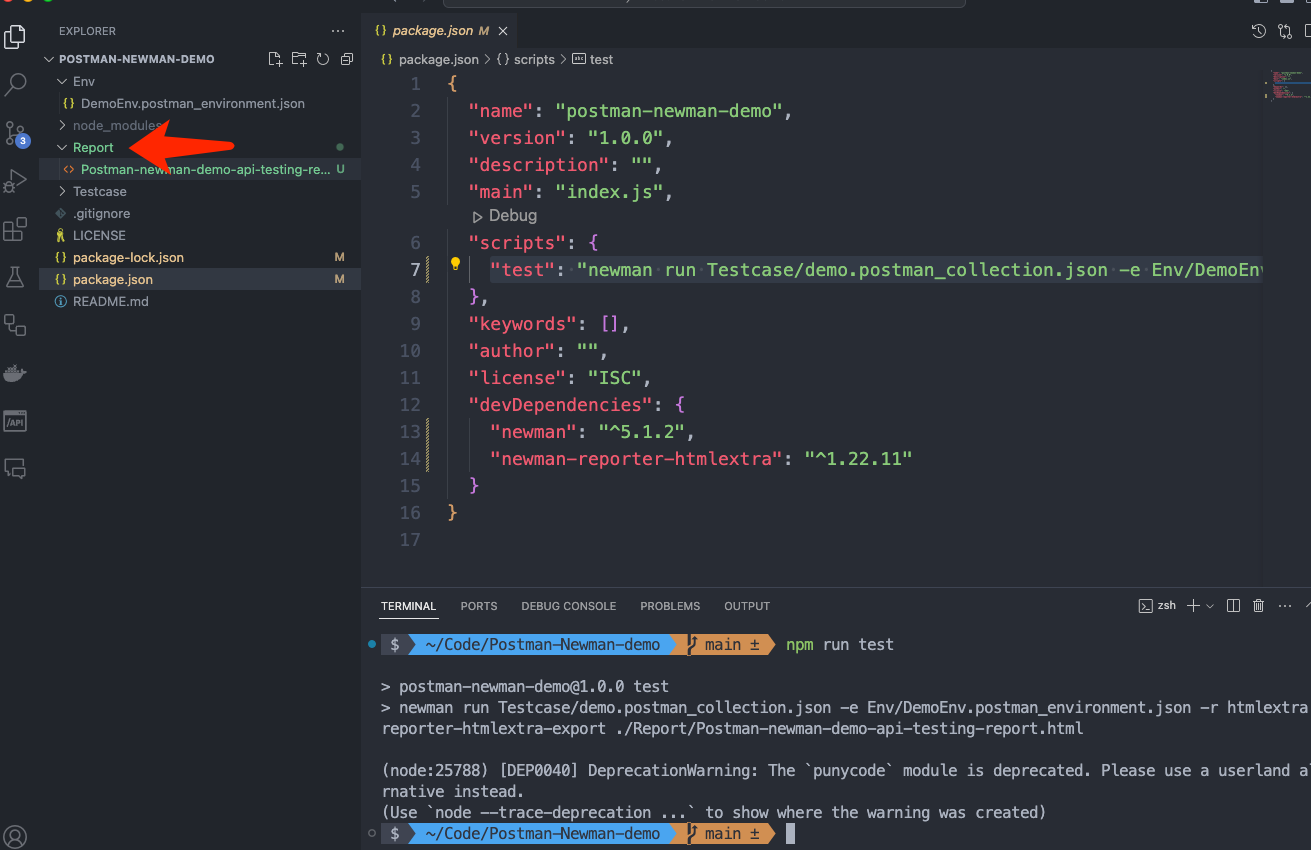
In the package.json file, update the test script to run test cases and generate HTML test reports:
"test": "newman run Testcase/demo.postman_collection.json -e Env/DemoEnv.postman_environment.json -r htmlextra --reporter-htmlextra-export ./Report/Postman-newman-demo-api-testing-report.html"
Specify the path for the HTML test report output as Report/Postman-newman-demo-api-testing-report.html
Run Test Cases to Generate HTML Report
- Run the test cases
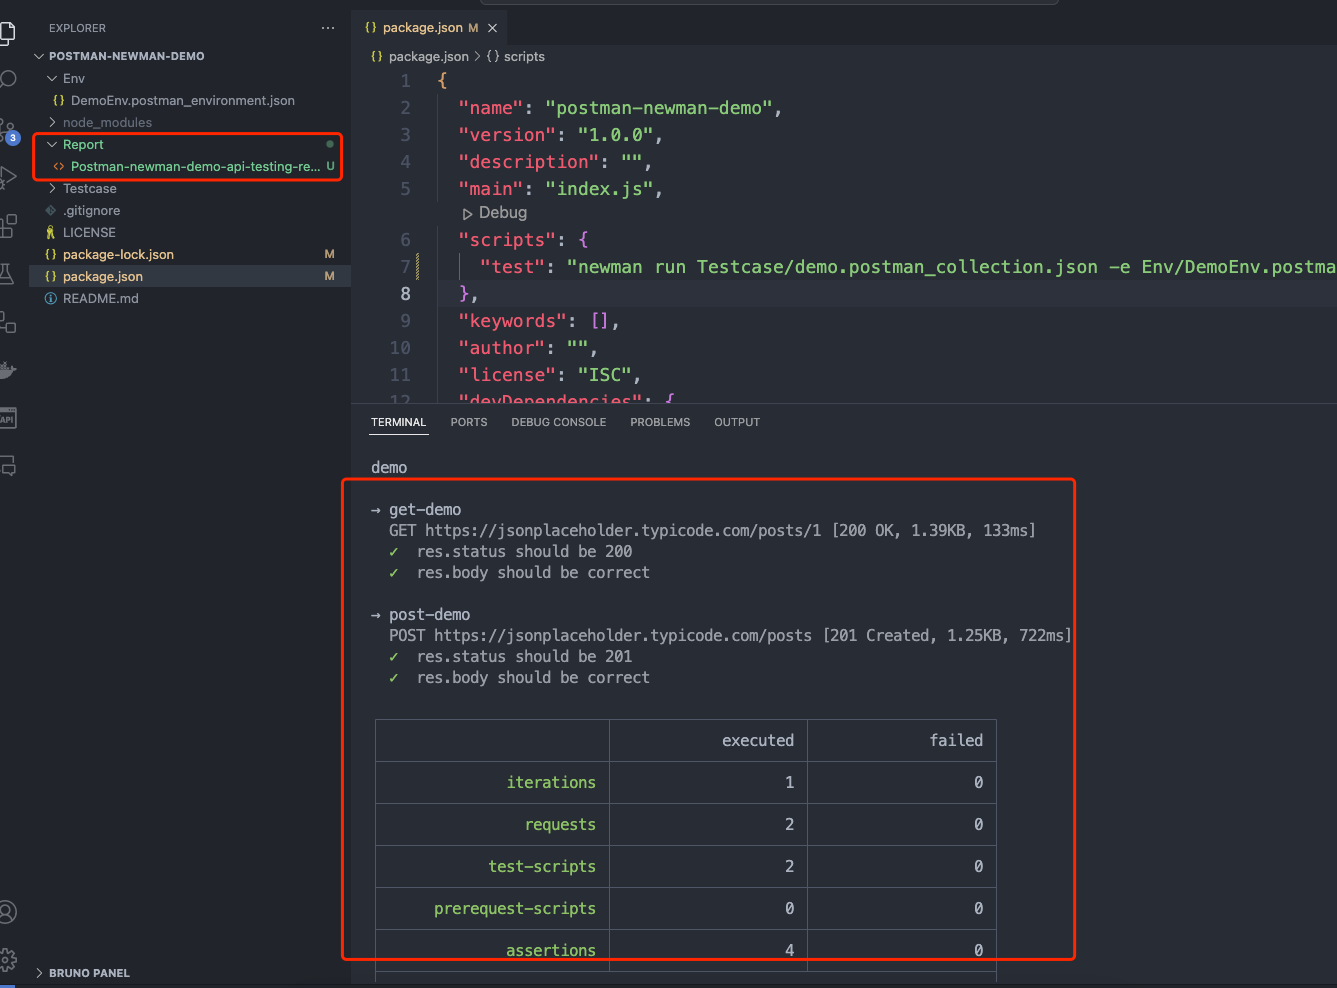
npm run test
- Check the Report folder, you will find that a Postman-newman-demo-api-testing-report.html file has been generated.
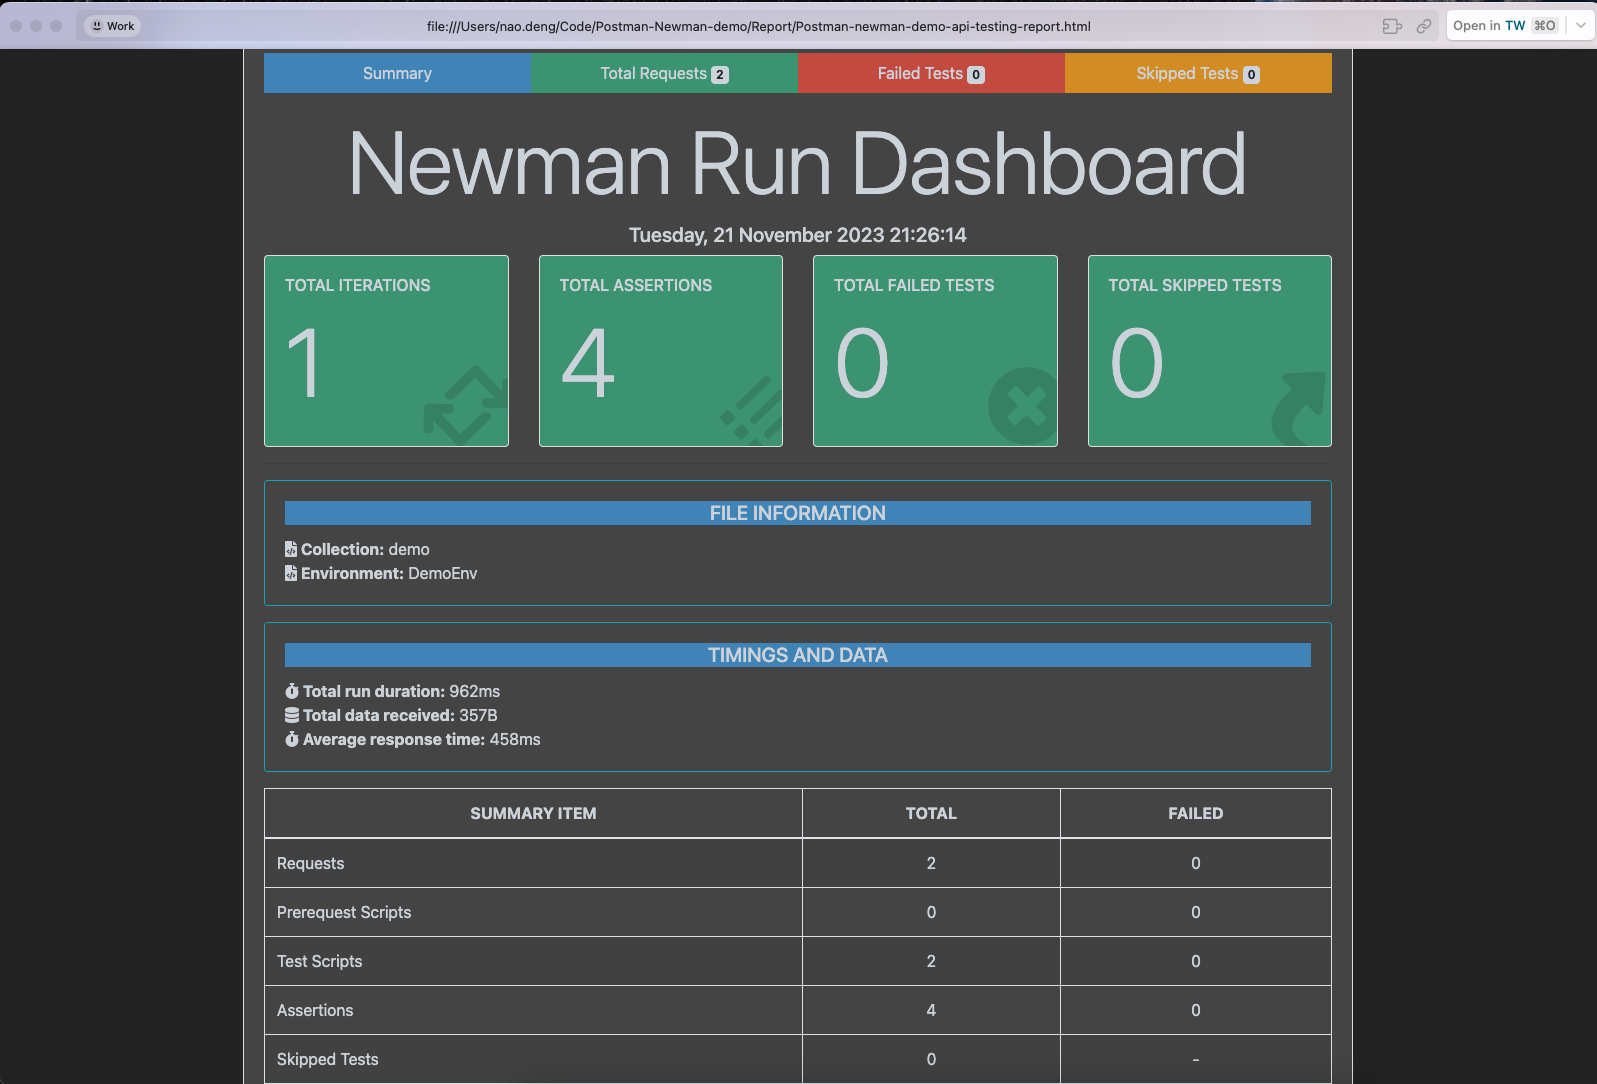
- Open the Postman-newman-demo-api-testing-report.html file in a browser to view the HTML test report.
Generating Reports in Multiple Formats
The previous configuration is for generating HTML-format test reports. If you want to output reports in multiple formats, such as the command line (CLI) report, add the following script to the package.json file:
"test": "newman run Testcase/demo.postman_collection.json -e Env/DemoEnv.postman_environment.json -r cli,htmlextra --reporter-htmlextra-export ./Report/Postman-newman-demo-api-testing-report.html"
Run the test cases again, and you will find both HTML and CLI format test reports in the Report folder.
Continuous Integration (CI) with CI/CD
Integrating API automation test code into the CI/CD process enables automated testing, improving testing efficiency.
Integrating with GitHub Actions
Taking GitHub Actions as an example, similar steps can be followed for other CI tools.
Refer to the demo: Postman-Newman-demo
Create the .github/workflows directory: In your GitHub repository, create a directory named .github/workflows. This will be the place to store GitHub Actions workflow files.
Create the workflow file: In the .github/workflows directory, create a YAML-formatted workflow file, for example, postman.yml.
Edit the postman.yml file: Copy and paste the following content into the file:
name: RUN Postman API Test CI

on:
  push:
    branches: [ "main" ]
  pull_request:
    branches: [ "main" ]

jobs:
  RUN-Postman-API-Test:

    runs-on: ubuntu-latest

    strategy:
      matrix:
        node-version: [ 18.x]
        # See supported Node.js release schedule at https://nodejs.org/en/about/releases/

    steps:
      - uses: actions/checkout@v3
      - name: Use Node.js ${{ matrix.node-version }}
        uses: actions/setup-node@v3
        with:
          node-version: ${{ matrix.node-version }}
          cache: 'npm'

      - name: Installation of related packages
        run: npm ci

      - name: RUN SuperTest API Testing
        run: npm test

      - name: Archive Postman test report
        uses: actions/upload-artifact@v3
        with:
          name: Postman-test-report
          path: Report

      - name: Upload Postman report to GitHub
        uses: actions/upload-artifact@v3
        with:
          name: Postman-test-report
          path: Report
- Commit your code: Add the postman.yml file to the repository and commit the changes.
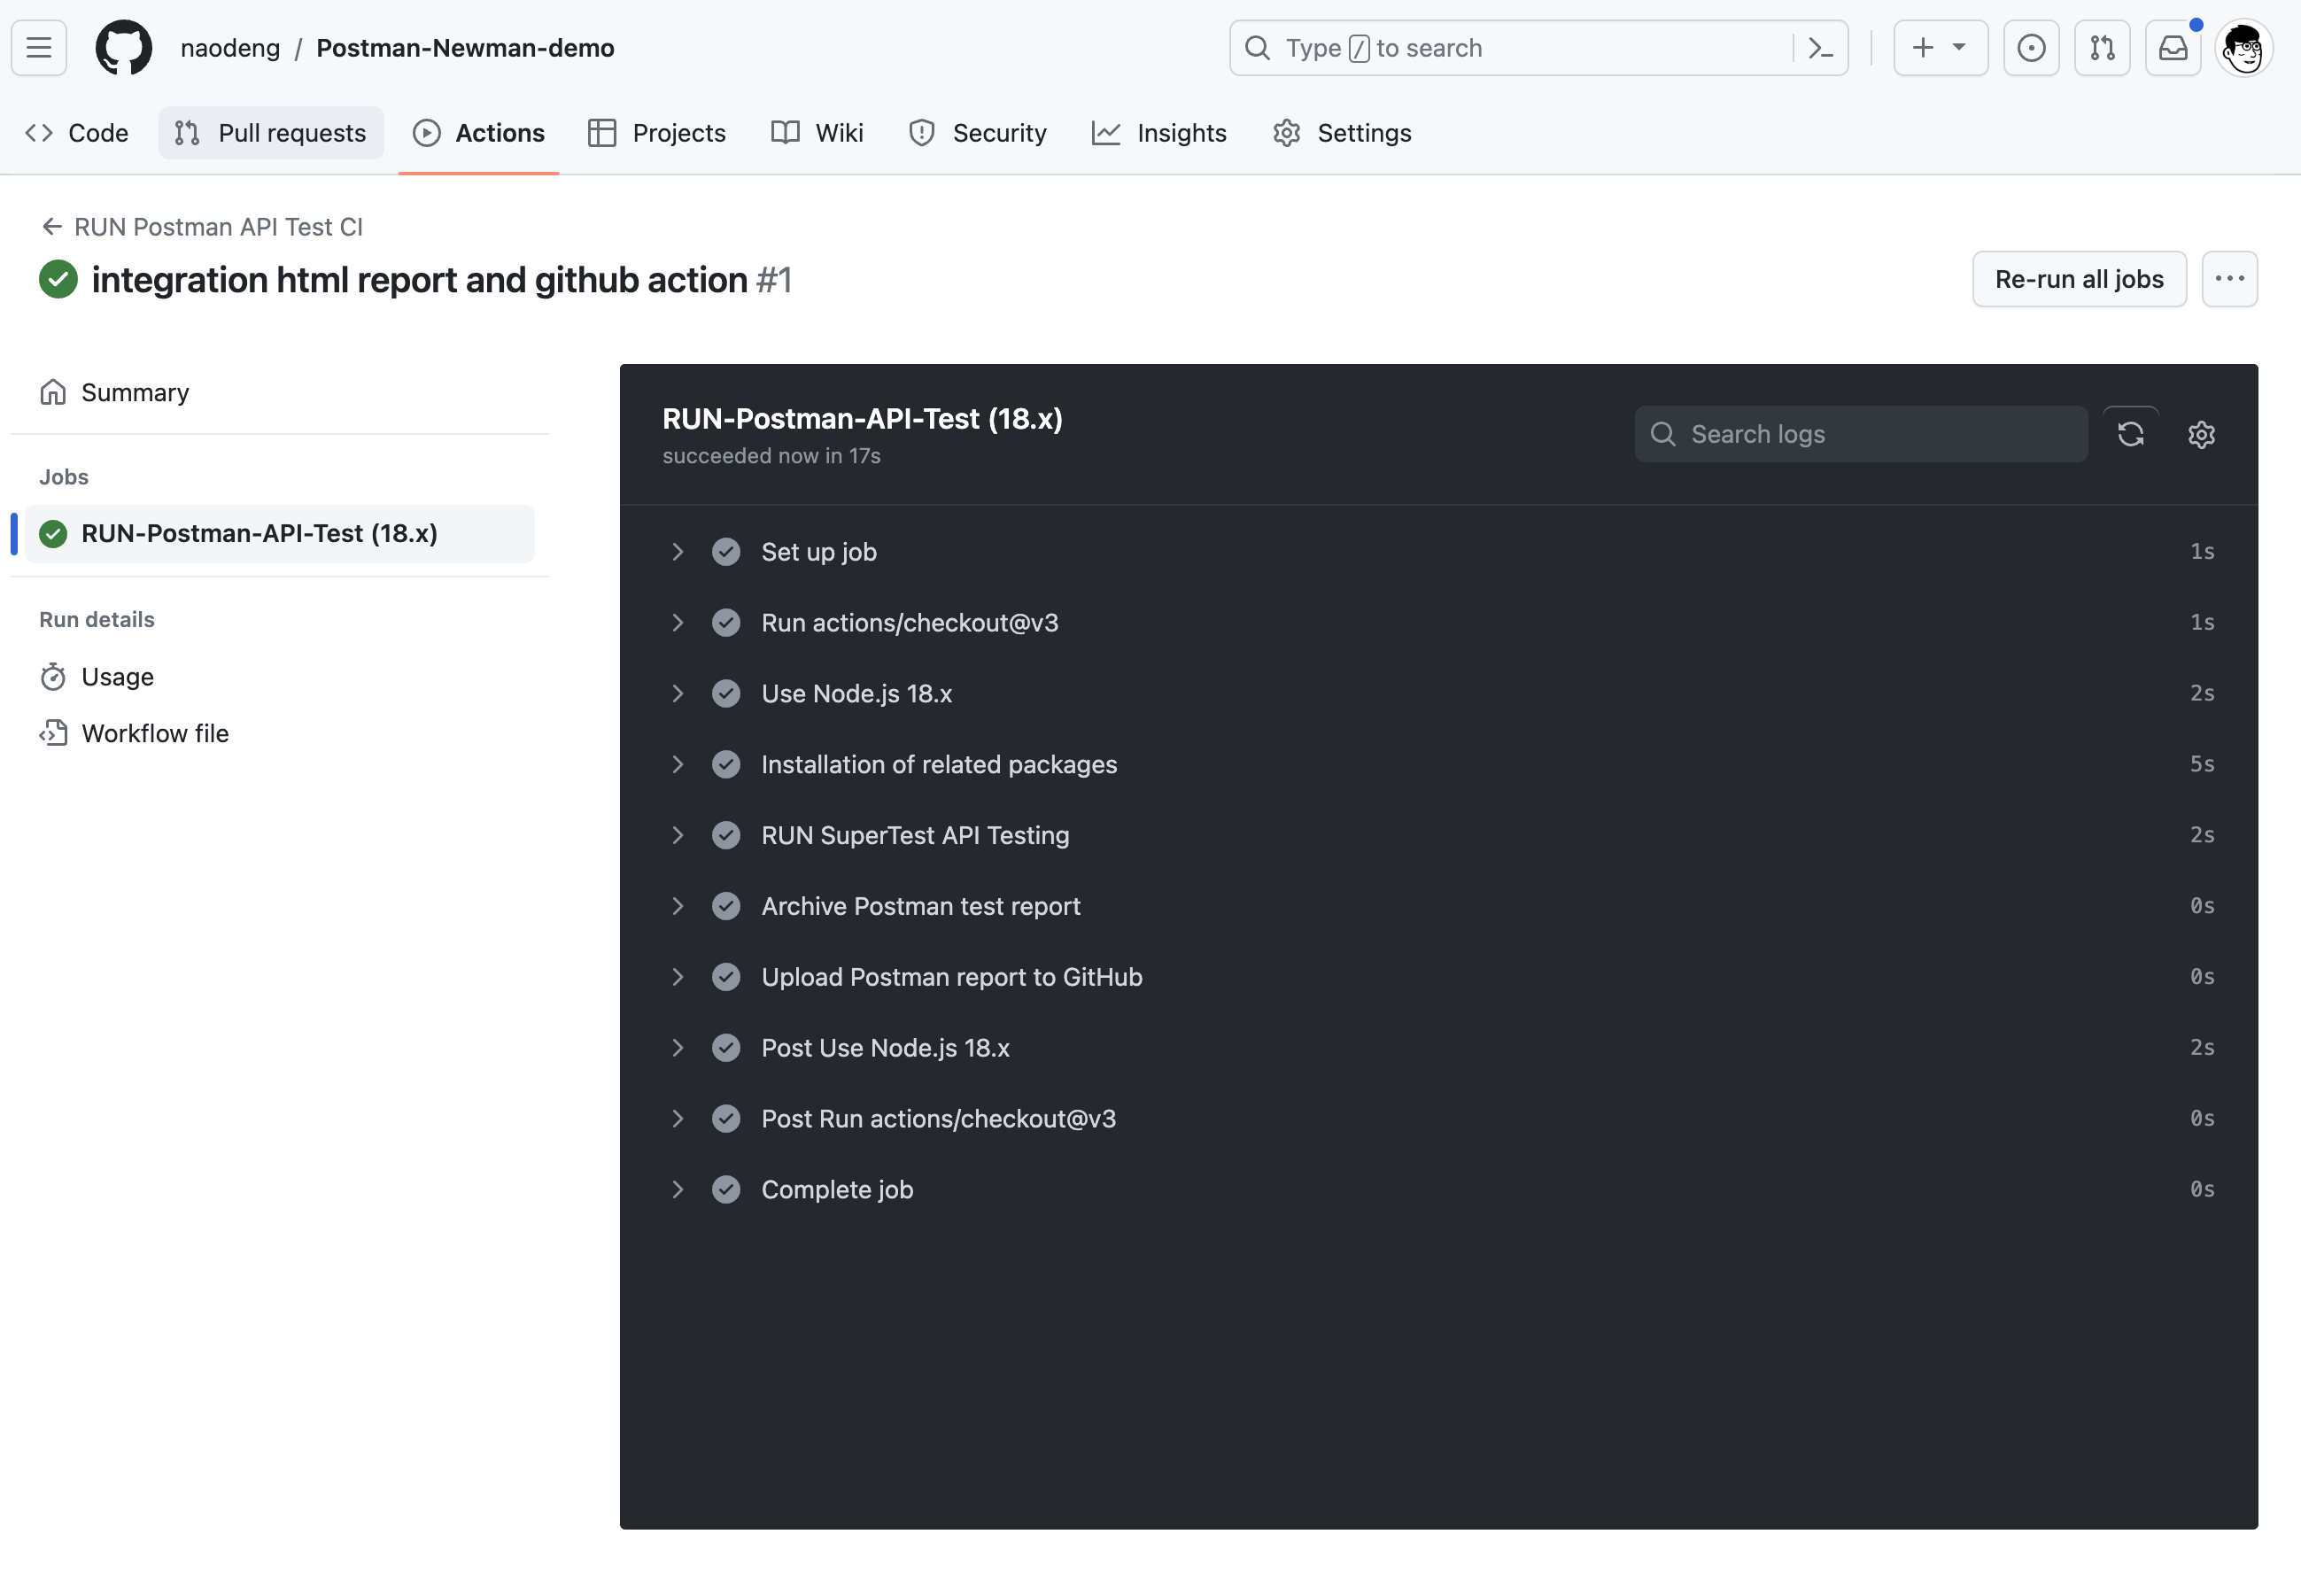
- View the test report: In GitHub, navigate to your repository. Click on the Actions tab at the top and then click on the RUN-Postman-API-Test workflow on the left. You should see the workflow running, and once it completes, you can view the results.
Integrating Allure Test Report
Allure is a lightweight, flexible, and multi-language-supported test reporting tool that can generate various types of test reports, including pie charts, bar charts, line charts, etc., making it easy to visualize test results.
Installing Allure Test Report Dependencies
npm install newman-reporter-allure --save-dev
Adjusting the Script in package.json for Generating Allure Test Reports
"test": "newman run Testcase/demo.postman_collection.json -e Env/DemoEnv.postman_environment.json -r cli,allure --reporter-allure-export ./allure-results"
Adjusting Postman Test Cases
- Modify the Tests script in the “get-demo” request. Add the following script to generate Allure test reports:
// @allure.label.suite=postman-new-api-testing-demo
// @allure.label.story="Verify-the-get-api-return-correct-data"
// @allure.label.owner="naodeng"
// @allure.label.tag="GETAPI"

pm.test("res.status should be 200", function () {
  pm.response.to.have.status(200);
});
pm.test("res.body should be correct", function() {
  var data = pm.response.json();
  pm.expect(data.id).to.equal(1);
  pm.expect(data.title).to.contains('provident');
});
- Adjust the Tests script in the “post-demo” request. Add the following script to generate Allure test reports:
// @allure.label.suite=postman-new-api-testing-demo
// @allure.label.story="Verify-the-post-api-return-correct-data"
// @allure.label.owner="naodeng"
// @allure.label.tag="POSTAPI"

pm.test("res.status should be 201", function () {
  pm.response.to.have.status(201);
});
pm.test("res.body should be correct", function() {
  var data = pm.response.json();
  pm.expect(data.id).to.equal(101);
  pm.expect(data.title).to.equal('foo');
});
- Save the modified Postman test cases, export the test case file again, and replace the original test case file.
Run Test Cases to Generate Allure Report
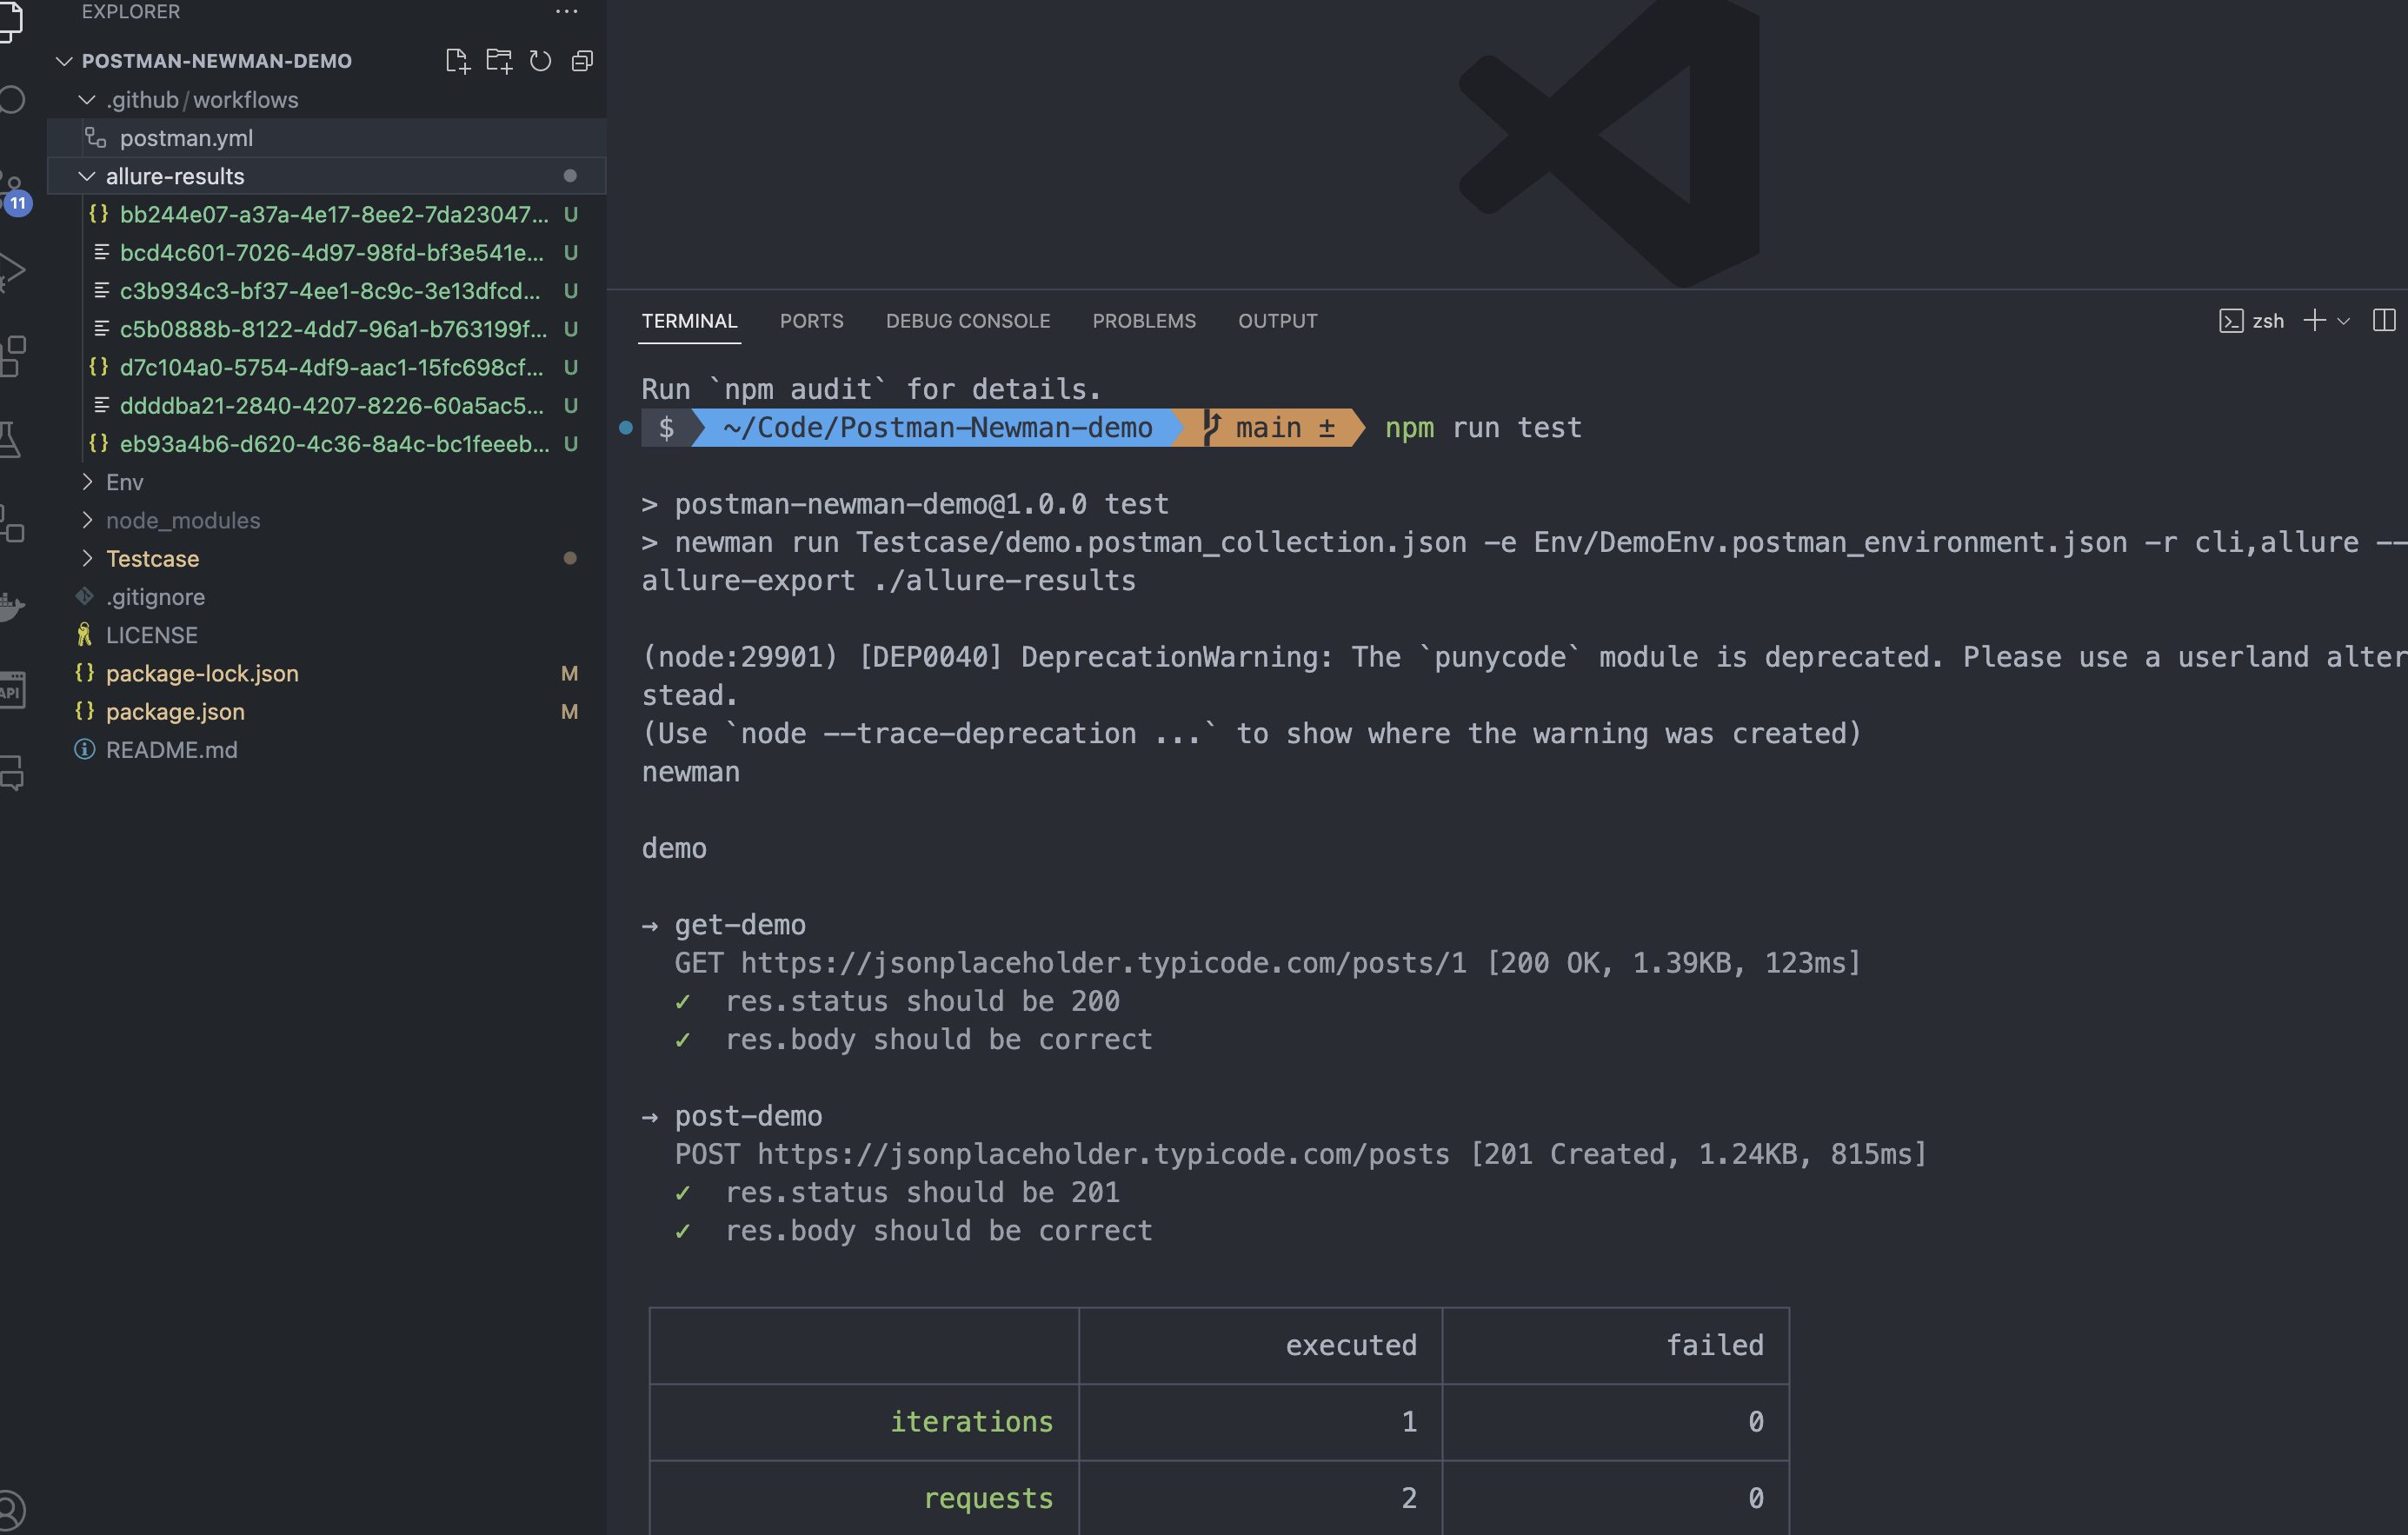
- Run the test cases
npm run test
The allure-results folder will be generated in the project folder, containing the execution results of the test cases.
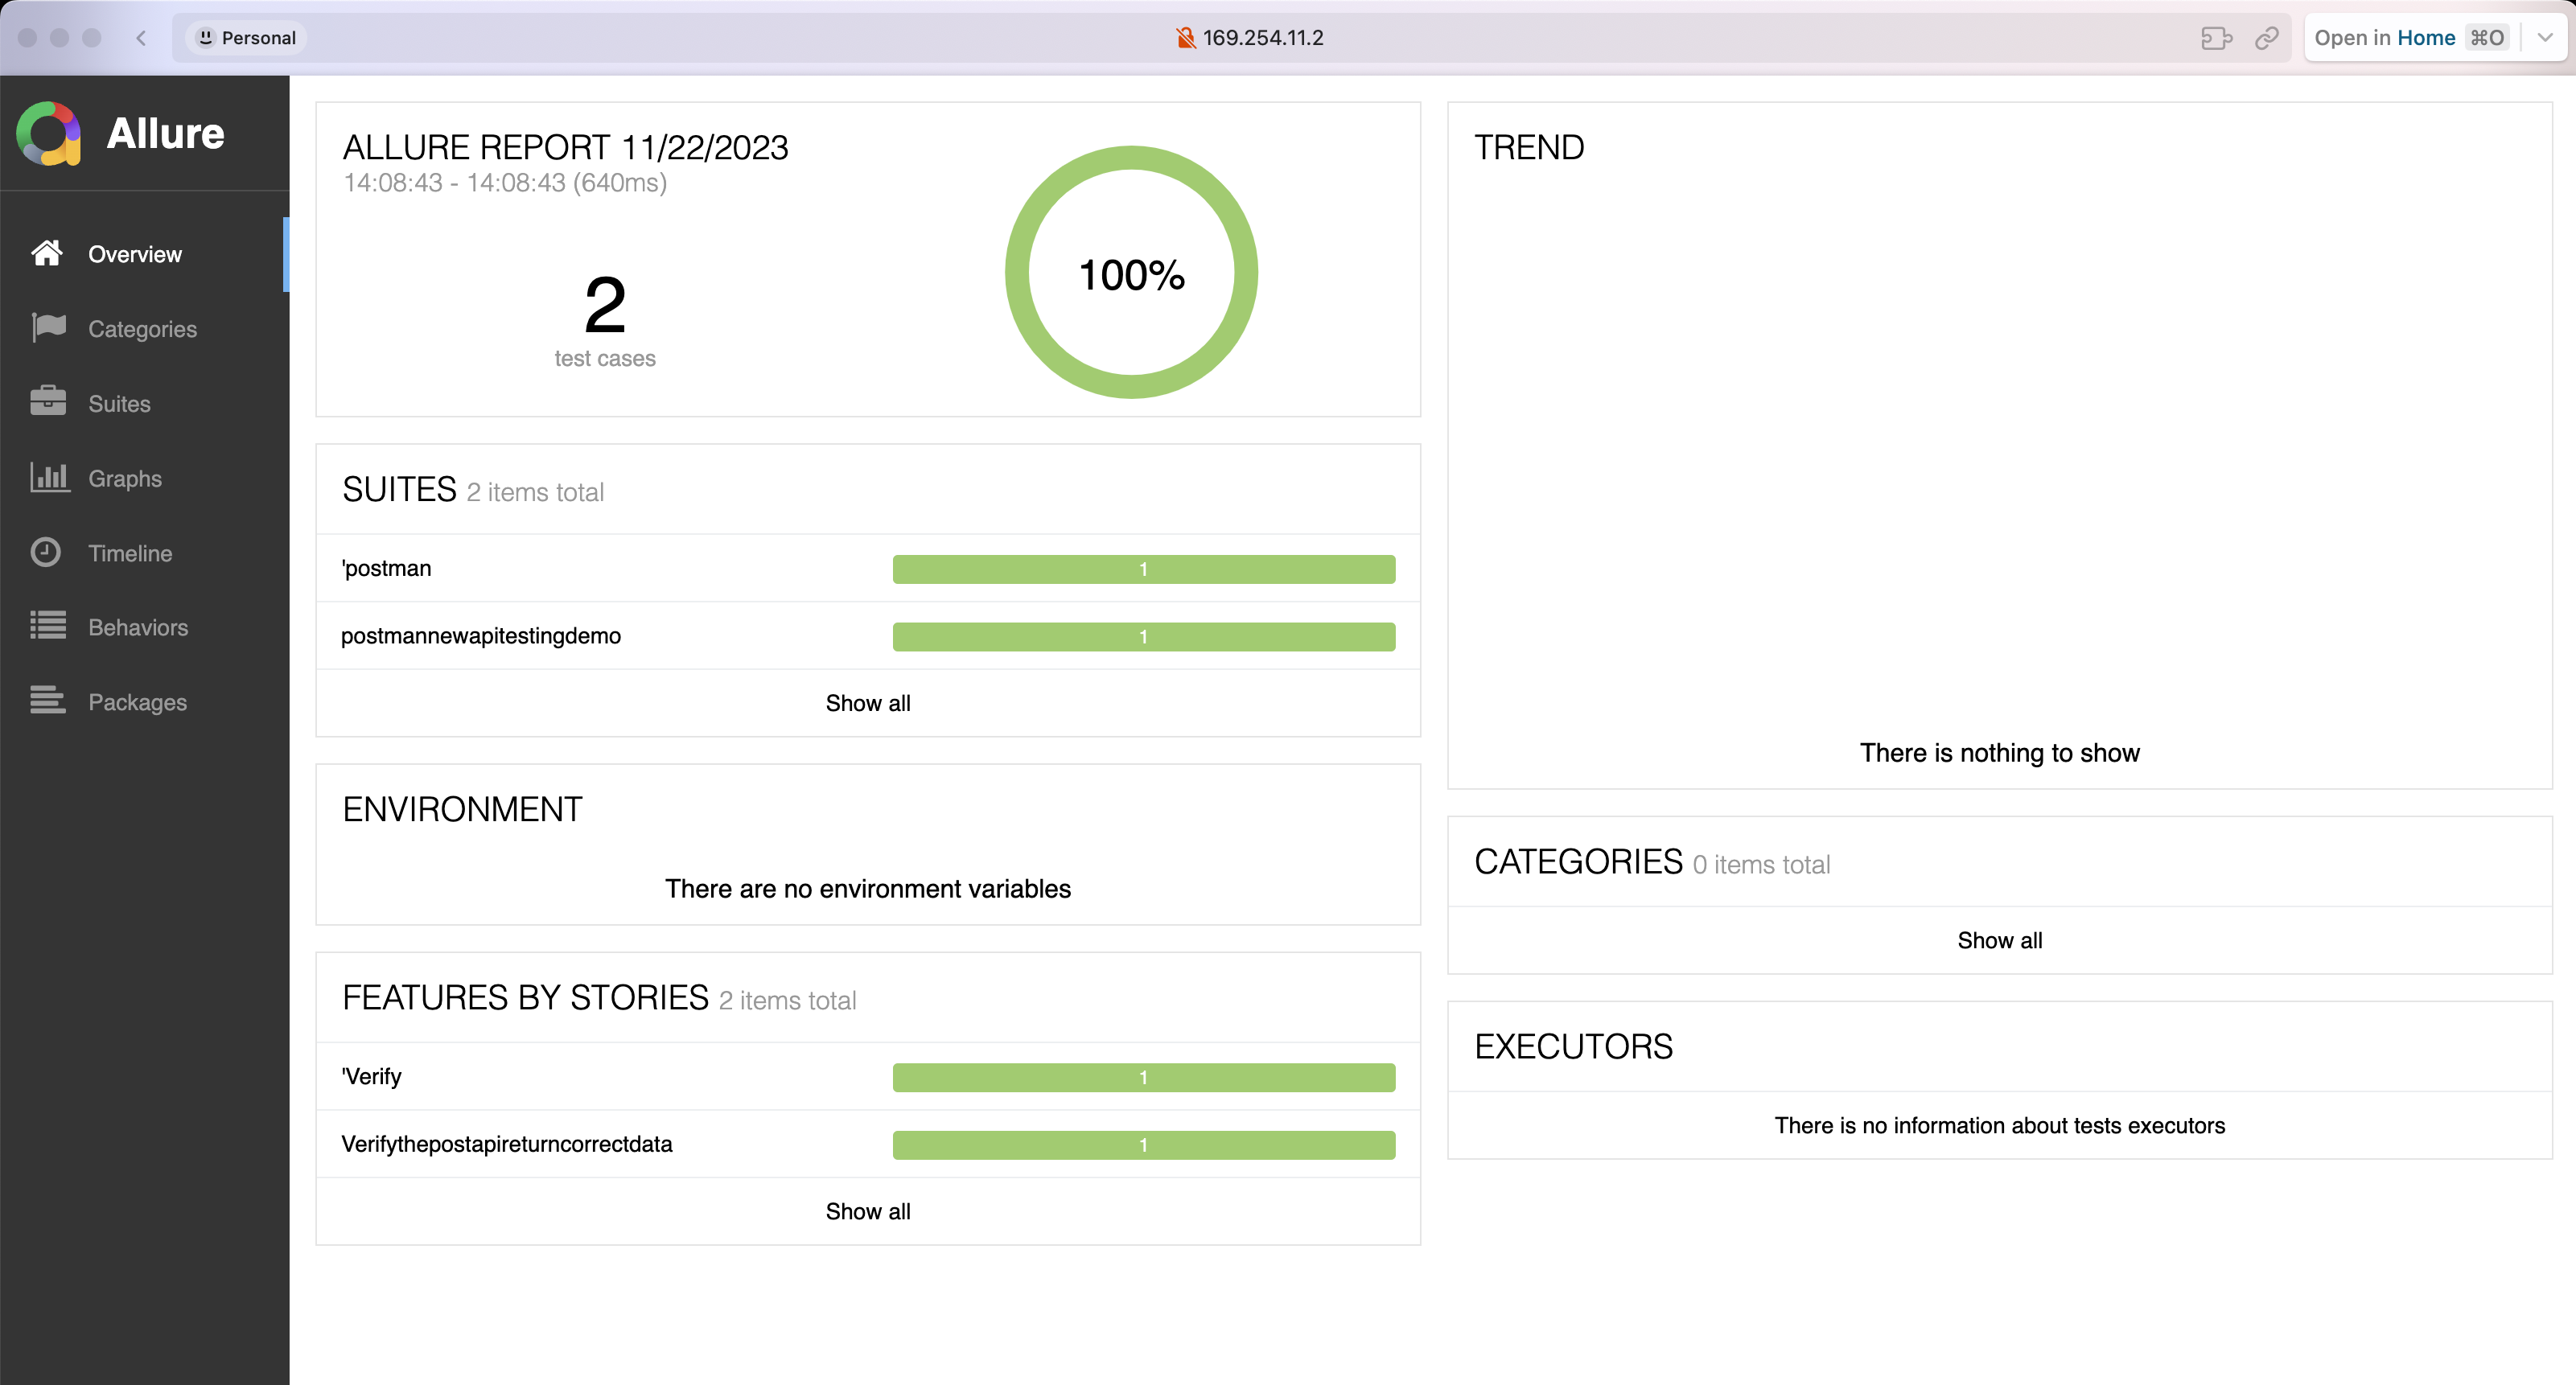
- Previewing the Allure Test Report
allure serve