Advanced Usage
Multi-environment support
In the actual API automation testing process, we need to run test cases in different environments to ensure that the API works properly in each environment.
By using Pytest’s fixture feature, we can easily support multiple environments.
Refer to the demo:https://github.com/Automation-Test-Starter/Pytest-API-Test-Demo
New test configuration files for different environments
Configuration file will be stored in json format for example, other formats such as YAML, CSV, etc. are similar, can refer to the
// Create a new test configuration folder
mkdir config
// Go to the test configuration folder
cd config
// Create a new test configuration file for the development environment
touch dev_config.json
// Create a new test configuration file for the production environment
touch prod_config.json
Writing different environment test profiles
- Writing Development Environment Test Profiles
Configure the development environment test profiles according to the actual situation.
{
  "host": "https://jsonplaceholder.typicode.com",
  "getAPI": "/posts/1",
  "postAPI":"/posts"
}
- Configuring Production Environment Test Profiles
Configure production environment test profiles according to the actual situation
{
  "host": "https://jsonplaceholder.typicode.com",
  "getAPI": "/posts/1",
  "postAPI":"/posts"
}
New Different Environment Test Data File
The different environments request data file and the response data file store the different environments request data and the different environments expected response data for the test cases, respectively.
// Create a new test data folder
mkdir data
// Go to the test data folder
cd data
// Create a new dev request data file
touch dev_request_data.json
// Create a new dev response data file
touch dev_response_data.json
// Create a new request data file for the production environment
touch prod_request_data.json
// Create a new production response data file
touch prod_response_data.json
Writing test data files for different environments
- Write the dev environment request data file
The dev environment request data file is configured with the request data for the getAPI API and the request data for the postAPI API.
{
  "getAPI": "",
  "postAPI":{
    "title": "foo",
    "body": "bar",
    "userId": 1
  }
}
- Writing the dev Environment Response Data File
The dev environment response data file is configured with the response data for the getAPI API and the response data for the postAPI API.
{
    "getAPI": {
      "userId": 1,
      "id": 1,
      "title": "sunt aut facere repellat provident occaecati excepturi optio reprehenderit",
      "body": "quia et suscipit\nsuscipit recusandae consequuntur expedita et cum\nreprehenderit molestiae ut ut quas totam\nnostrum rerum est autem sunt rem eveniet architecto"
    },
    "postAPI":{
      "title": "foo",
      "body": "bar",
      "userId": 1,
      "id": 101
    }
}
- Write the prod environment request data file
The prod environment request data file is configured with the request data for the getAPI API and the request data for the postAPI API.
{
  "getAPI": "",
  "postAPI":{
    "title": "foo",
    "body": "bar",
    "userId": 1
  }
}
- Writing the prod Environment Response Data File
The prod environment response data file is configured with the response data for the getAPI API and the response data for the postAPI API.
{
    "getAPI": {
      "userId": 1,
      "id": 1,
      "title": "sunt aut facere repellat provident occaecati excepturi optio reprehenderit",
      "body": "quia et suscipit\nsuscipit recusandae consequuntur expedita et cum\nreprehenderit molestiae ut ut quas totam\nnostrum rerum est autem sunt rem eveniet architecto"
    },
    "postAPI":{
      "title": "foo",
      "body": "bar",
      "userId": 1,
      "id": 101
    }
}
Configure fixture to support multiple environments
The > fixture will be stored in the conftest.py file as an example, other formats such as YAML, CSV, etc. are similar.
- Create a new conftest.py file in the project root directory.
mkdrir conftest.py
- Writing the conftest.py file
import pytest
import json
import json
import os


@pytest.fixture(scope="session")
def env_config(request):
    # get config file from different env
    env = os.getenv('ENV', 'dev')
    with open(f'config/{env}_config.json', 'r') as config_file:
        config = json.load(config_file)
    return config


@pytest.fixture(scope="session")
def env_request_data(request):
    # get request data file from different env
    env = os.getenv('ENV', 'dev')
    with open(f'data/{env}_request_data.json', 'r') as request_data_file:
        request_data = json.load(request_data_file)
    return request_data


@pytest.fixture (scope="session")
def env_response_data(request):
    # get response data file from different env
    env = os.getenv('ENV', 'dev')
    with open(f'data/{env}_response_data.json', 'r') as response_data_file:
        response_data = json.load(response_data_file)
    return response_data
Update test case to support multi environment
To make a distinction, here is a new test case file named test_demo_multi_environment.py
import requests
import json


class TestPytestMultiEnvDemo:

    def test_get_demo_multi_env(self, env_config, env_request_data, env_response_data):
        host = env_config["host"]
        get_api = env_config["getAPI"]
        get_api_response_data = env_response_data["getAPI"]
        # send request
        response = requests.get(host+get_api)
        # assert
        assert response.status_code == 200
        assert response.json() == get_api_response_data

    def test_post_demo_multi_env(self, env_config, env_request_data, env_response_data):
        host = env_config["host"]
        post_api = env_config["postAPI"]
        post_api_request_data = env_request_data["postAPI"]
        post_api_response_data = env_response_data["postAPI"]
        # send request
        response = requests.post(host + post_api, post_api_request_data)
        # assert
        assert response.status_code == 201
        assert response.json() == post_api_response_data
Run this test case to confirm that multi-environment support is in effect
- Run the dev environment test case
ENV=dev pytest test_case/test_demo_multi_environment.py

- Run the prod environment test case
ENV=prod pytest test_case/test_demo_multi_environment.py

Integration with allure reporting
allure is a lightweight, flexible, and easily extensible test reporting tool that provides a rich set of report types and features to help you better visualize your test results.
allure reports can be integrated with Pytest to generate detailed test reports.
Refer to the demo:https://github.com/Automation-Test-Starter/Pytest-API-Test-Demo
Install allure-pytest library
pip install allure-pytest
To avoid conflicts between the previously installed pytest-html-reporter and the allure-pytest package, it is recommended to uninstall the pytest-html-reporter package first.
pip uninstall pytest-html-reporter
Configuration allure-pytest library
Update the pytest.ini file to specify where allure reports are stored
[pytest]
# allure
addopts = --alluredir ./allure-results
Adjusting test cases to support allure reporting
To differentiate, create a new test case file here, named test_demo_allure.py
import allure
import requests


@allure.feature("Test example API")
class TestPytestAllureDemo:

    @allure.story("Test example get endpoint")
    @allure.title("Verify the get API")
    @allure.description("verify the get API response status code and data")
    @allure.severity("blocker")
    def test_get_example_endpoint_allure(self, env_config, env_request_data, env_response_data):
        host = env_config["host"]
        get_api = env_config["getAPI"]
        get_api_request_data = env_request_data["getAPI"]
        get_api_response_data = env_response_data["getAPI"]
        # send get request
        response = requests.get(host + get_api)
        # assert
        print("response status code is" + str(response.status_code))
        assert response.status_code == 200
        print("response data is" + str(response.json()))
        assert response.json() == get_api_response_data

    @allure.story("Test example POST API")
    @allure.title("Verify the POST API")
    @allure.description("verify the POST API response status code and data")
    @allure.severity("Critical")
    def test_post_example_endpoint_allure(self, env_config, env_request_data, env_response_data):
        host = env_config["host"]
        post_api = env_config["postAPI"]
        post_api_request_data = env_request_data["postAPI"]
        post_api_response_data = env_response_data["postAPI"]
        # send request
        response = requests.post(host + post_api, json=post_api_request_data)
        # assert
        print("response status code is" + str(response.status_code))
        assert response.status_code == 201
        print("response data is" + str(response.json()))
        assert response.json() == post_api_response_data
Run test cases to generate allure reports
ENV=dev pytest test_case/test_demo_allure.py
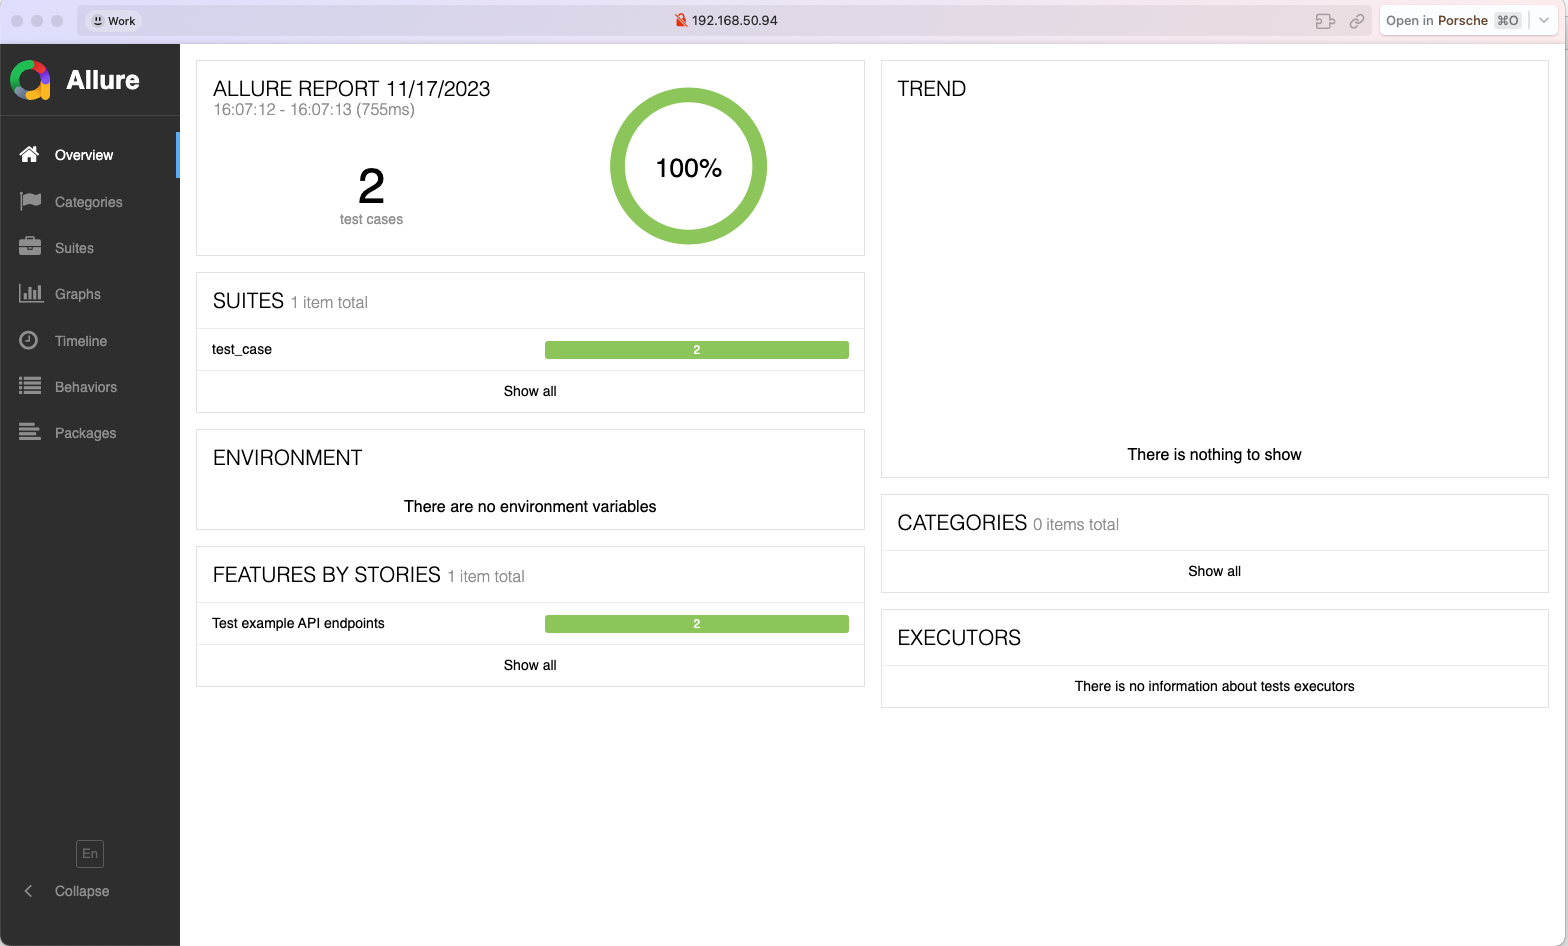
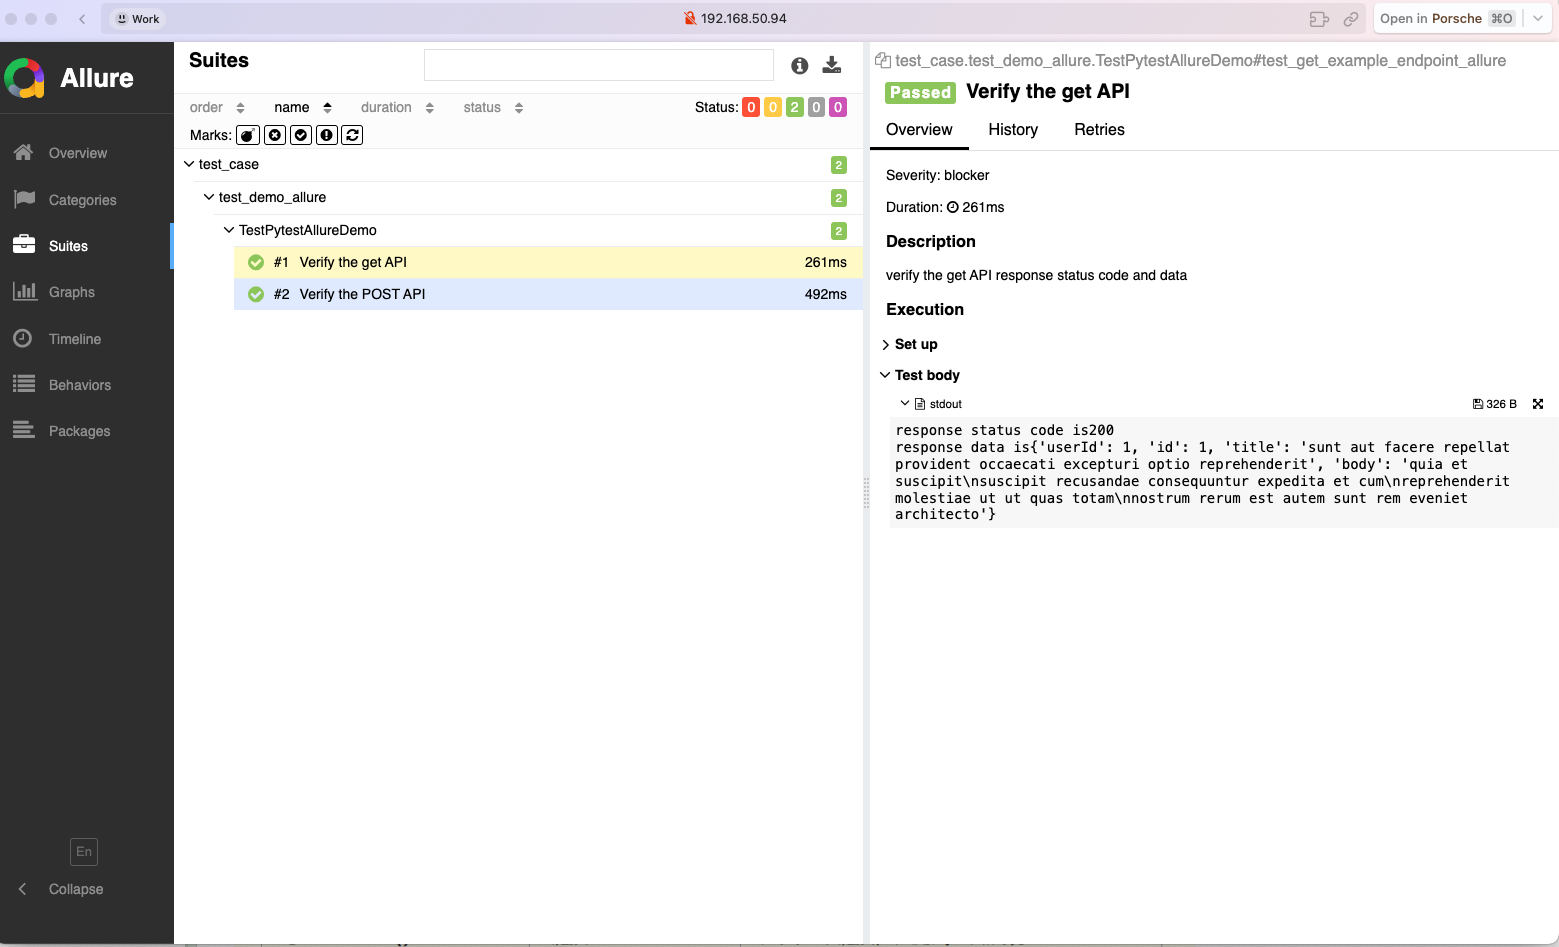
View allure report
Run the following command to view the allure report in the browser
allure serve allure-results


Adapting CI/CD processes to support allure reporting
Github action is an example, other CI tools are similar.
Update the contents of the .github/workflows/pytest.yml file to upload allure reports to GitHub.
name: Pytest API Testing

on:
  push:
    branches: [ "main" ]
  pull_request:
    branches: [ "main" ]

permissions:
  contents: read

jobs:
  Pytes-API-Testing:

    runs-on: ubuntu-latest

    steps:
    - uses: actions/checkout@v3
    - name: Set up Python 3.10
      uses: actions/setup-python@v3
      with:
        python-version: "3.10"
    - name: Install dependencies
      run: |
        python -m pip install --upgrade pip
        pip install -r requirements.txt

    - name: Test with pytest
      run: |
        ENV=dev pytest

    - name: Archive Pytest allure test report
      uses: actions/upload-artifact@v3
      with:
        name: Pytest-allure-report
        path: allure-results

    - name: Upload Pytest allure report to GitHub
      uses: actions/upload-artifact@v3
      with:
        name: Pytest-allure-report
        path: allure-results
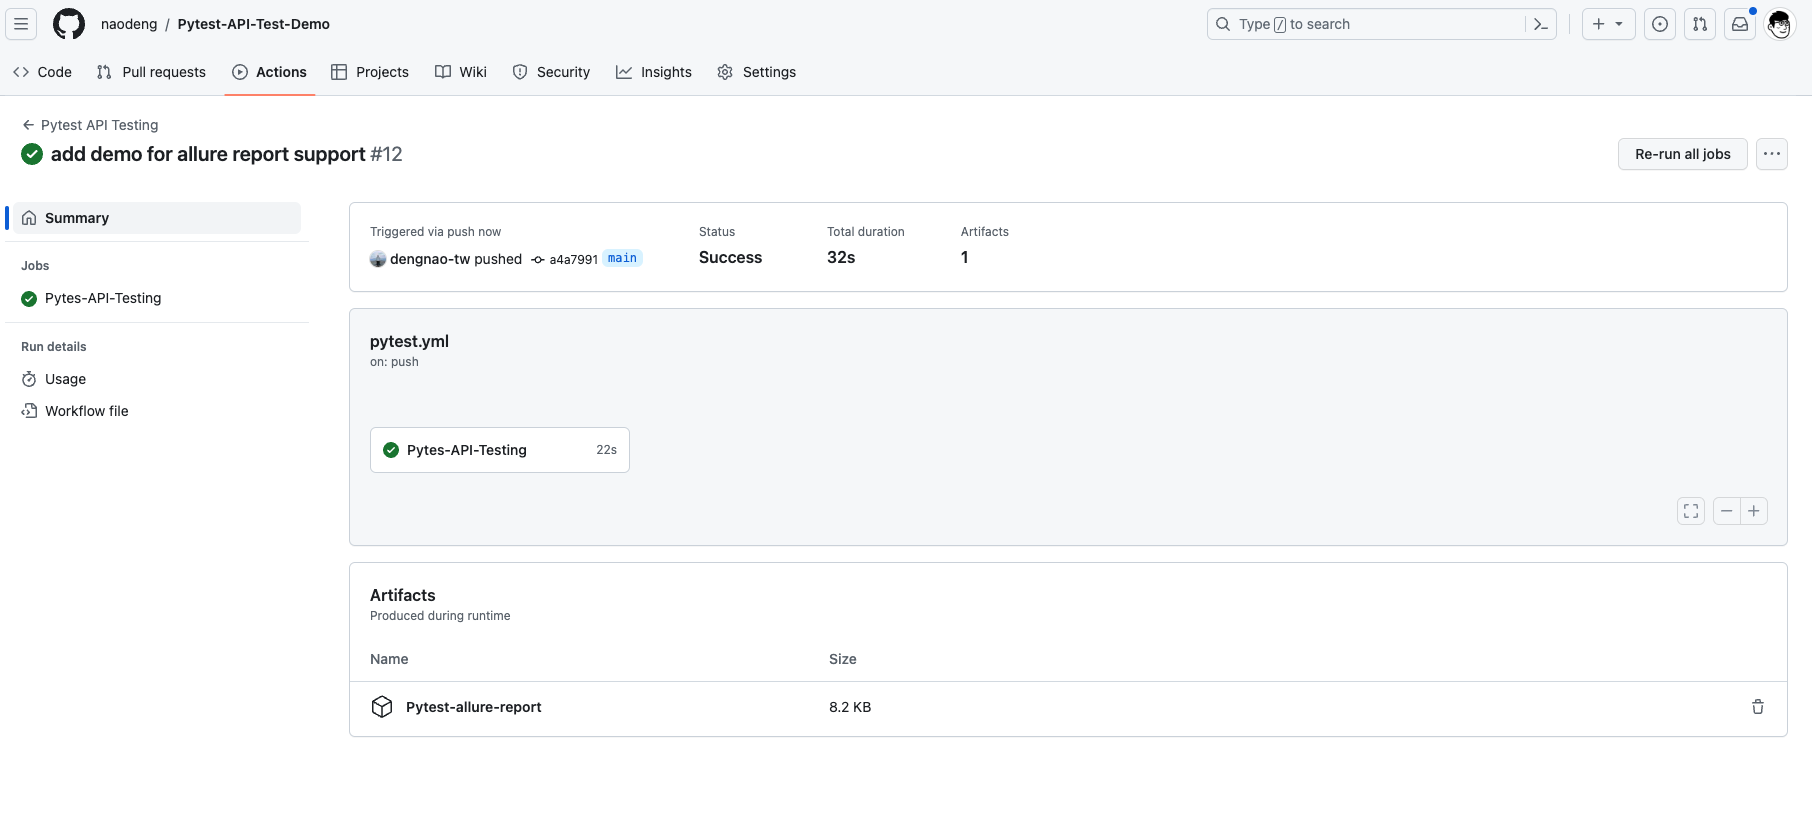
View github action allure report
In GitHub, navigate to your repository. Click the Actions tab at the top, and then click the Pytest API Testing workflow on the left. You should see the workflow running, wait for the execution to complete, and then you can view the results.
