CI/CD integration
Integration github action
Use github action as an example, and other CI tools similarly
The mocha version integration github action
See the demo at https://github.com/Automation-Test-Starter/SuperTest-Mocha-demo
Create the .github/workflows directory: In your GitHub repository, create a directory called .github/workflows. This will be where the GitHub Actions workflow files will be stored.
Create a workflow file: Create a YAML-formatted workflow file, such as mocha.yml, in the .github/workflows directory.
Edit the mocha.yml file: Copy the following into the file
name: RUN SuperTest API Test CI

on:
  push:
    branches: [ "main" ]
  pull_request:
    branches: [ "main" ]

jobs:
  RUN-SuperTest-API-Test:

    runs-on: ubuntu-latest

    strategy:
      matrix:
        node-version: [ 18.x]
        # See supported Node.js release schedule at https://nodejs.org/en/about/releases/

    steps:
    - uses: actions/checkout@v3
    - name: Use Node.js ${{ matrix.node-version }}
      uses: actions/setup-node@v3
      with:
        node-version: ${{ matrix.node-version }}
        cache: 'npm'

    - name: Installation of related packages
      run: npm ci

    - name: RUN SuperTest API Testing
      run: npm test

    - name: Archive SuperTest mochawesome test report
      uses: actions/upload-artifact@v3
      with:
        name: SuperTest-mochawesome-test-report
        path: Report

    - name: Upload SuperTest mochawesome report to GitHub
      uses: actions/upload-artifact@v3
      with:
        name: SuperTest-mochawesome-test-report
        path: Report
- Commit the code: Add the mocha.yml file to your repository and commit.
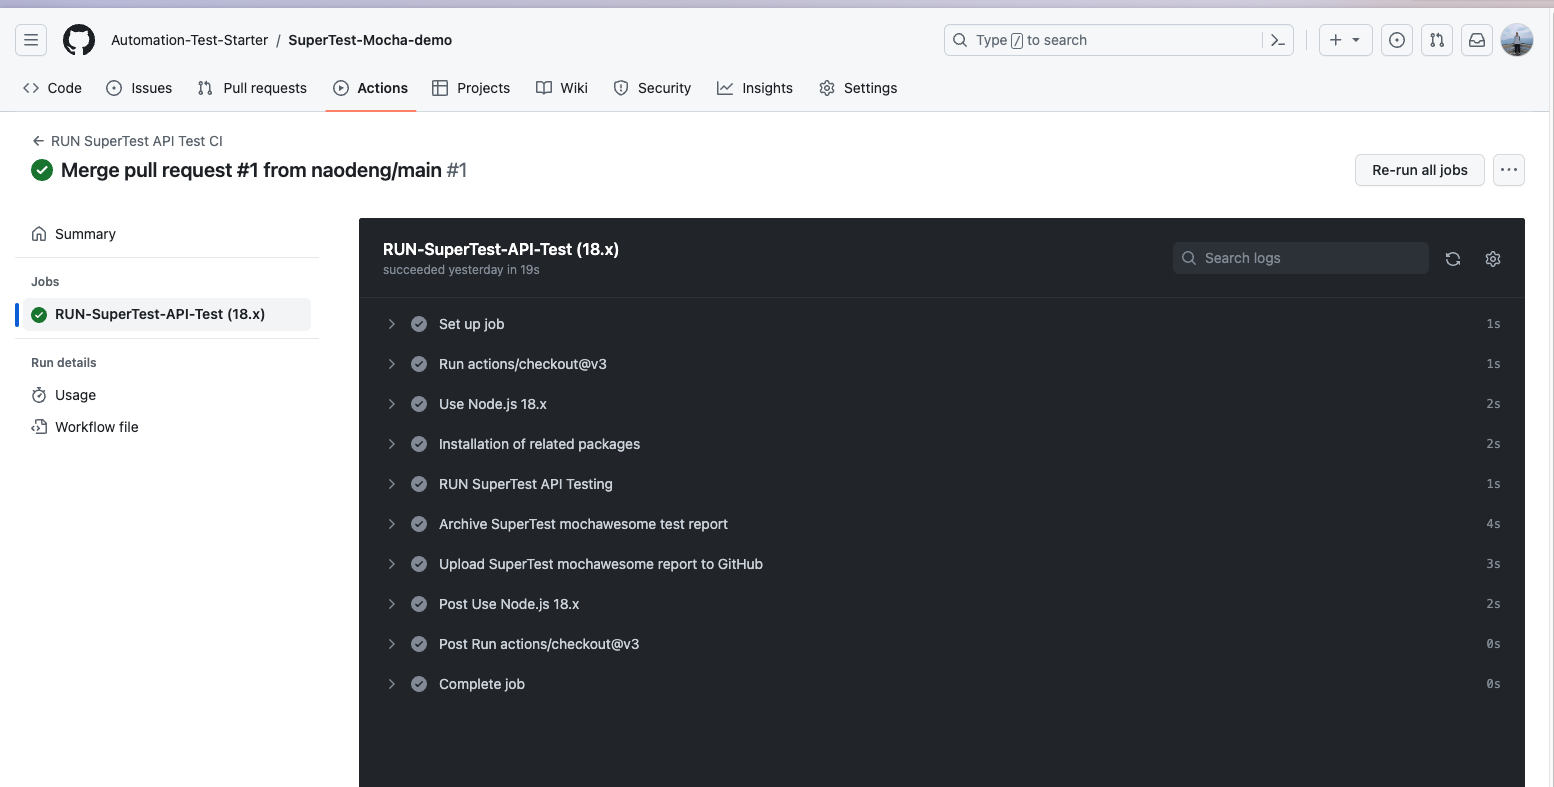
- View test reports: In GitHub, navigate to your repository. Click the Actions tab at the top and then click the RUN SuperTest API Test CI workflow on the left. You should see the workflow running, wait for the execution to complete and you can view the results.

The jest version integration github action
See the demo at https://github.com/Automation-Test-Starter/SuperTest-Jest-demo
Create the .github/workflows directory: In your GitHub repository, create a directory called .github/workflows. This will be where the GitHub Actions workflow files will be stored.
Create a workflow file: Create a YAML-formatted workflow file, such as jest.yml, in the .github/workflows directory.
Edit the jest.yml file: Copy the following into the file
name: RUN SuperTest API Test CI

on:
  push:
    branches: [ "main" ]
  pull_request:
    branches: [ "main" ]

jobs:
  RUN-SuperTest-API-Test:

    runs-on: ubuntu-latest

    strategy:
      matrix:
        node-version: [ 18.x]
        # See supported Node.js release schedule at https://nodejs.org/en/about/releases/

    steps:
      - uses: actions/checkout@v3
      - name: Use Node.js ${{ matrix.node-version }}
        uses: actions/setup-node@v3
        with:
          node-version: ${{ matrix.node-version }}
          cache: 'npm'

      - name: Installation of related packages
        run: npm ci

      - name: RUN SuperTest API Testing
        run: npm test

      - name: Archive SuperTest test report
        uses: actions/upload-artifact@v3
        with:
          name: SuperTest-test-report
          path: Report

      - name: Upload SuperTest  report to GitHub
        uses: actions/upload-artifact@v3
        with:
          name: SuperTest-test-report
          path: Report
- Commit the code: Add the jest.yml file to the repository and commit.
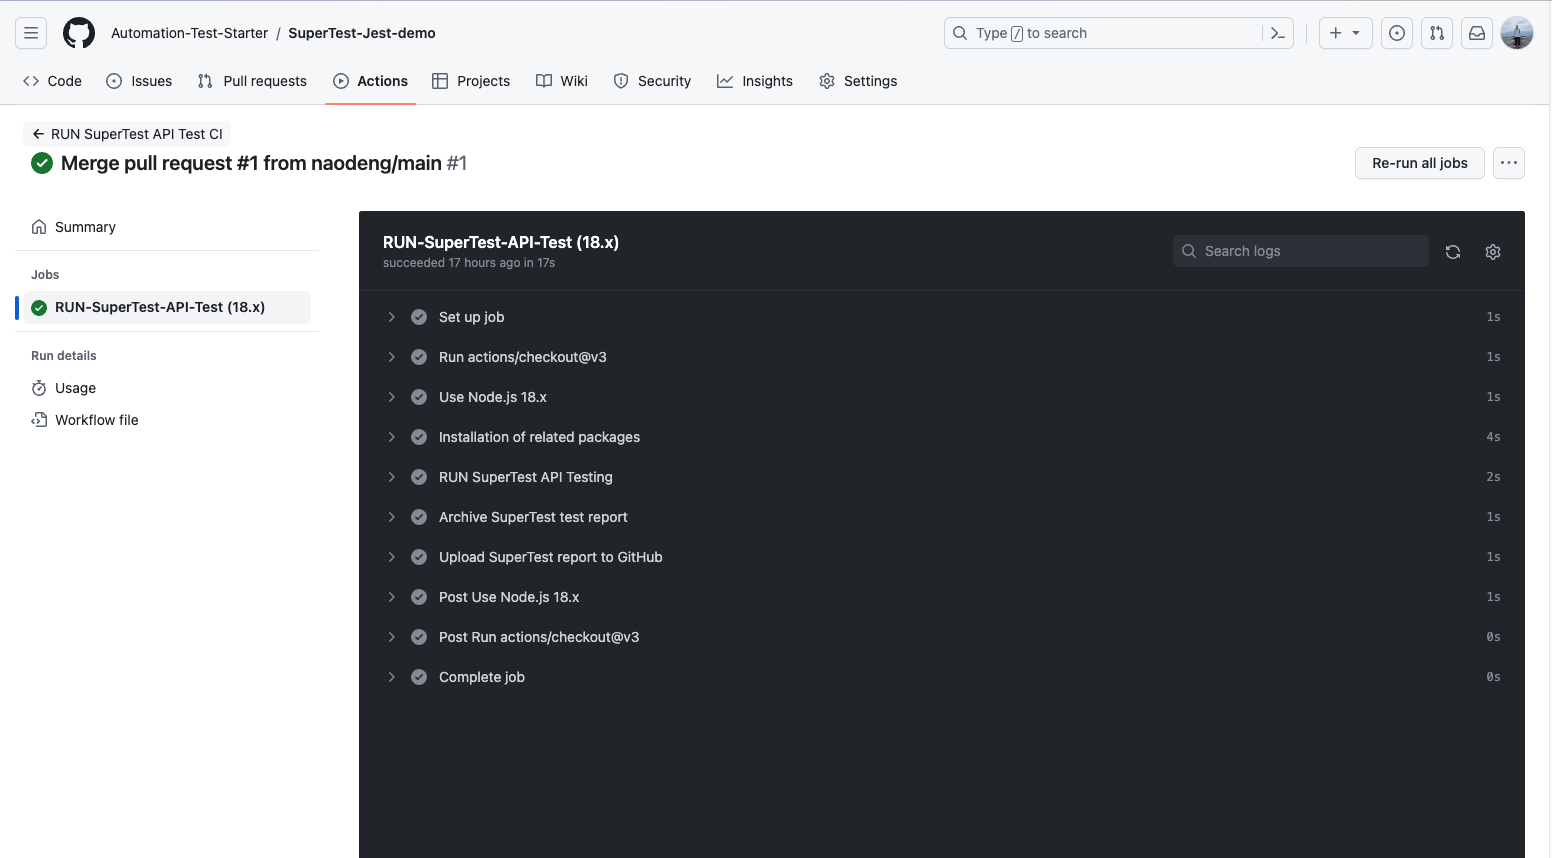
- View test reports: In GitHub, navigate to your repository. Click the Actions tab at the top and then click the RUN-SuperTest-API-Test workflow on the left. You should see the workflow running, wait for the execution to complete and you can view the results.
