Day 14: Generate AI test code and share your experience
Nearly at the halfway mark! For Day 14, we want to focus on how AI is being used to build automation. In recent times, there has been a growth in automation tools using AI to simplify the creation or improvement of test code or to (nearly) eliminate the need for knowledge of coding all together (so called Low-Code or No-Code tools). They represent a potentially different way of building automation that could be faster and more robust.
For today’s task, let’s focus on building test code for functional testing… we have other challenges coming up that focus on AI’s impact on other types of testing and topics such as self-healing tests.
Task Steps
- Select a tool: Early in the challenge, we created lists of tools and their features, so review those posts and find a tool that interests you. Here are some tips:
- If you are not comfortable with building automation, pick a No-Code or Low-Code tool and try creating automation with it. Some examples might be:
- If are experienced with building automation, why not try using a code assistant such as CoPilot or Cody AI to assist you in writing some automation.
- If you have already evaluated a functional automation tool earlier in the challenge, why not pick a different tool and compare the two?
- Create some test code: Set a timebox (such as 20-30 mins) and try to build a small example of automation using your tool of choice:
- Not sure what to use? Try one of these demo applications:
- Restful Booker https://automationintesting.online
- Evil Tester’s Web Testing and Automation Practice Application Pages
- Applitools ACME demo app
- Swag Labs https://www.saucedemo.com
- Petstore https://petstore.octoperf.com
- Not sure what to use? Try one of these demo applications:
- Share your thoughts: Reply to this post and share your findings and insights such as:
- What level of experience you have with functional automation.
- Which tool you used and the automation you were trying to create.
- How you found working with the tool to build and update your automation.
- Did the code work the first time, or did you need further refinement?
- Did you find any limitations or frustrations with the tool?
Why Take Part
- Better understand the direction of AI for automation: The use of AI in functional automation is expanding, and taking part in this task allows you to gain exposure to these new ways of building automation and their limitations. Sharing your experiences with the community makes us all smarter.
Task Link
My Day 14 Task
1. About Choosing a Tool
This time I chose Postman AI Assistant because I am currently implementing API testing and API automation regression testing in the project. I hope to gain some practical experience in using AI to enhance API testing efficiency that can be applied from the trial process of the Postman AI Assistant tool.
About the use of the Postman tool: Since Postman announced in May 2023 that it would gradually phase out the Scratch Pad model with offline capabilities, most functions will move to the cloud, and you must log in to use all the features of Postman. Our company has been notified to stop using Postman and migrate to other tools. Since then, I have been researching and learning to use Bruno, an open-source tool that can replace Postman for API testing and API automation regression testing. Recently, I have also implemented Bruno+github in the project team for interface document management and interface automation testing, and worked with developers to manage and test APIs using Bruno+github.
Postman AI Assistant’s official introduction:
Postbot, an AI assistant for API workflows, will be available in an early access program on May 22, 2023.
- 📅 Availability: Early access program starts on May 22, 2023.
- 🪄✨ Features: AI-driven autocomplete, test case design, documentation writing, test suite building, data report summarization, API call debugging.
- 💳 Pricing: Available in Basic and Professional plans at $9/user/month starting October 15, 2023.
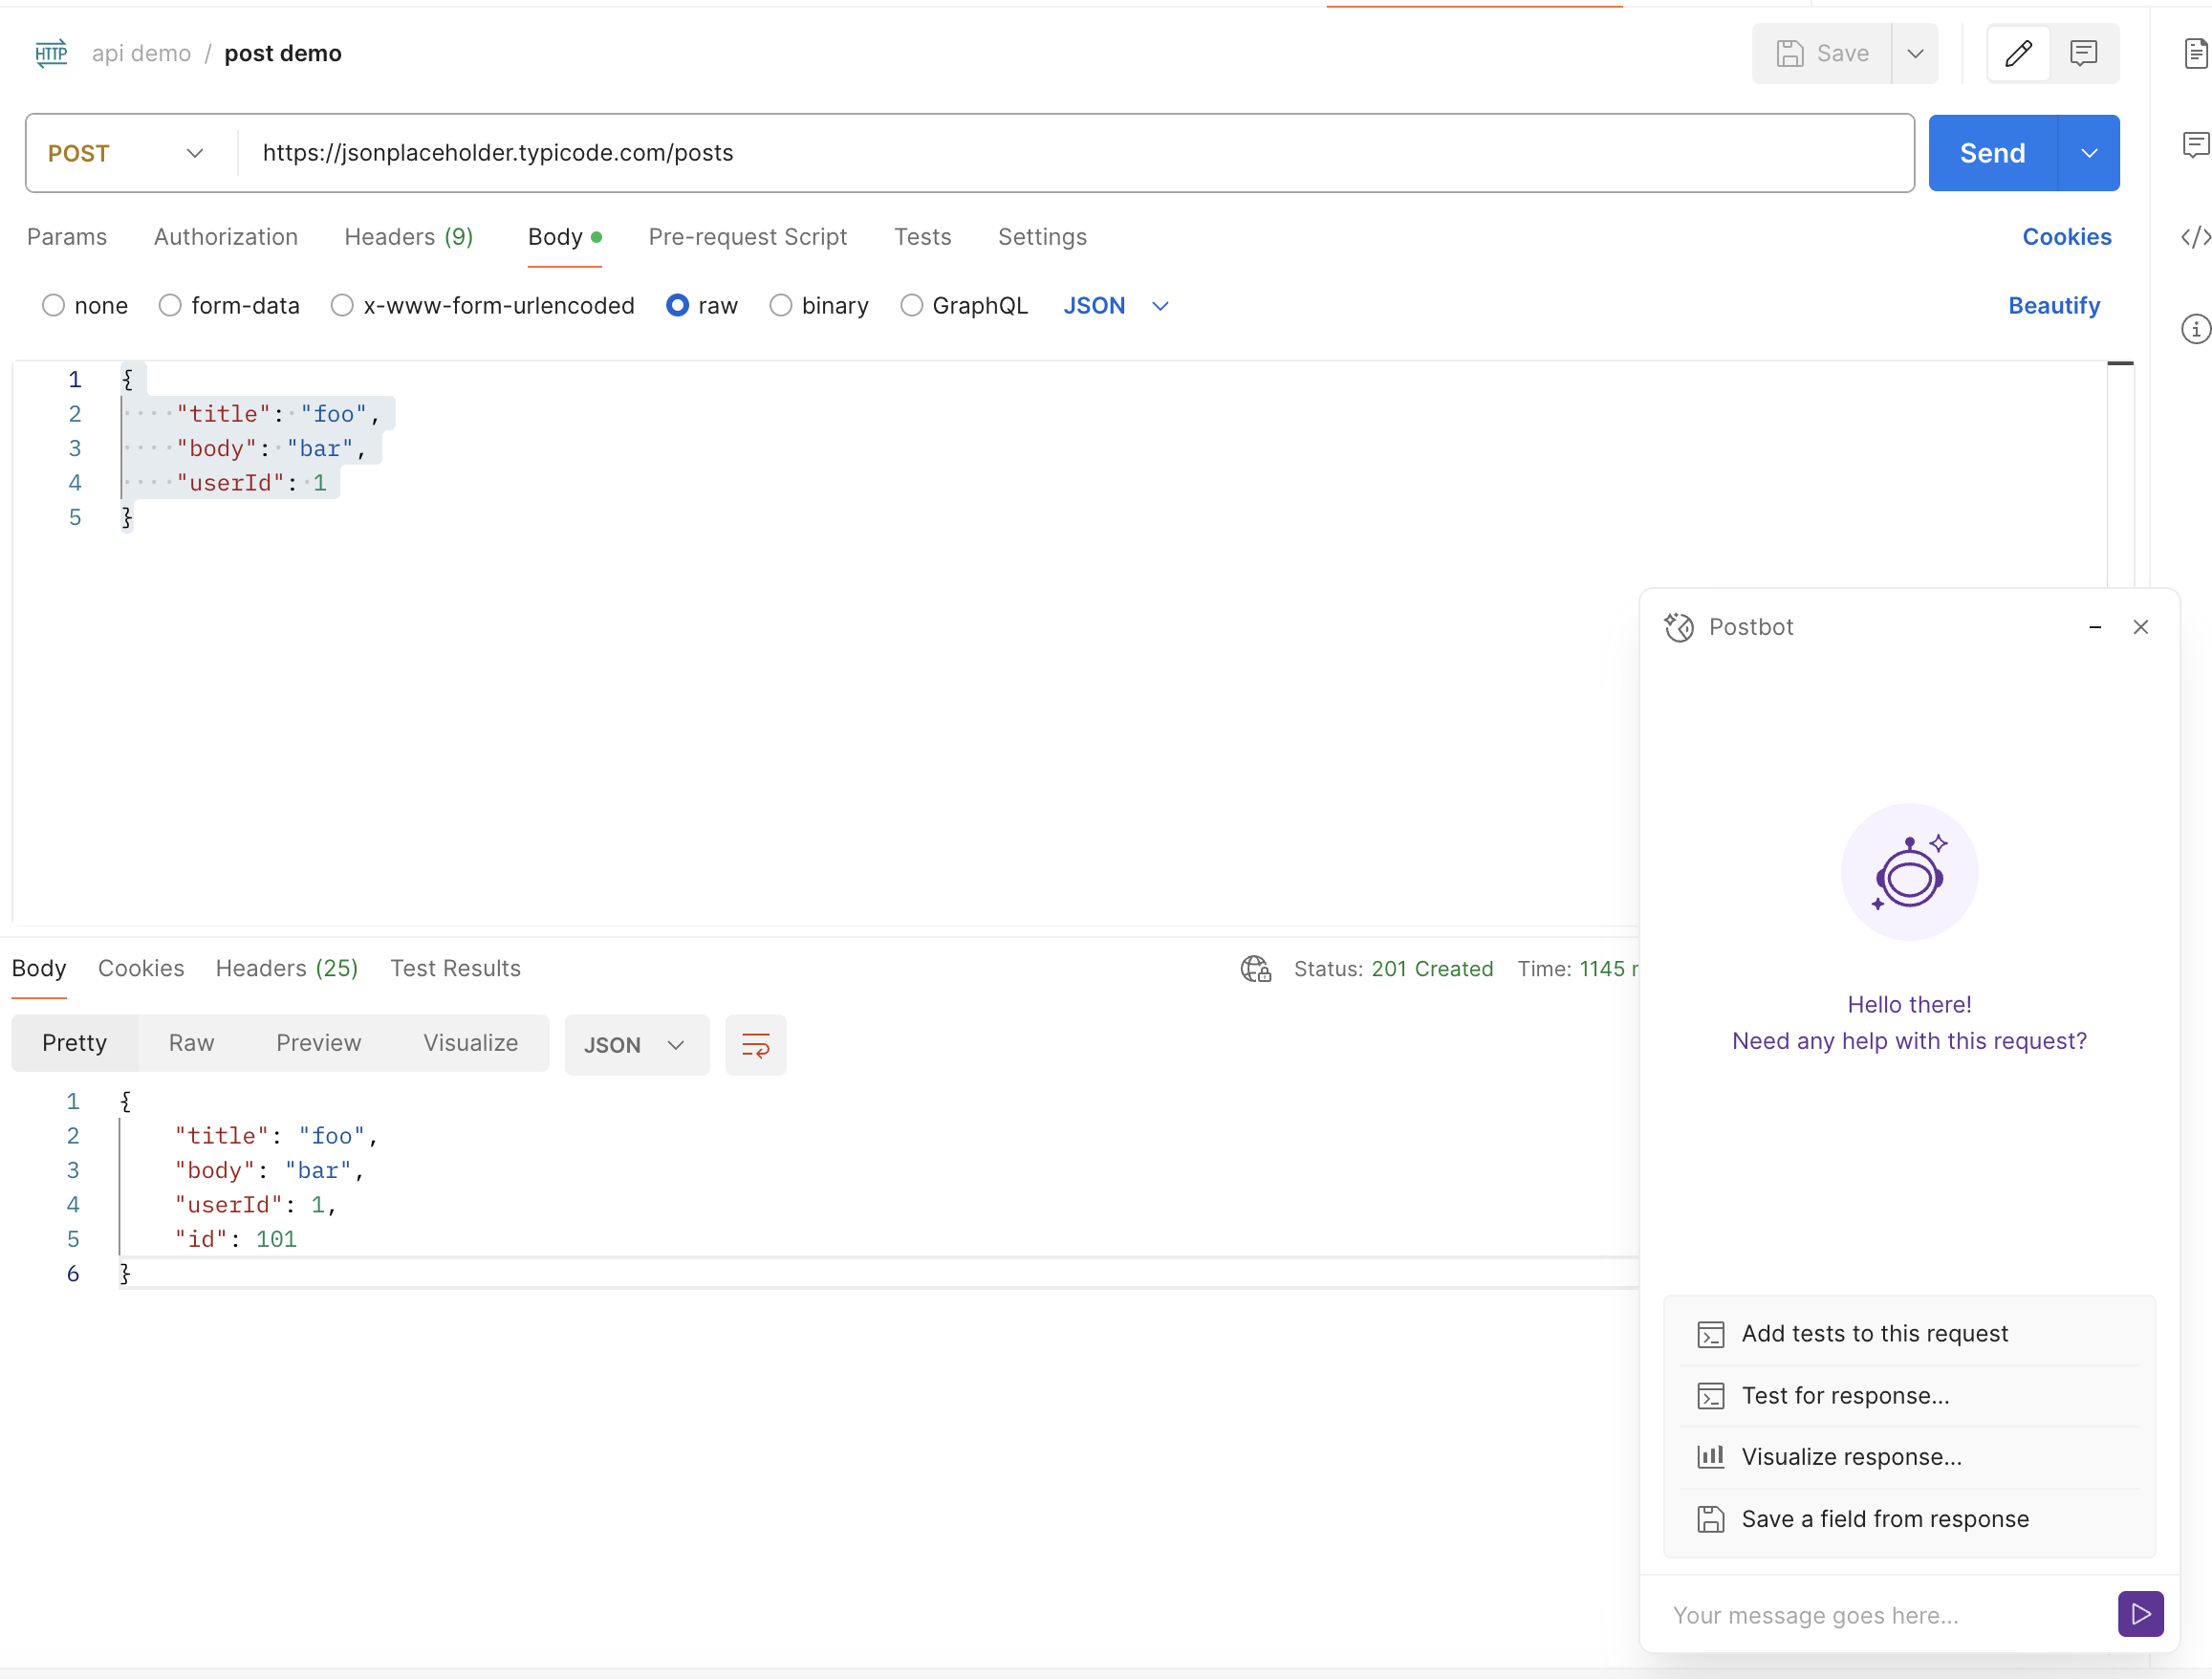
I downloaded Postman and tried Postbot with commonly used demo interfaces:
2. About Creating Some Test Code
After adding the demo interface request in the postman interface, click Postbot on the bottom menu bar to start the Postman AI Assistant. A suggestion command menu for the request appears in the Postbot window, currently with the following recommended commands:
- Add tests to this request
- Test for response
- Visualize response
- Save a field from response
- Add documentation
Next, I will try the functions suggested by Postbot one by one.
Trying Add tests to this request
Click Add tests to this request in the Postbot interface
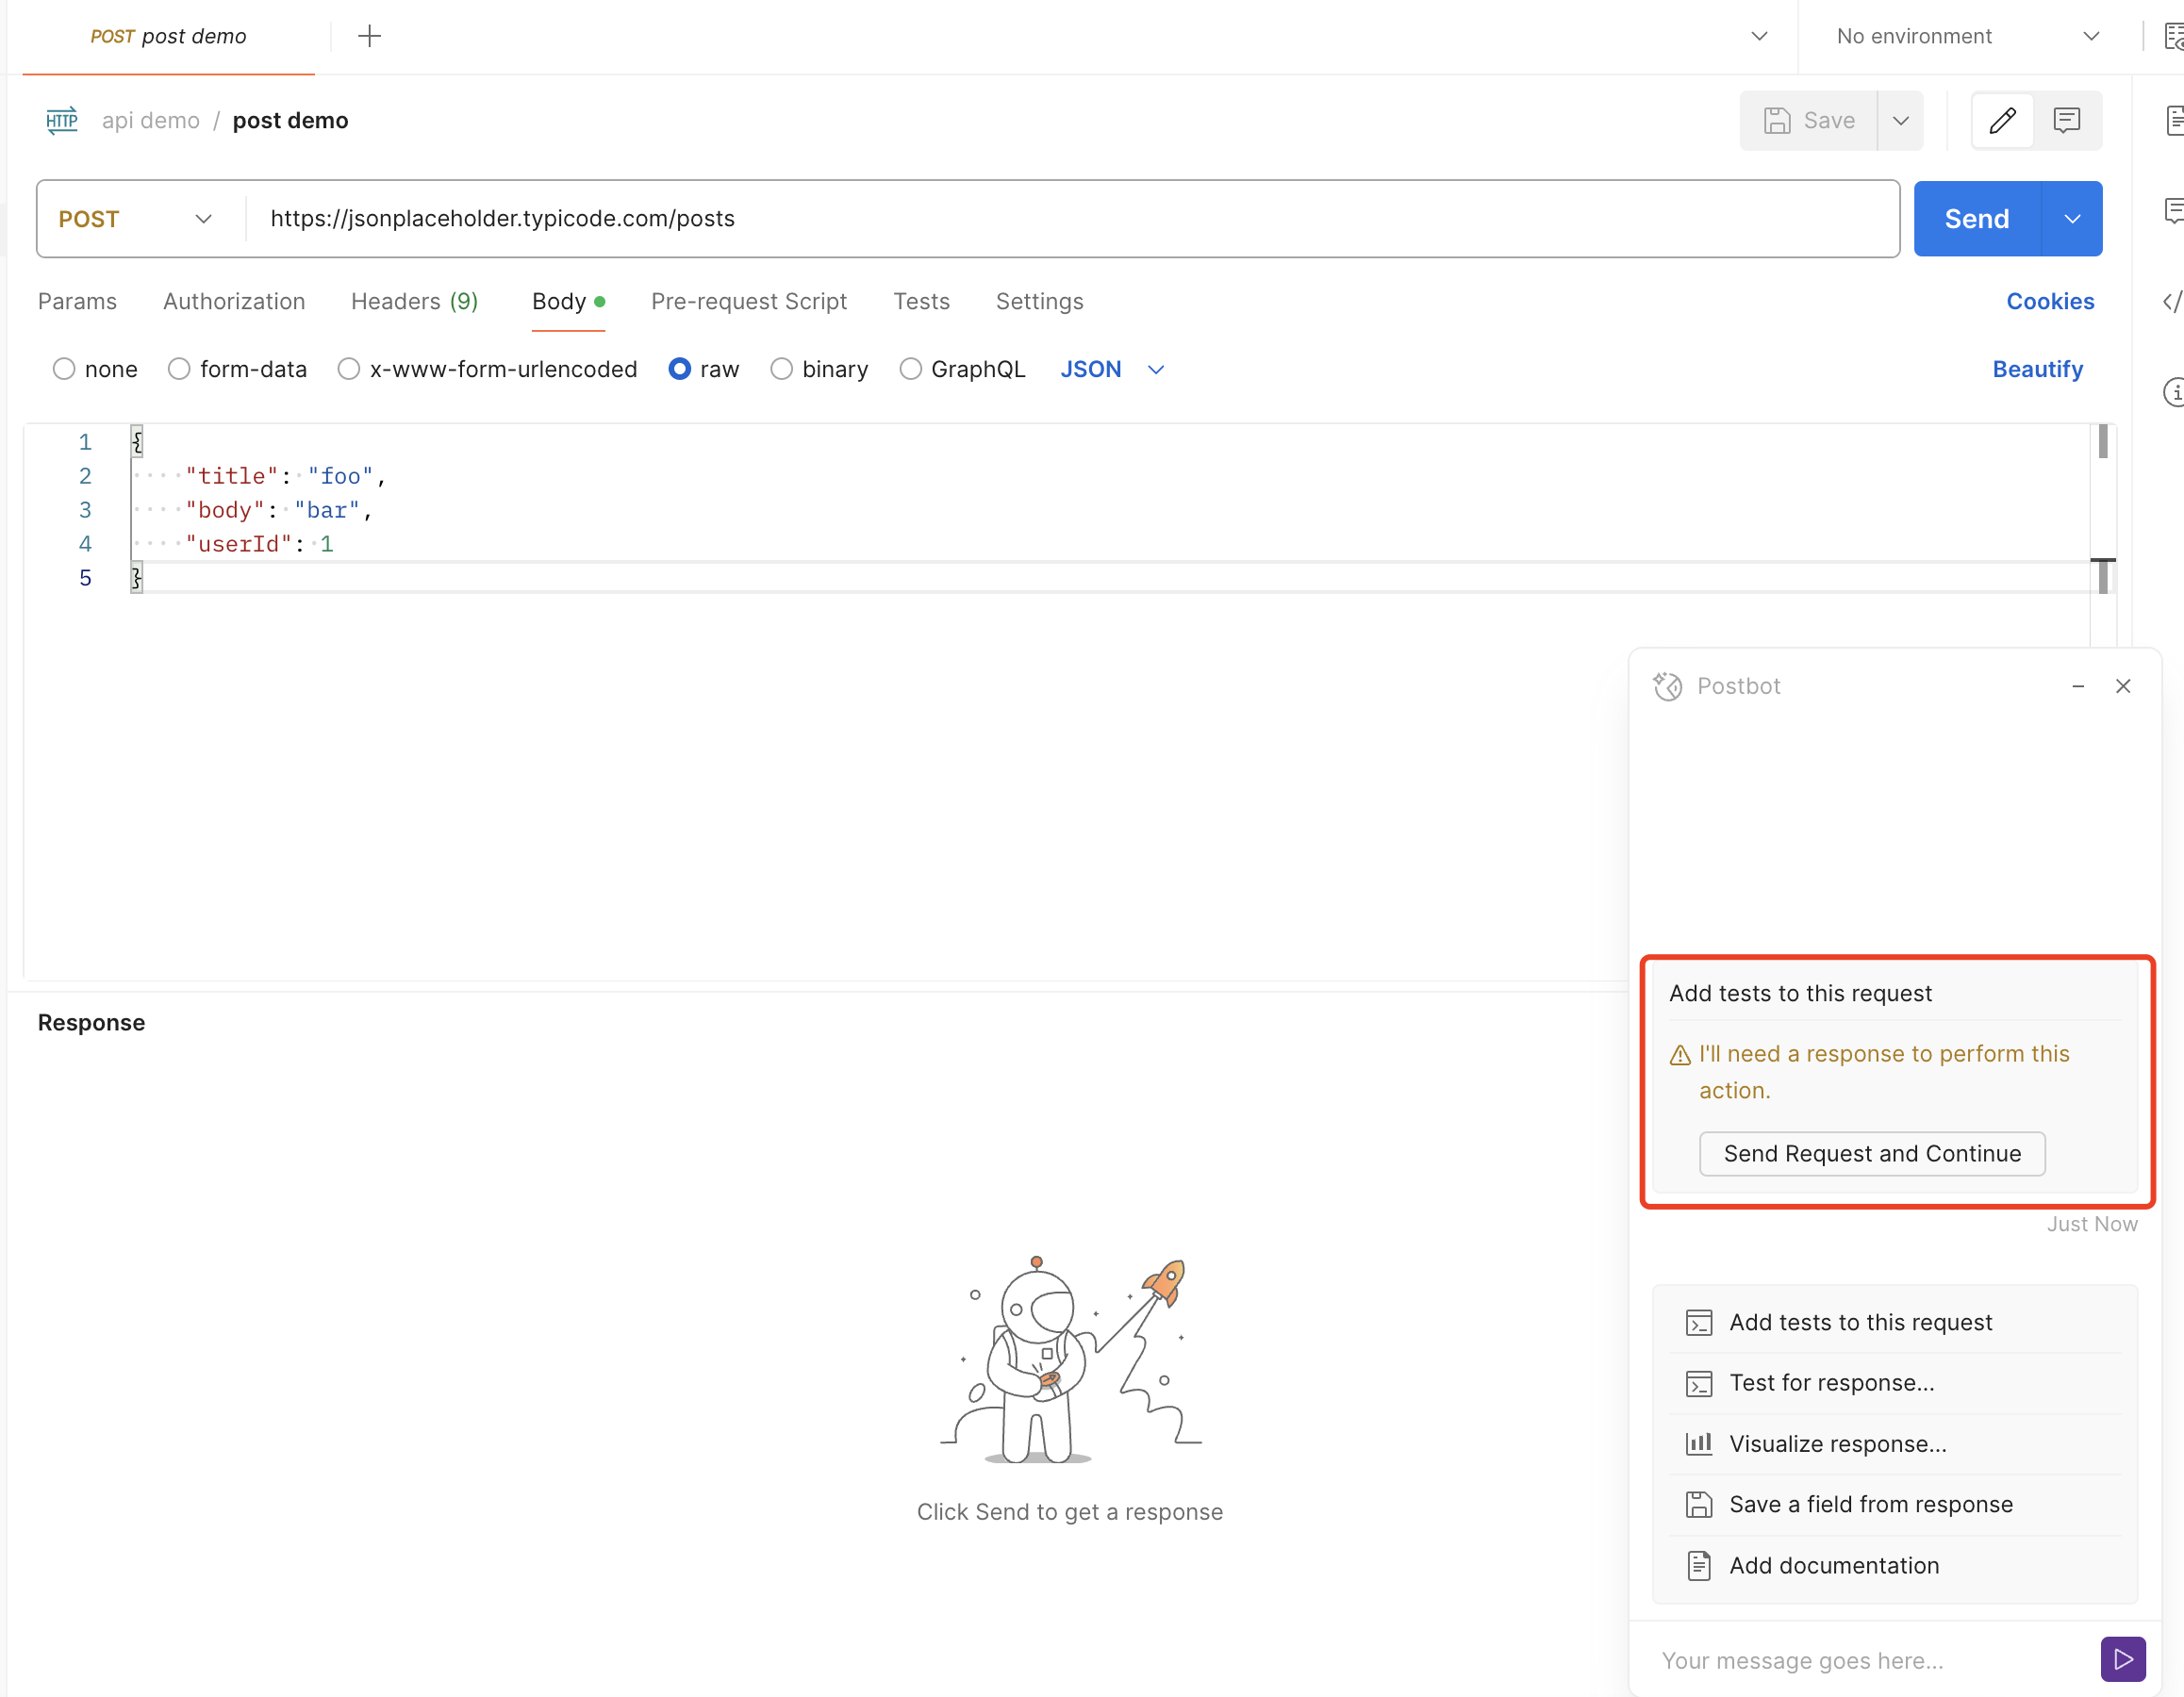
If you have added a request but have not clicked send to run that request, Postbot will prompt “I’ll need a response to perform this action,” and Postbot will also provide a menu to quickly run the request and output the response; after clicking the “Send request and continue” button, Postman will automatically run the request and write the test script, as shown below:
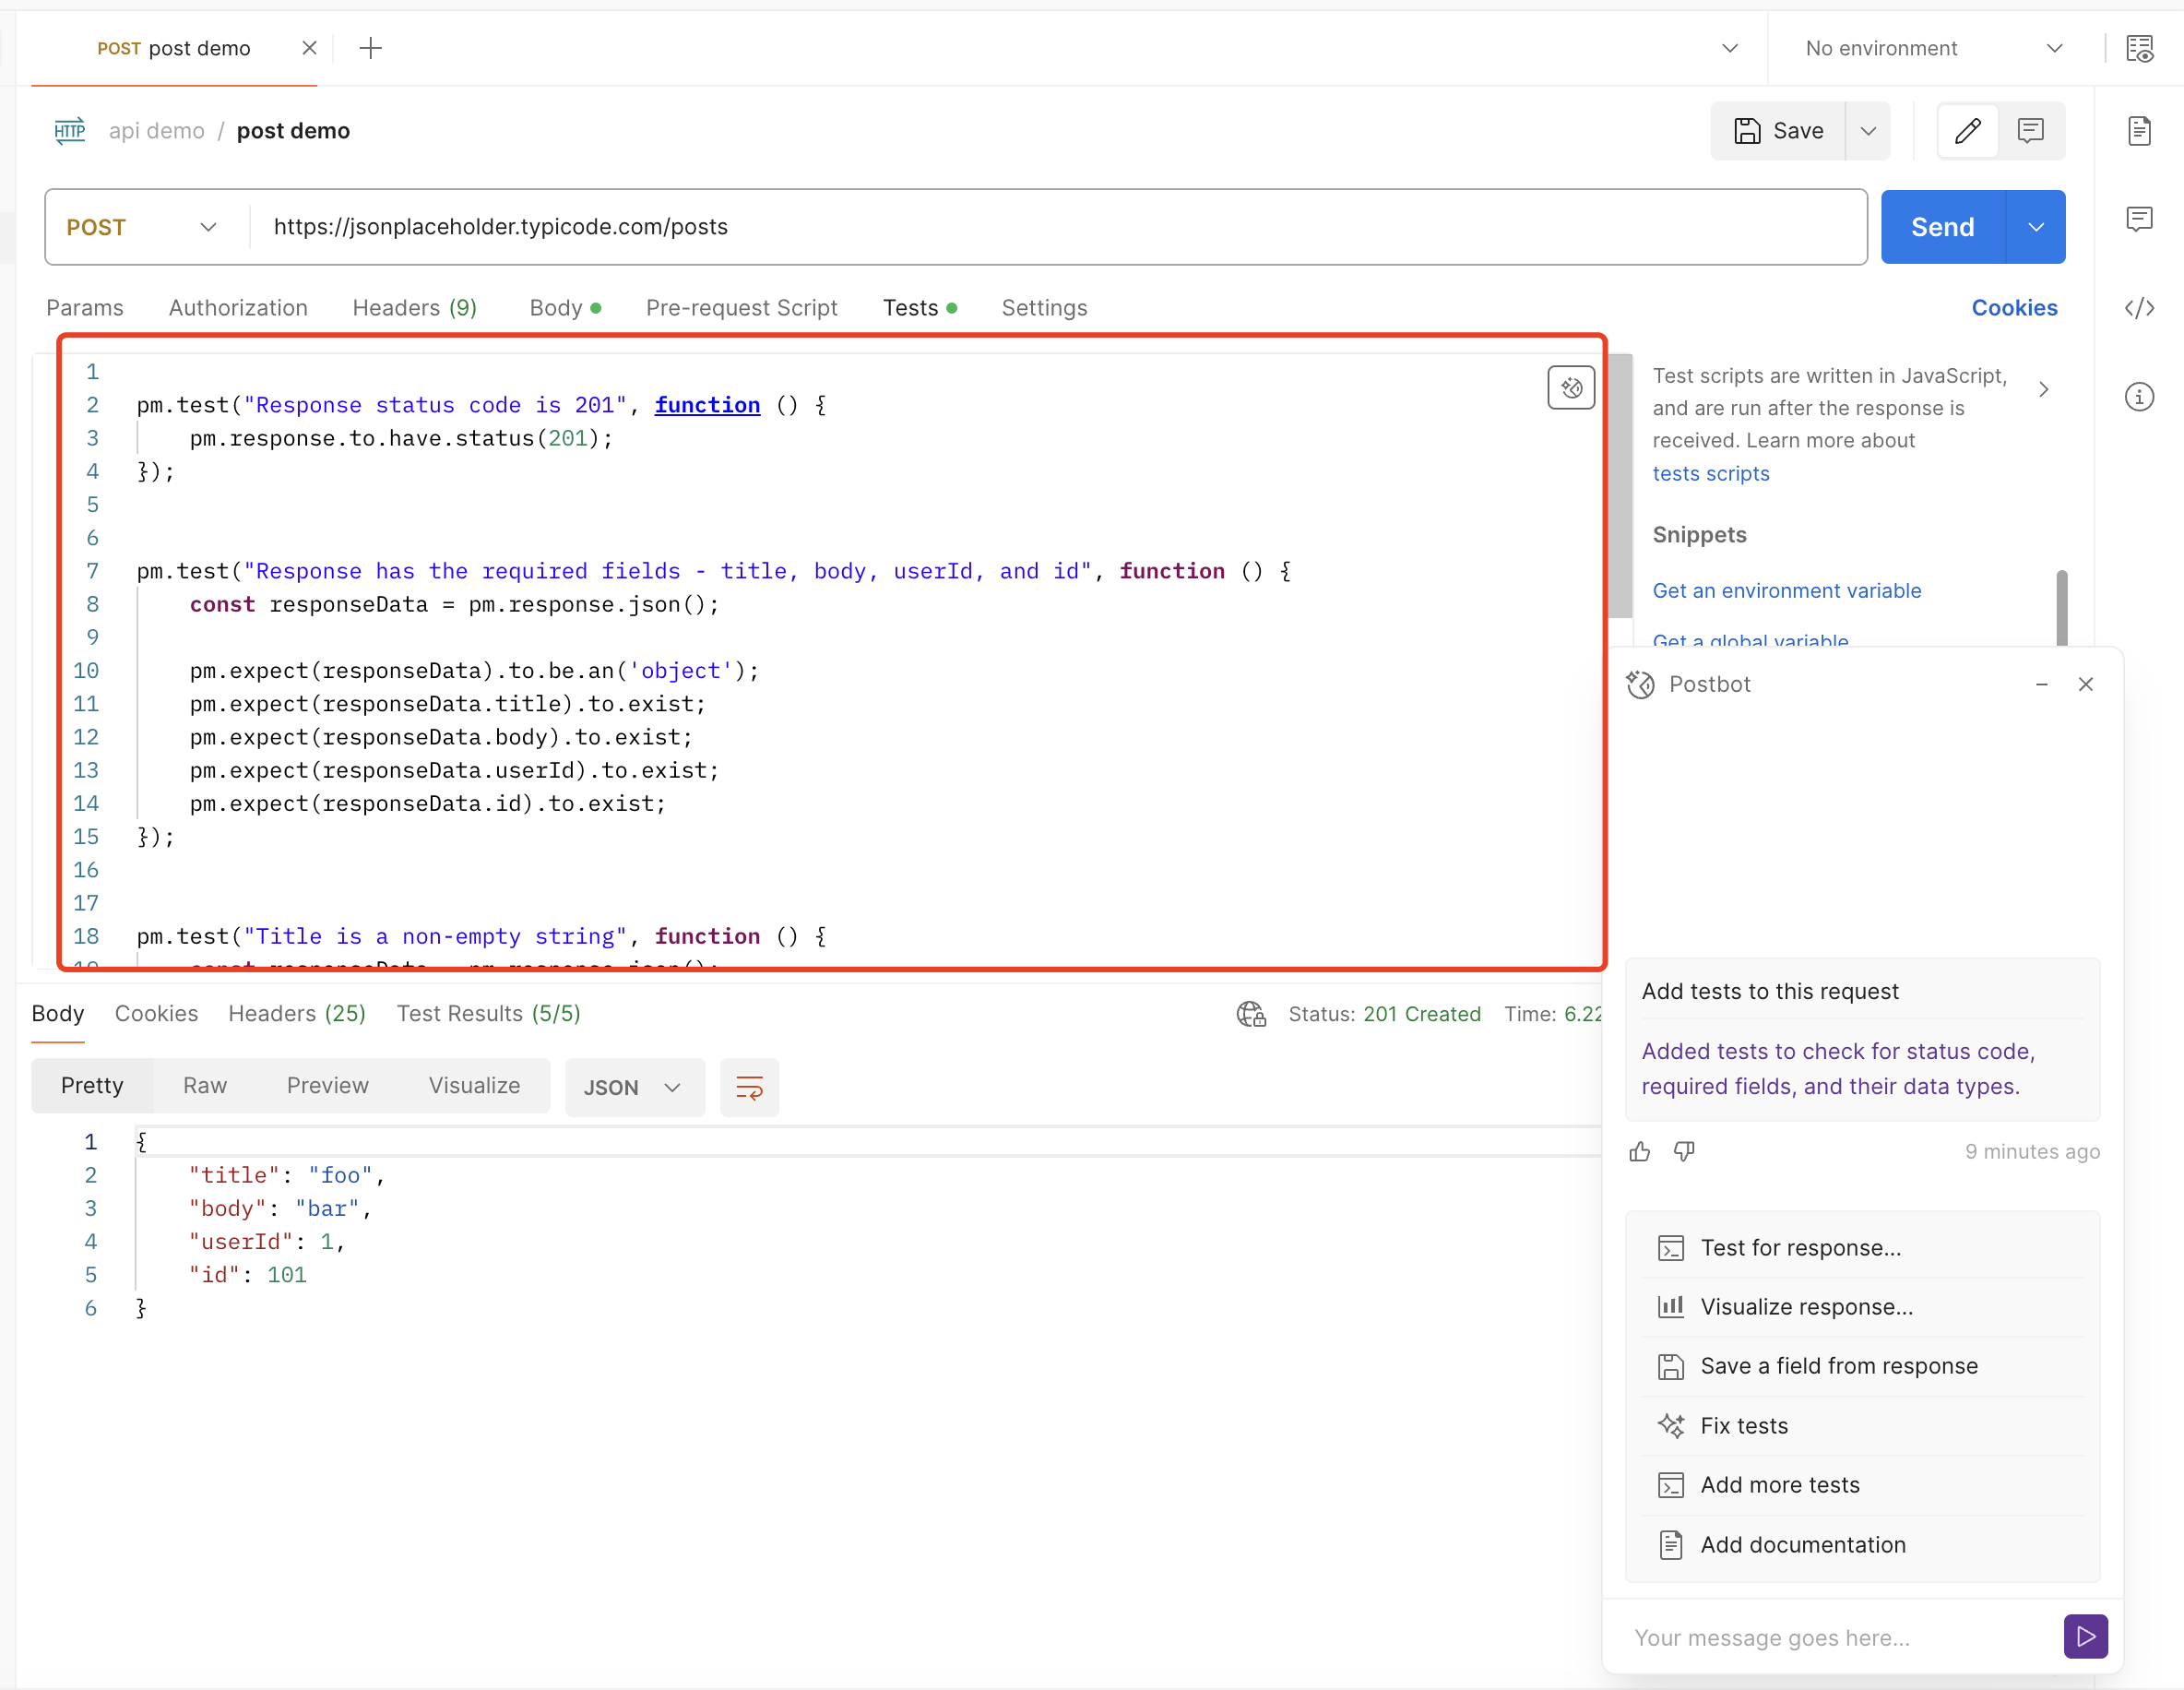
Postbot’s test script for the demo request is as follows:
pm.test("Response status code is 201", function () {
    pm.response.to.have.status(201);
});

pm.test("Response has the required fields - title, body, userId, and id", function () {
    const responseData = pm.response.json();
    pm.expect(responseData.title).to.exist;
    pm.expect(responseData.body).to.exist;
    pm.expect(responseData.userId).to.exist;
    pm.expect(responseData.id).to.exist;
});

pm.test("Title is a non-empty string", function () {
    const responseData = pm.response.json();
    pm.expect(responseData).to.be.an('object');
    pm.expect(responseData.title).to.be.a('string').and.to.have.lengthOf.at.least(1, "Title should not be empty");
});

pm.test("Body is a non-empty string", function () {
    const responseData = pm.response.json();
    pm.expect(responseData).to.be.an('object');
    pm.expect(responseData.body).to.be.a('string').and.to.have.lengthOf.at.least(1, "Body should not be empty");
});

pm.test("UserId is a positive integer", function () {
    const responseData = pm.response.json();
    pm.expect(responseData.userId).to.be.a('number');
    pm.expect(responseData.userId).to.be.above(0, "UserId should be a positive integer");
});
The written test covers the interface response’s status judgment and body field type judgment and can run through.
At this point, I noticed that two new recommended commands were added to Postbot’s suggestion menu
- Add more tests
- Fix test
I first tried running “Add more tests,” and then Postbot added a few more tests
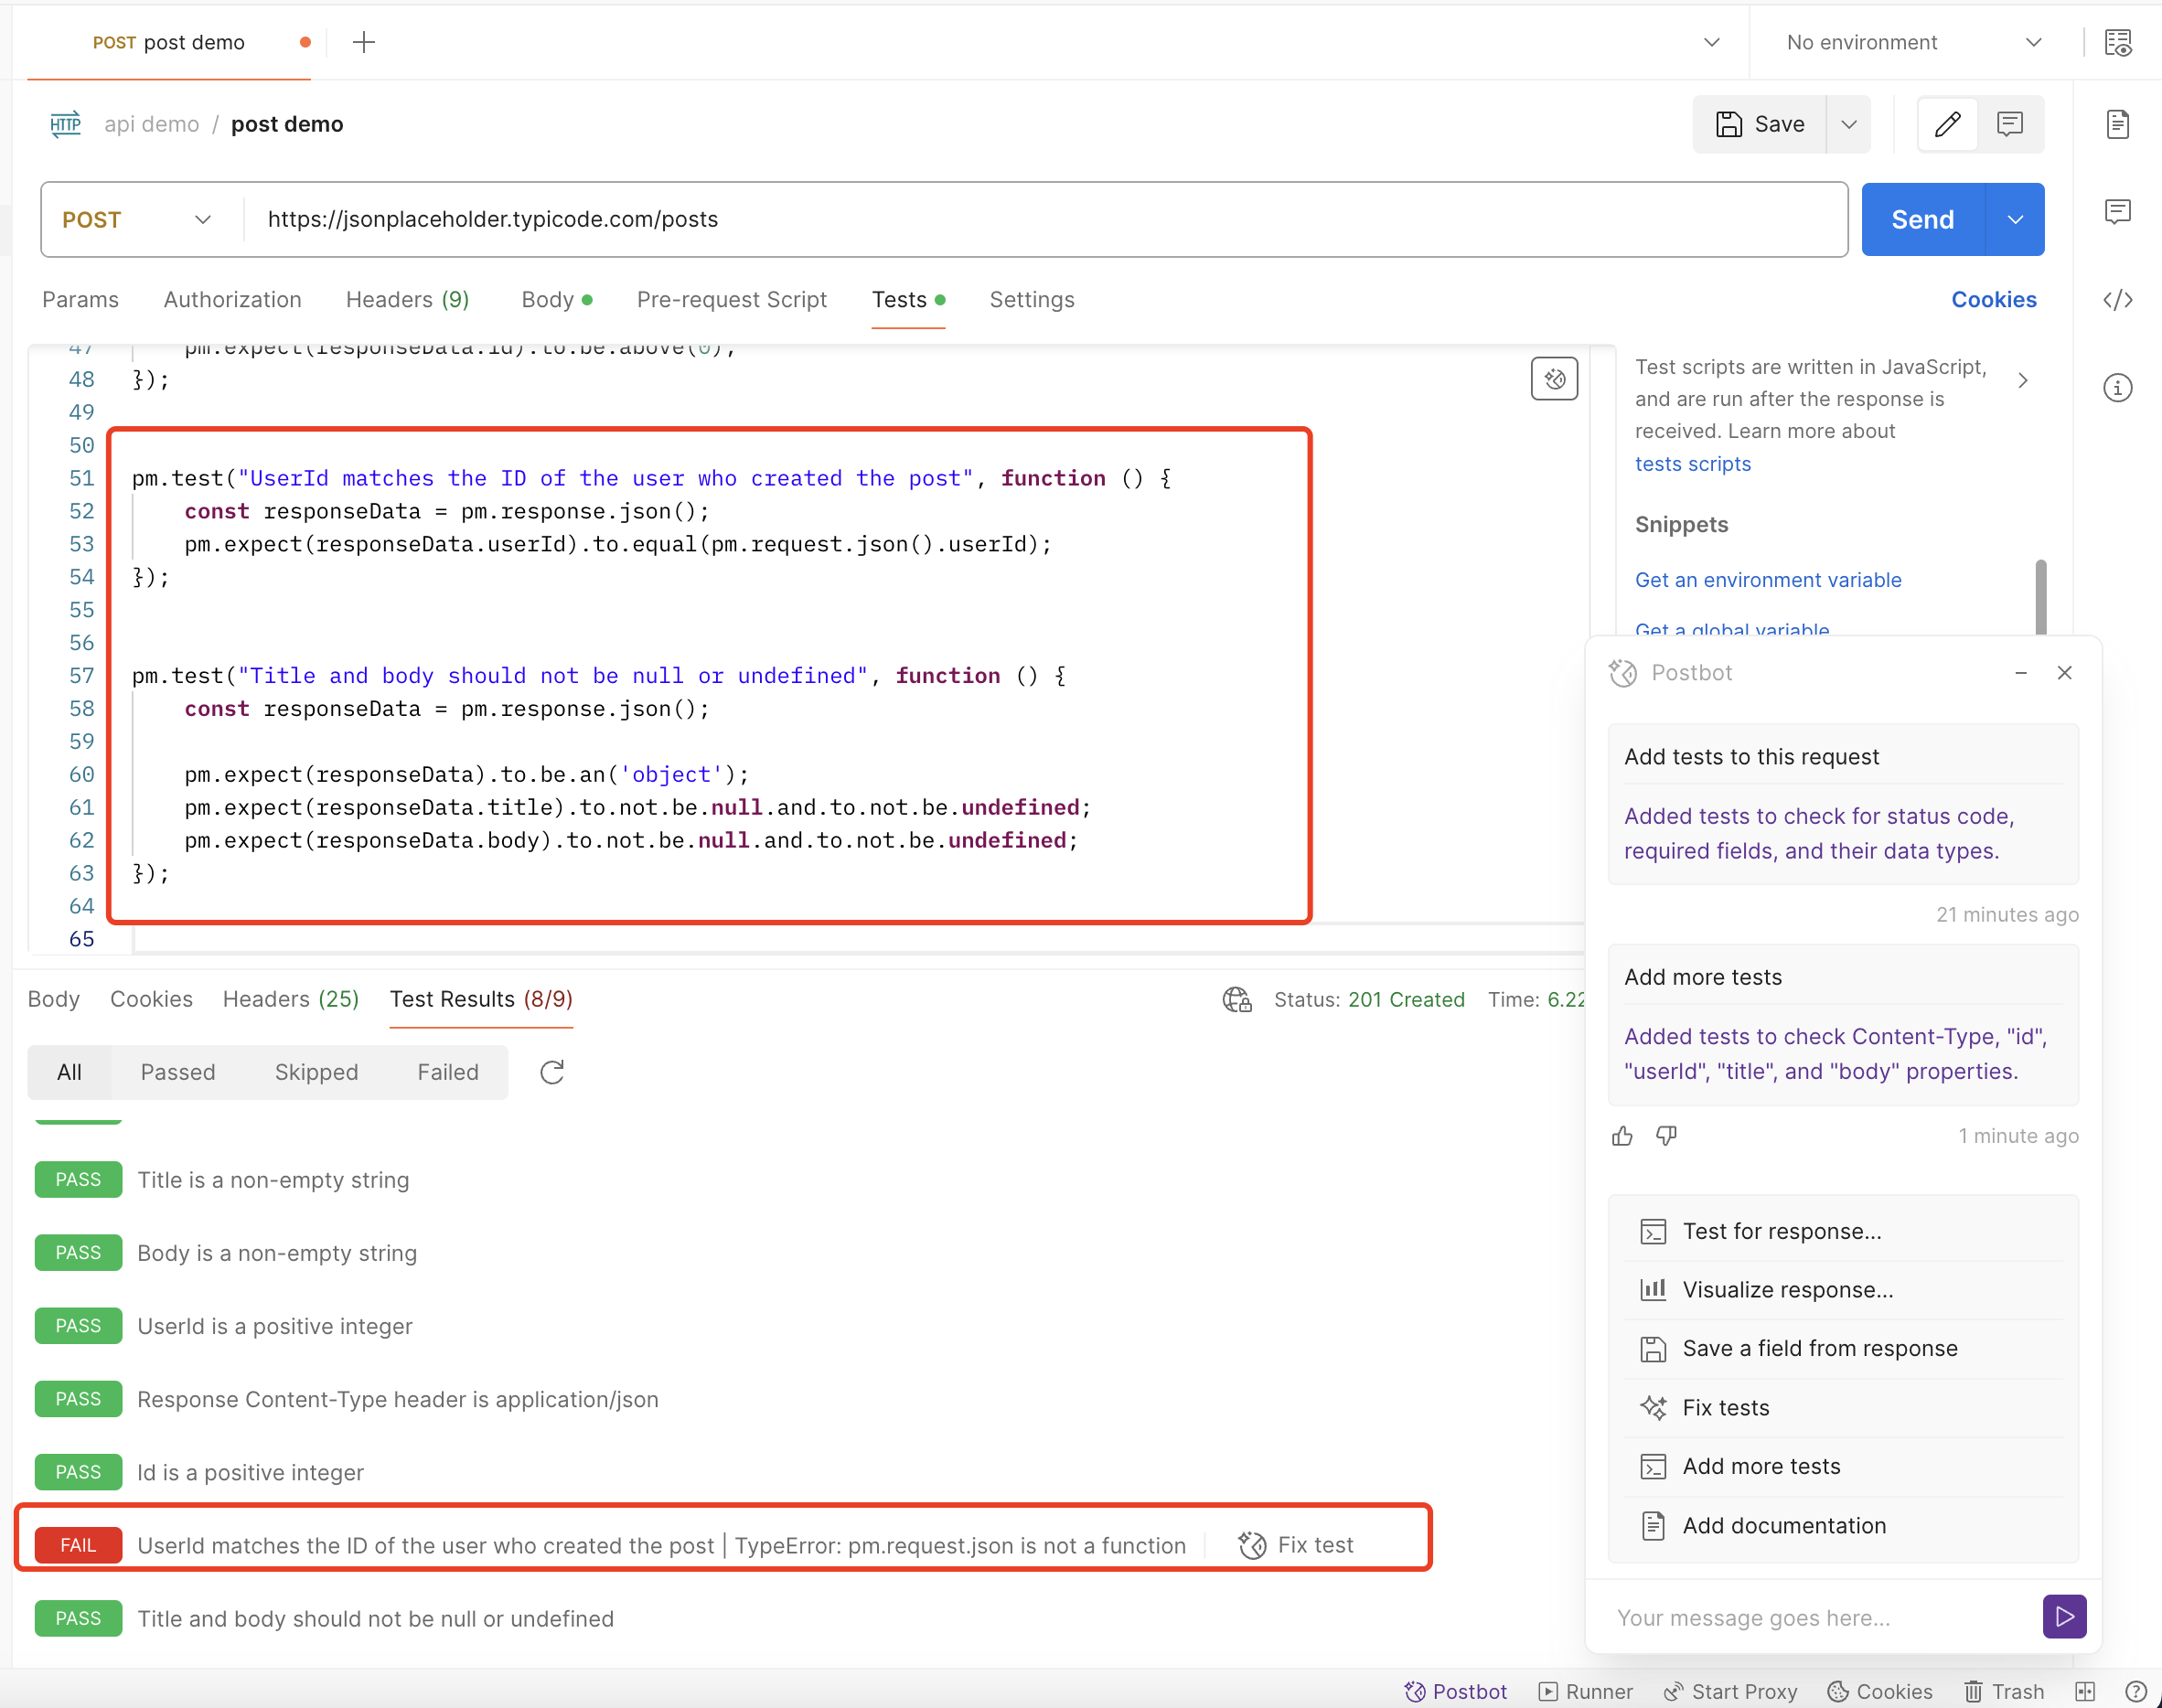
Interestingly, one of the tests failed, so I clicked “Fix test” to try to let Postbot fix this wrong test
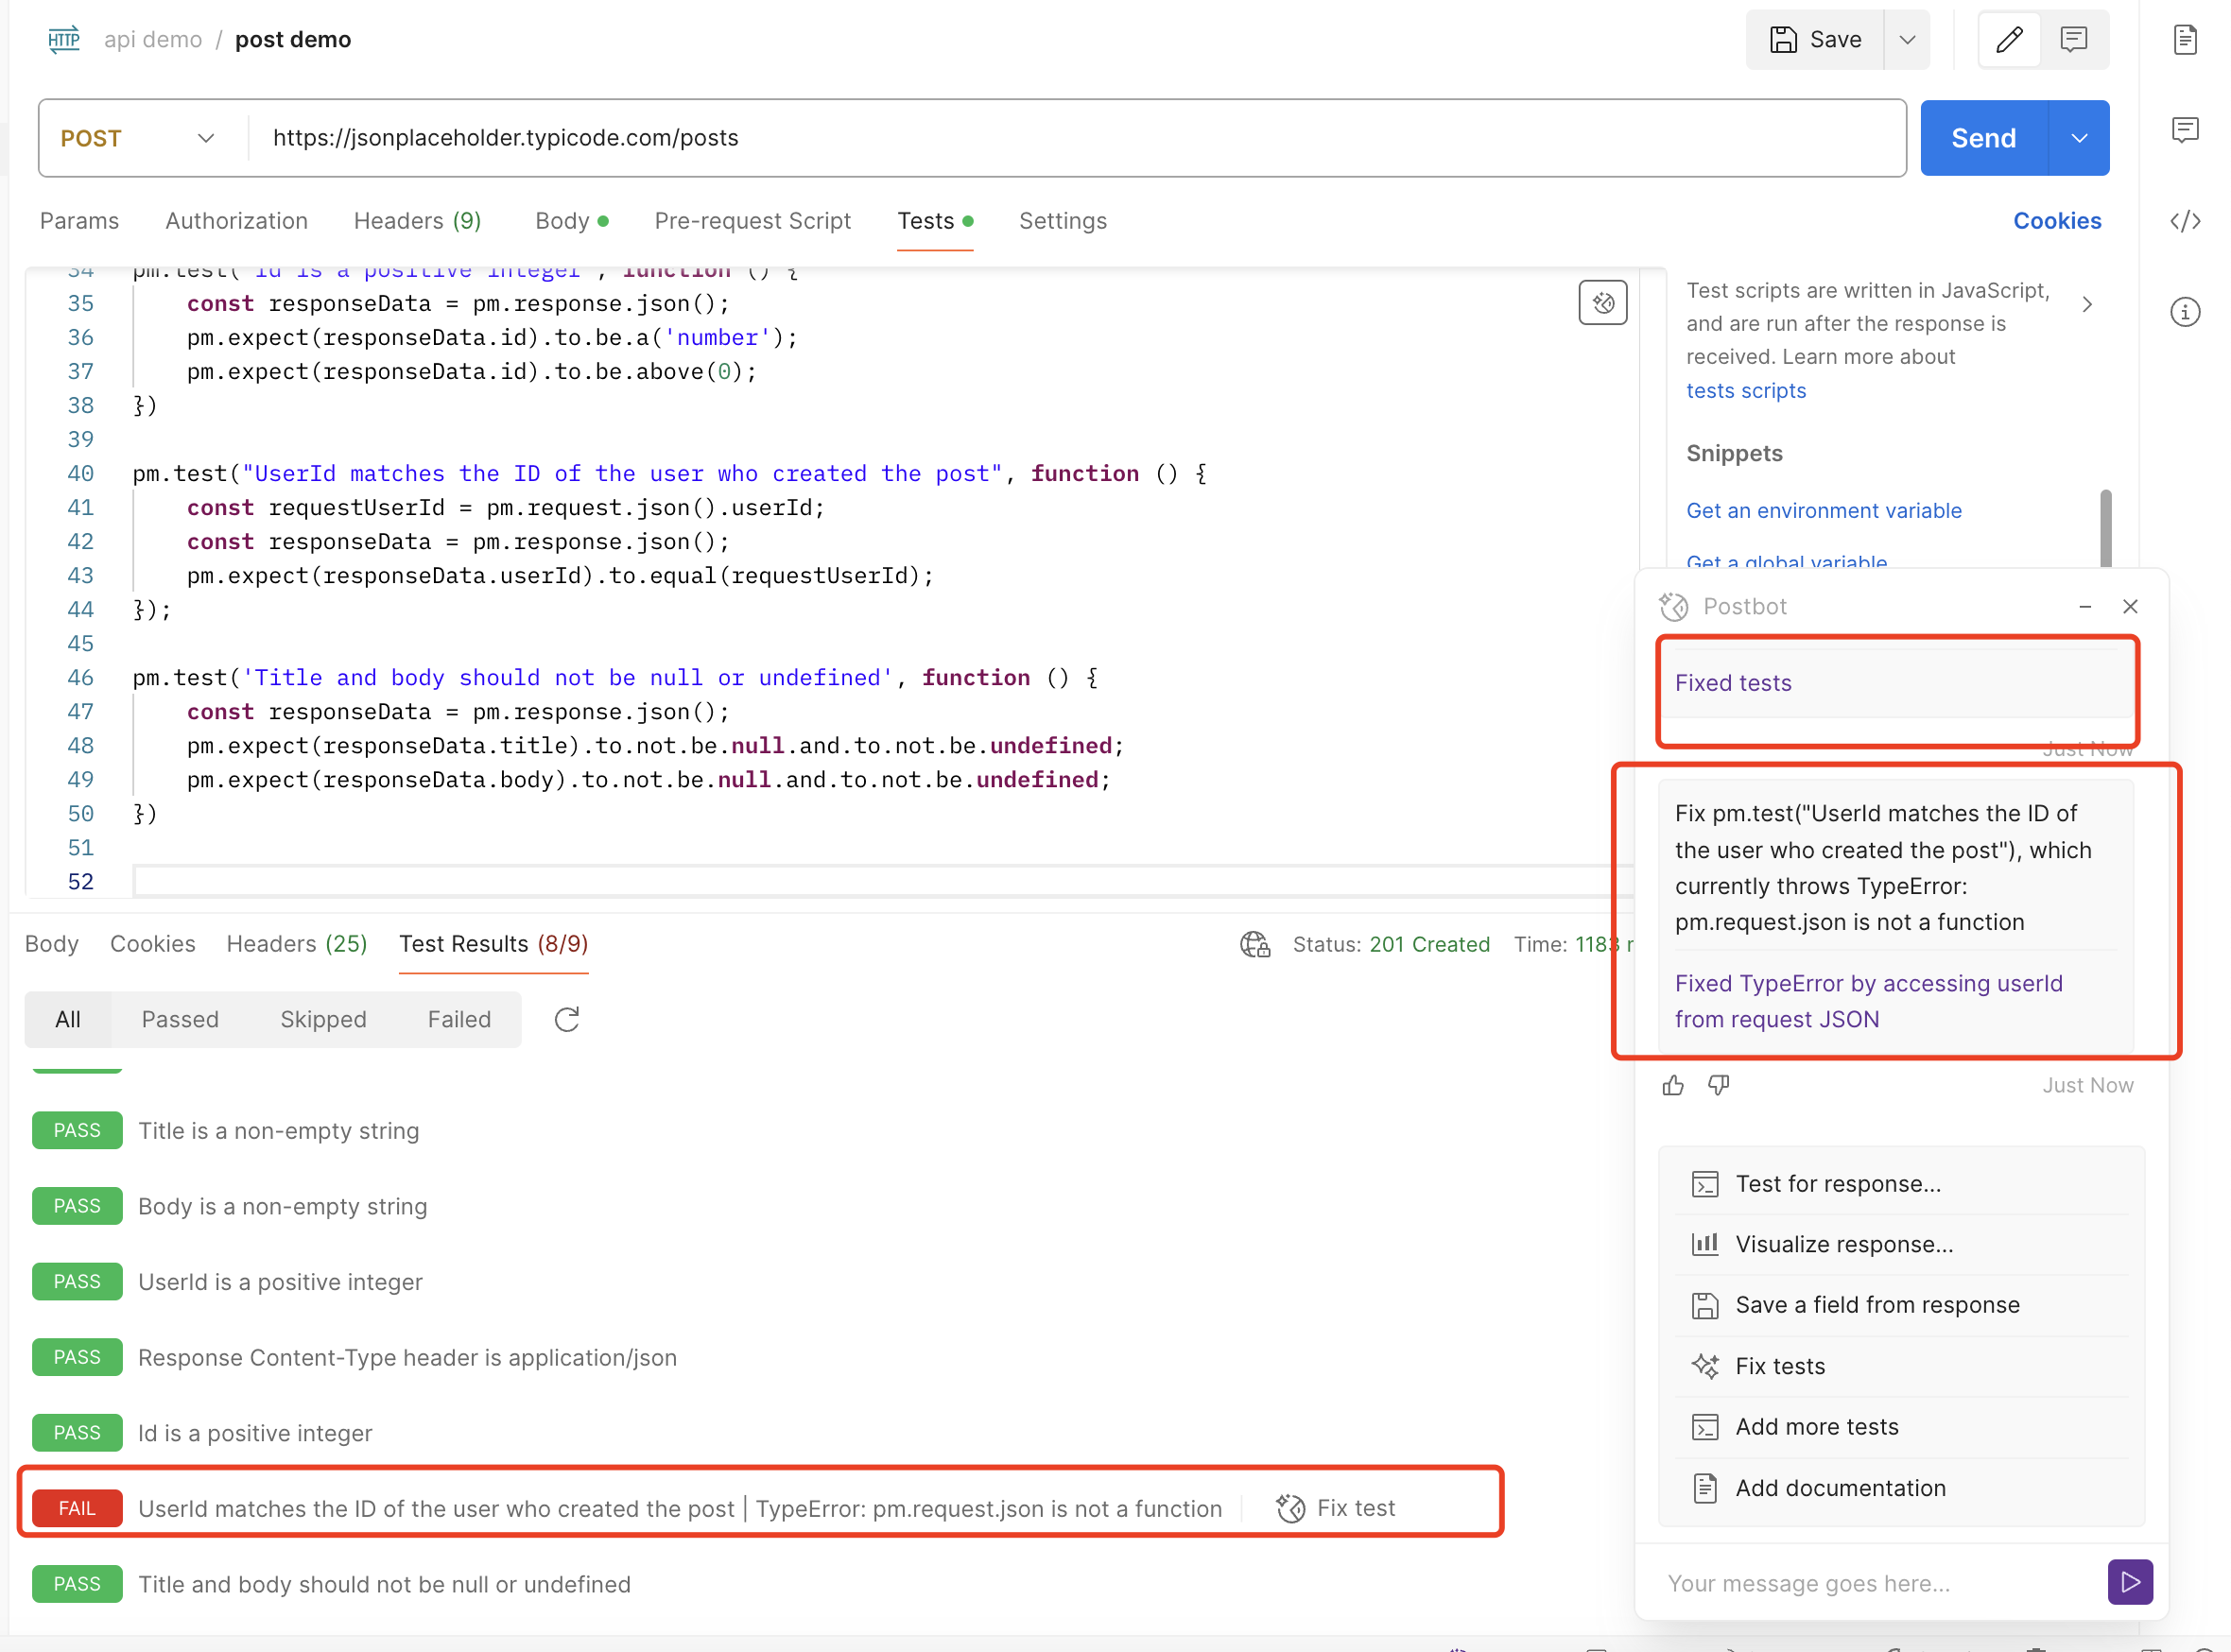
However, Postbot did not fix this wrong test case successfully
This wrong test case is as follows:
pm.test("UserId matches the ID of the user who created the post", function () {
    const requestUserId = pm.request.json().userId;
    const responseData = pm.response.json();
    pm.expect(responseData.userId).to.equal(requestUserId);
});
I can only manually fix it, and the corrected script is as follows
pm.test("UserId matches the ID of the user who created the post", function () {

    const requestUserId = JSON
    .parse(pm.request.body.raw).userId;
    const responseData = pm.response.json();
    pm.expect(responseData.userId).to.equal(requestUserId);
});
The script was wrong because the request body was in raw format and needed to be parsed into a JSON object before being read.
Trying Test for response
After clicking Test for response in the Postbot interface, Postbot will update the test cases generated by Add tests to this request as shown below:
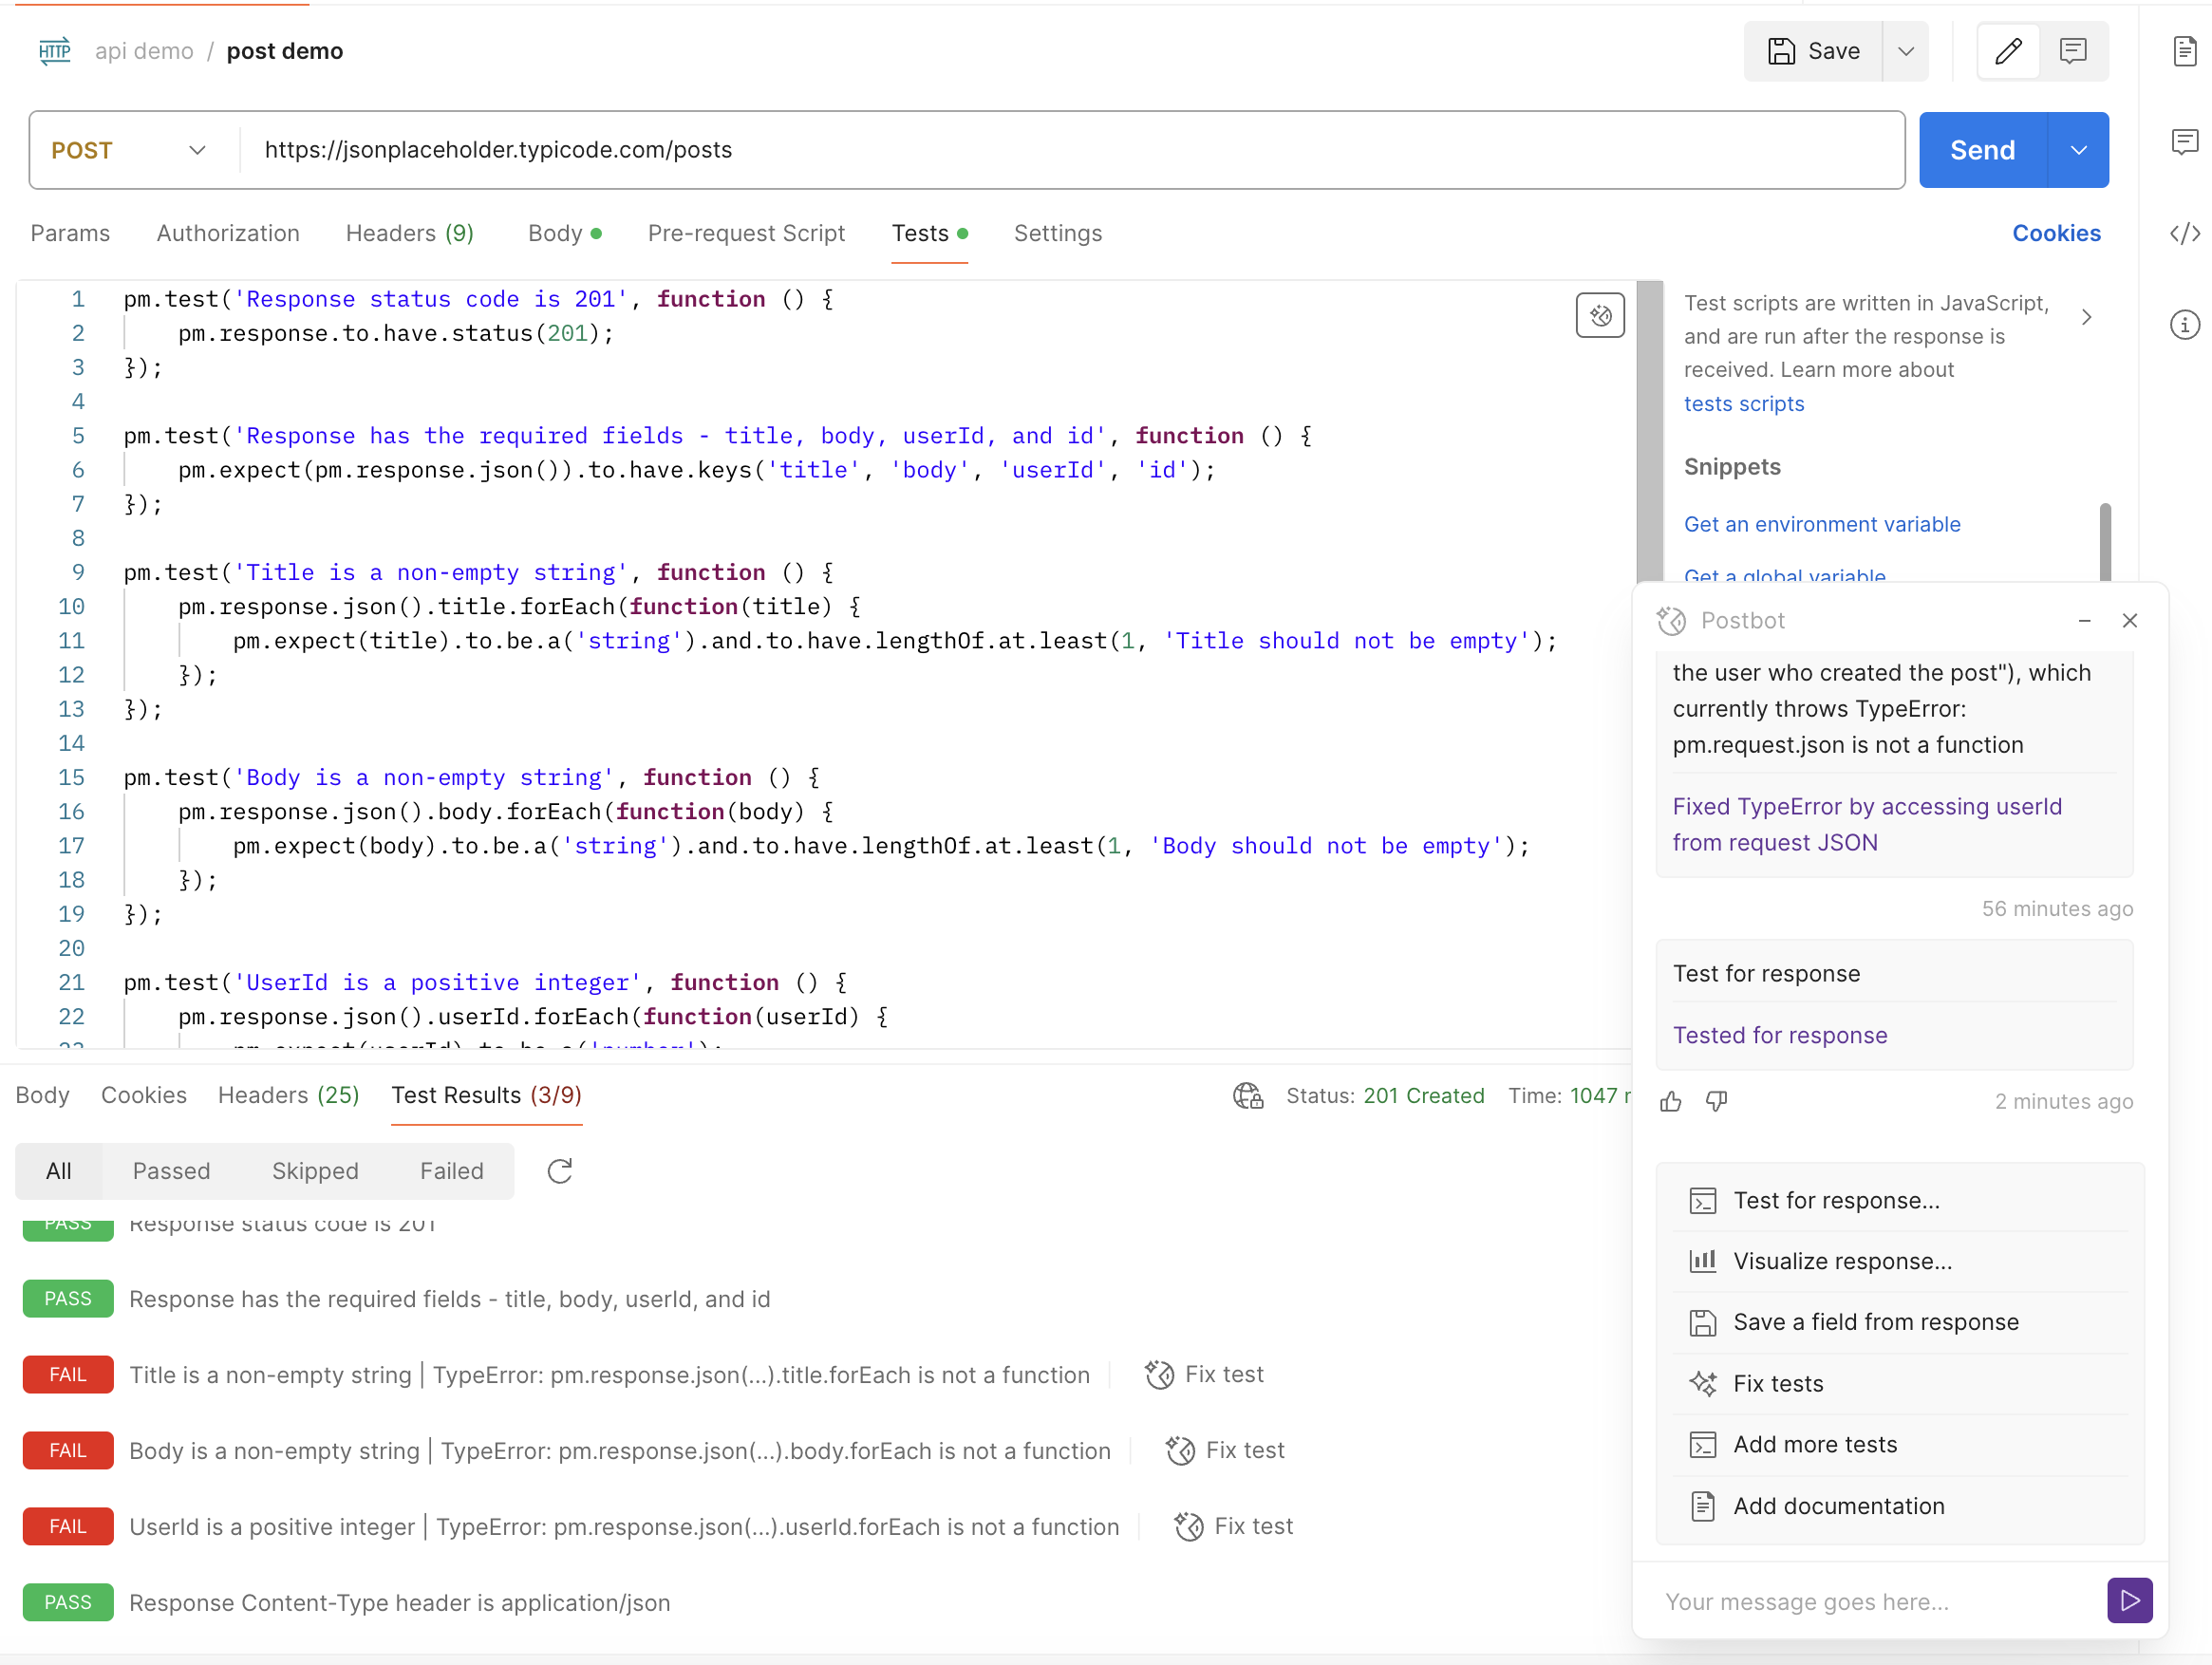
By examining the results of the updated tests, I found that most of the updated cases could not run through.
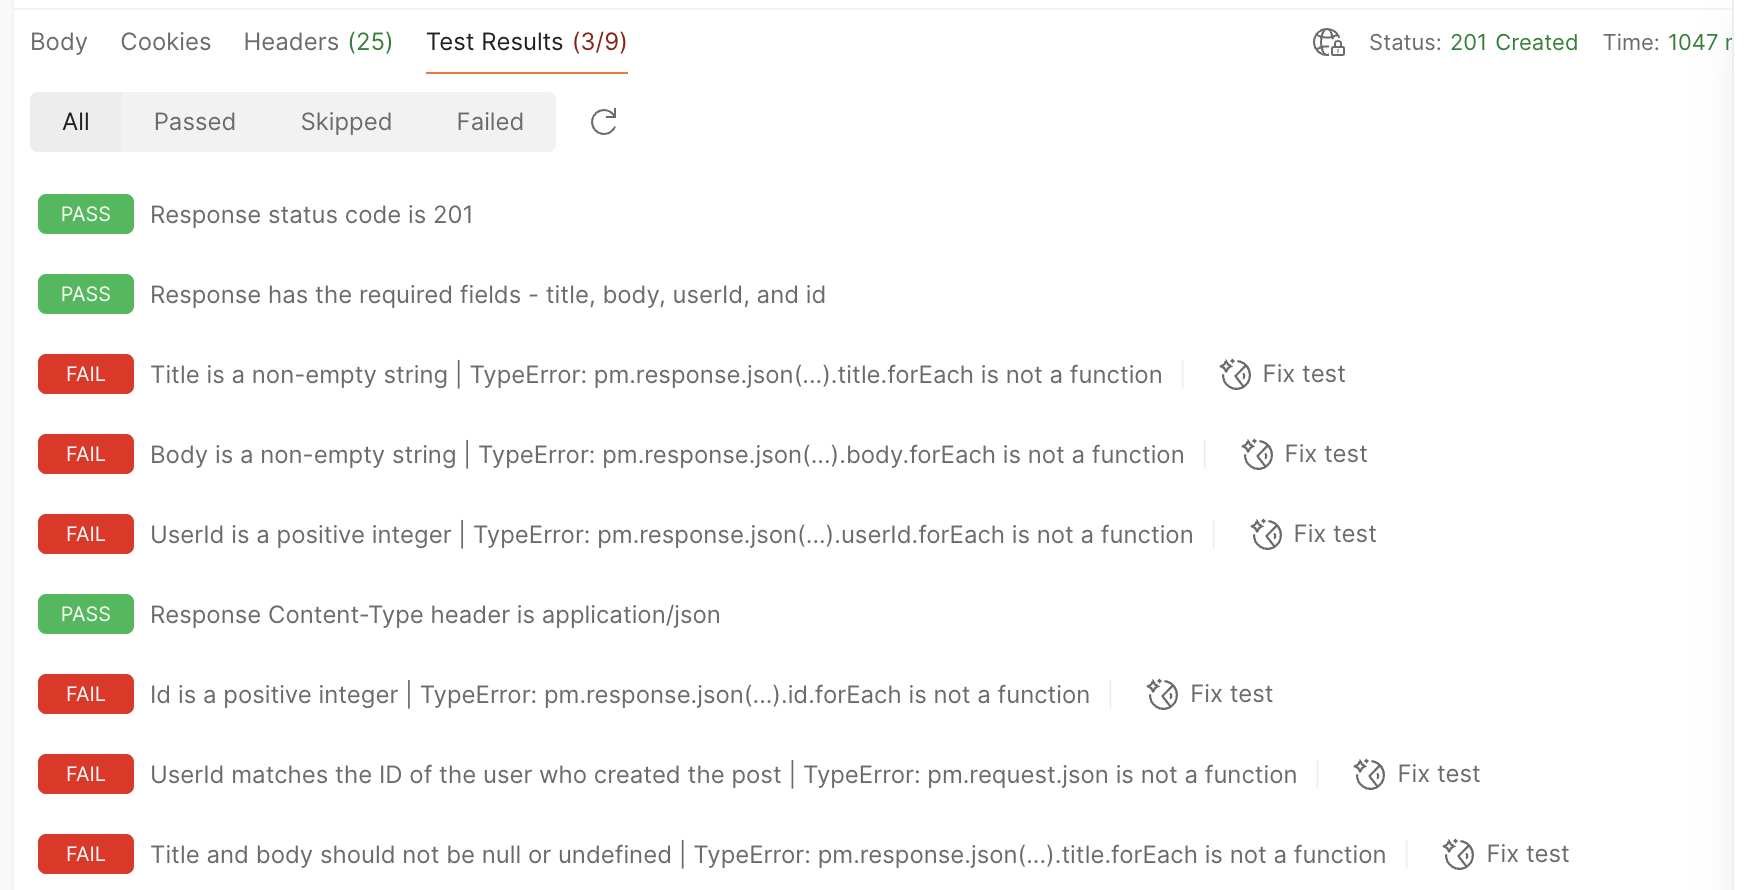
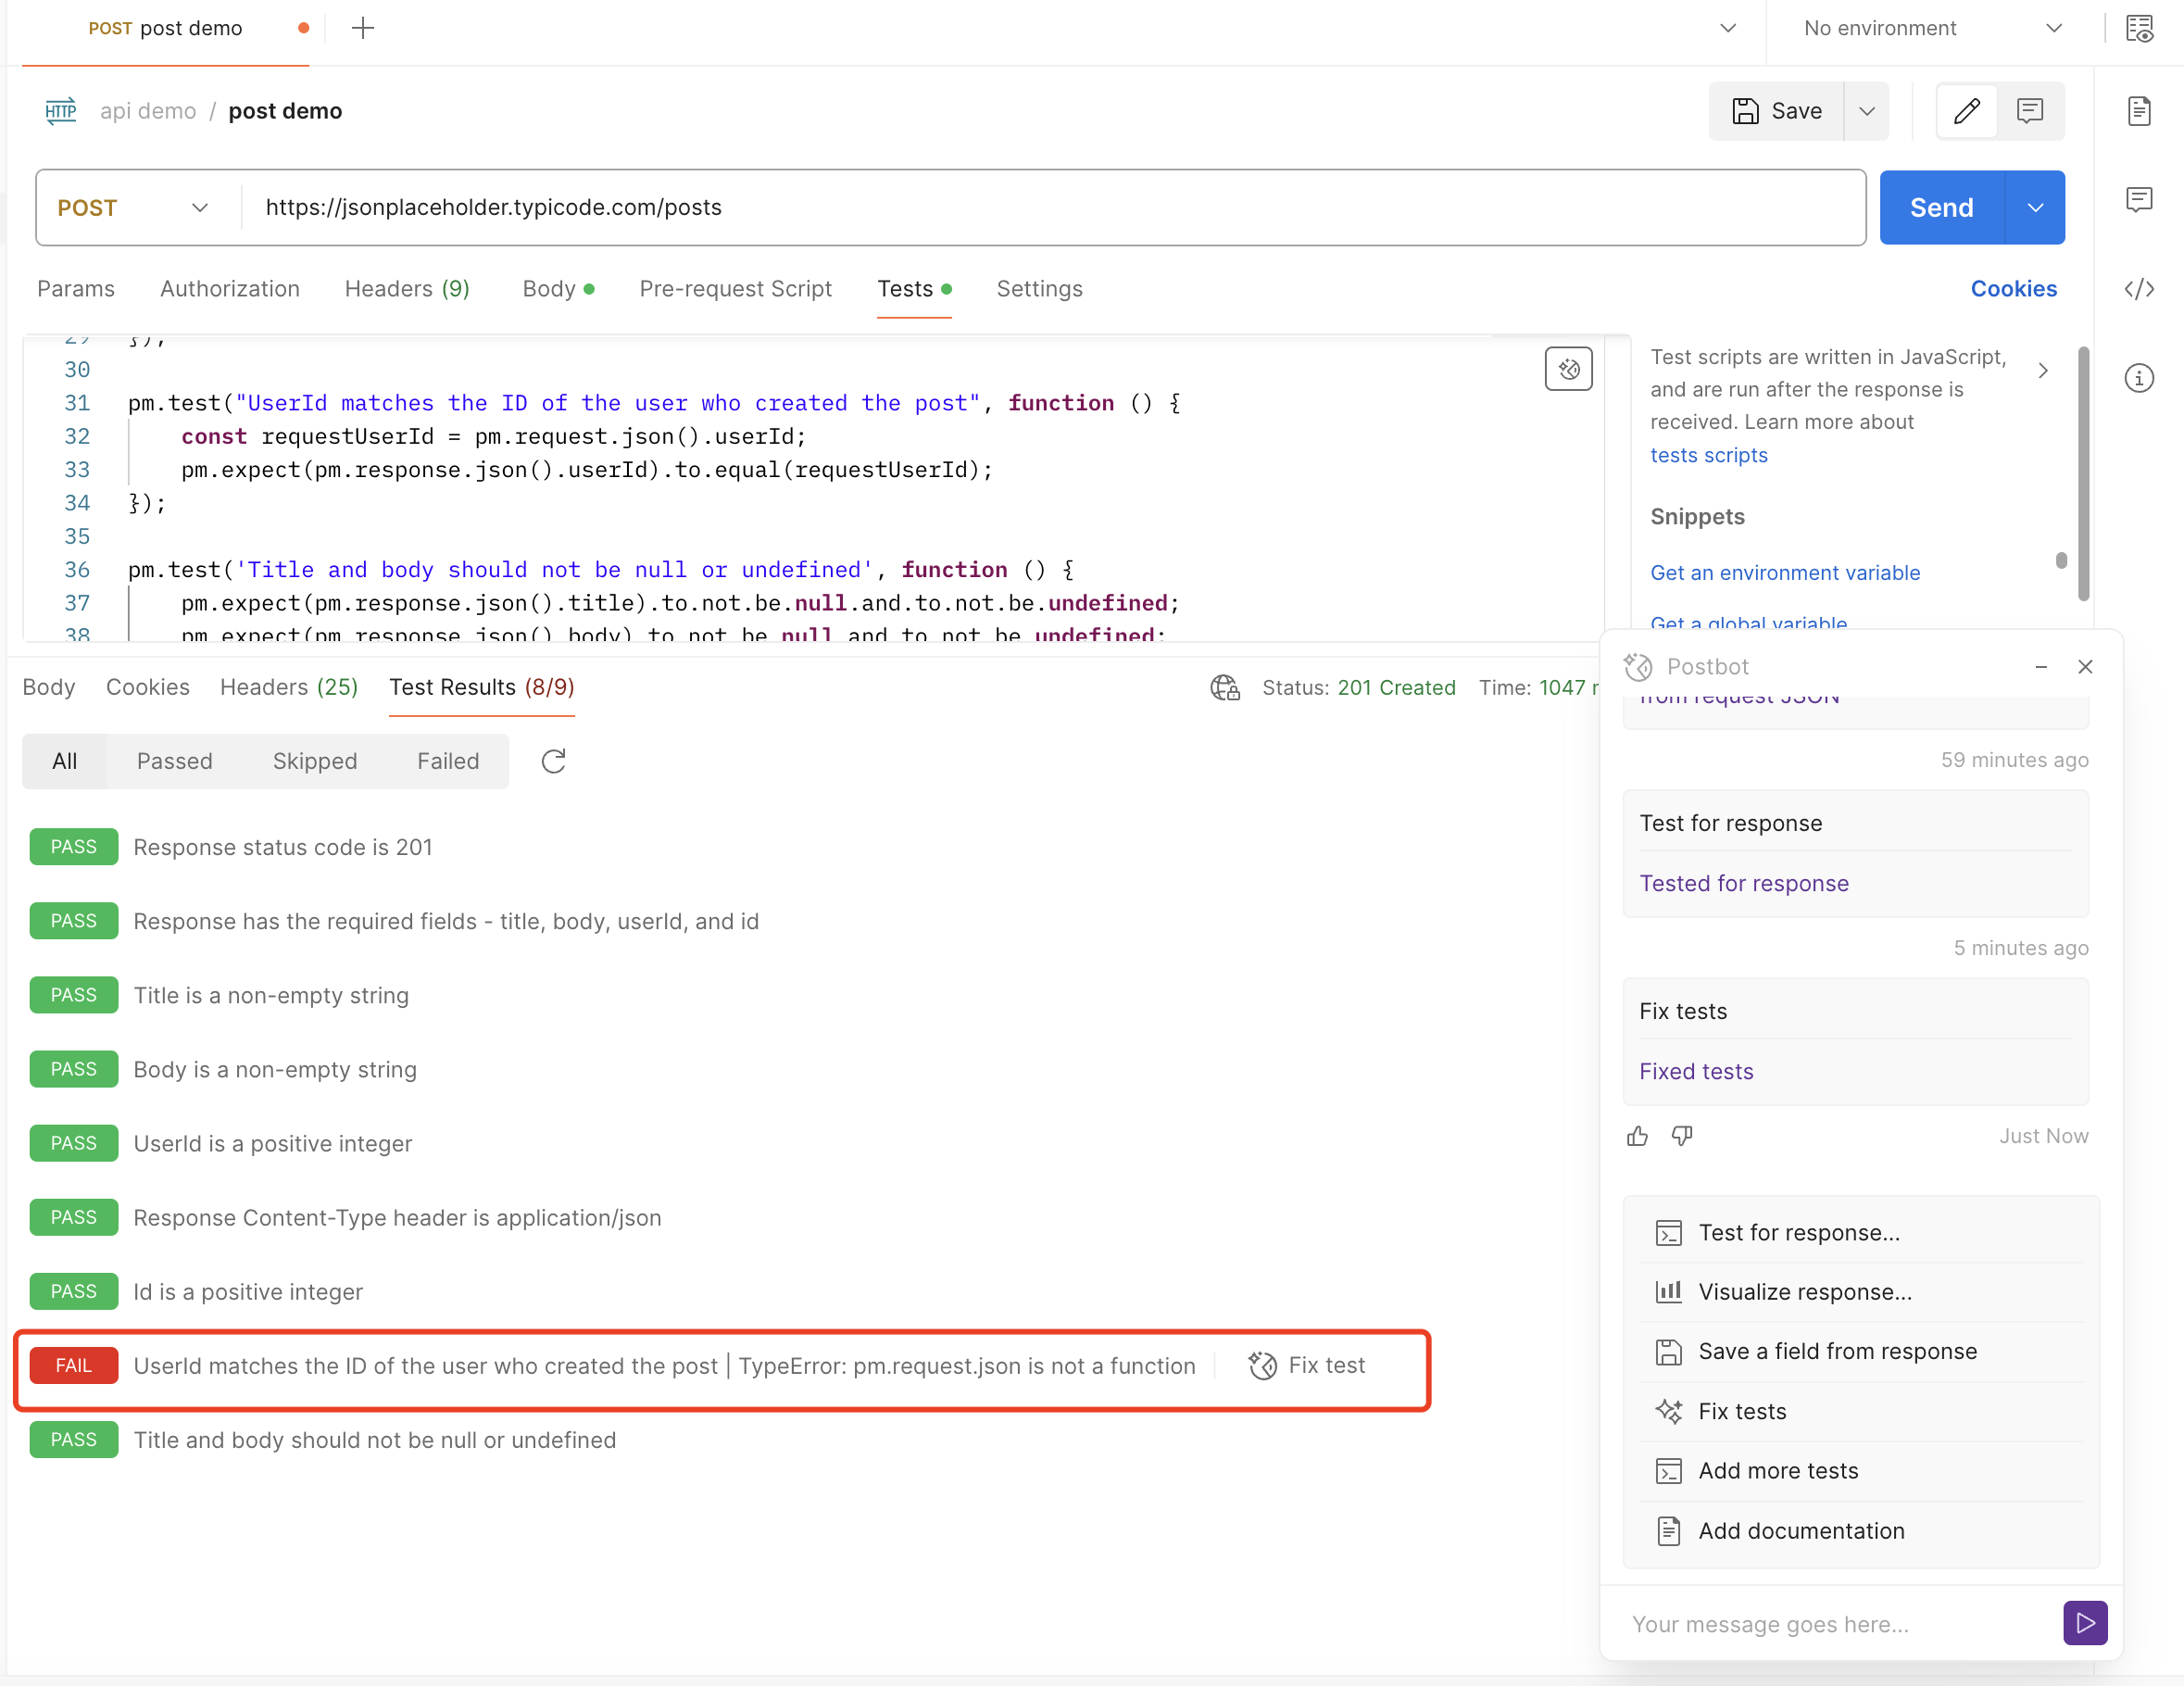
Then I tried to fix the wrong cases through Postbot’s “Fix test”, most of the cases could run through, but there were still errors in the test cases generated by the Add tests to this request command.
In addition, clicking on Postbot’s “Fix test” to fix the cases generated by the Test for response command will update most of the cases to the test cases generated by the Add tests to this request command
I wonder where the difference between the Add tests to this request and Test for response commands is?
Trying Visualize response
After clicking Visualize response in the Postbot interface, you need to select the generated format, which can be a table/line chart/bar chart. Here I choose a table, and then Postbot will display the instantiated table style of the response on the result page after the request.
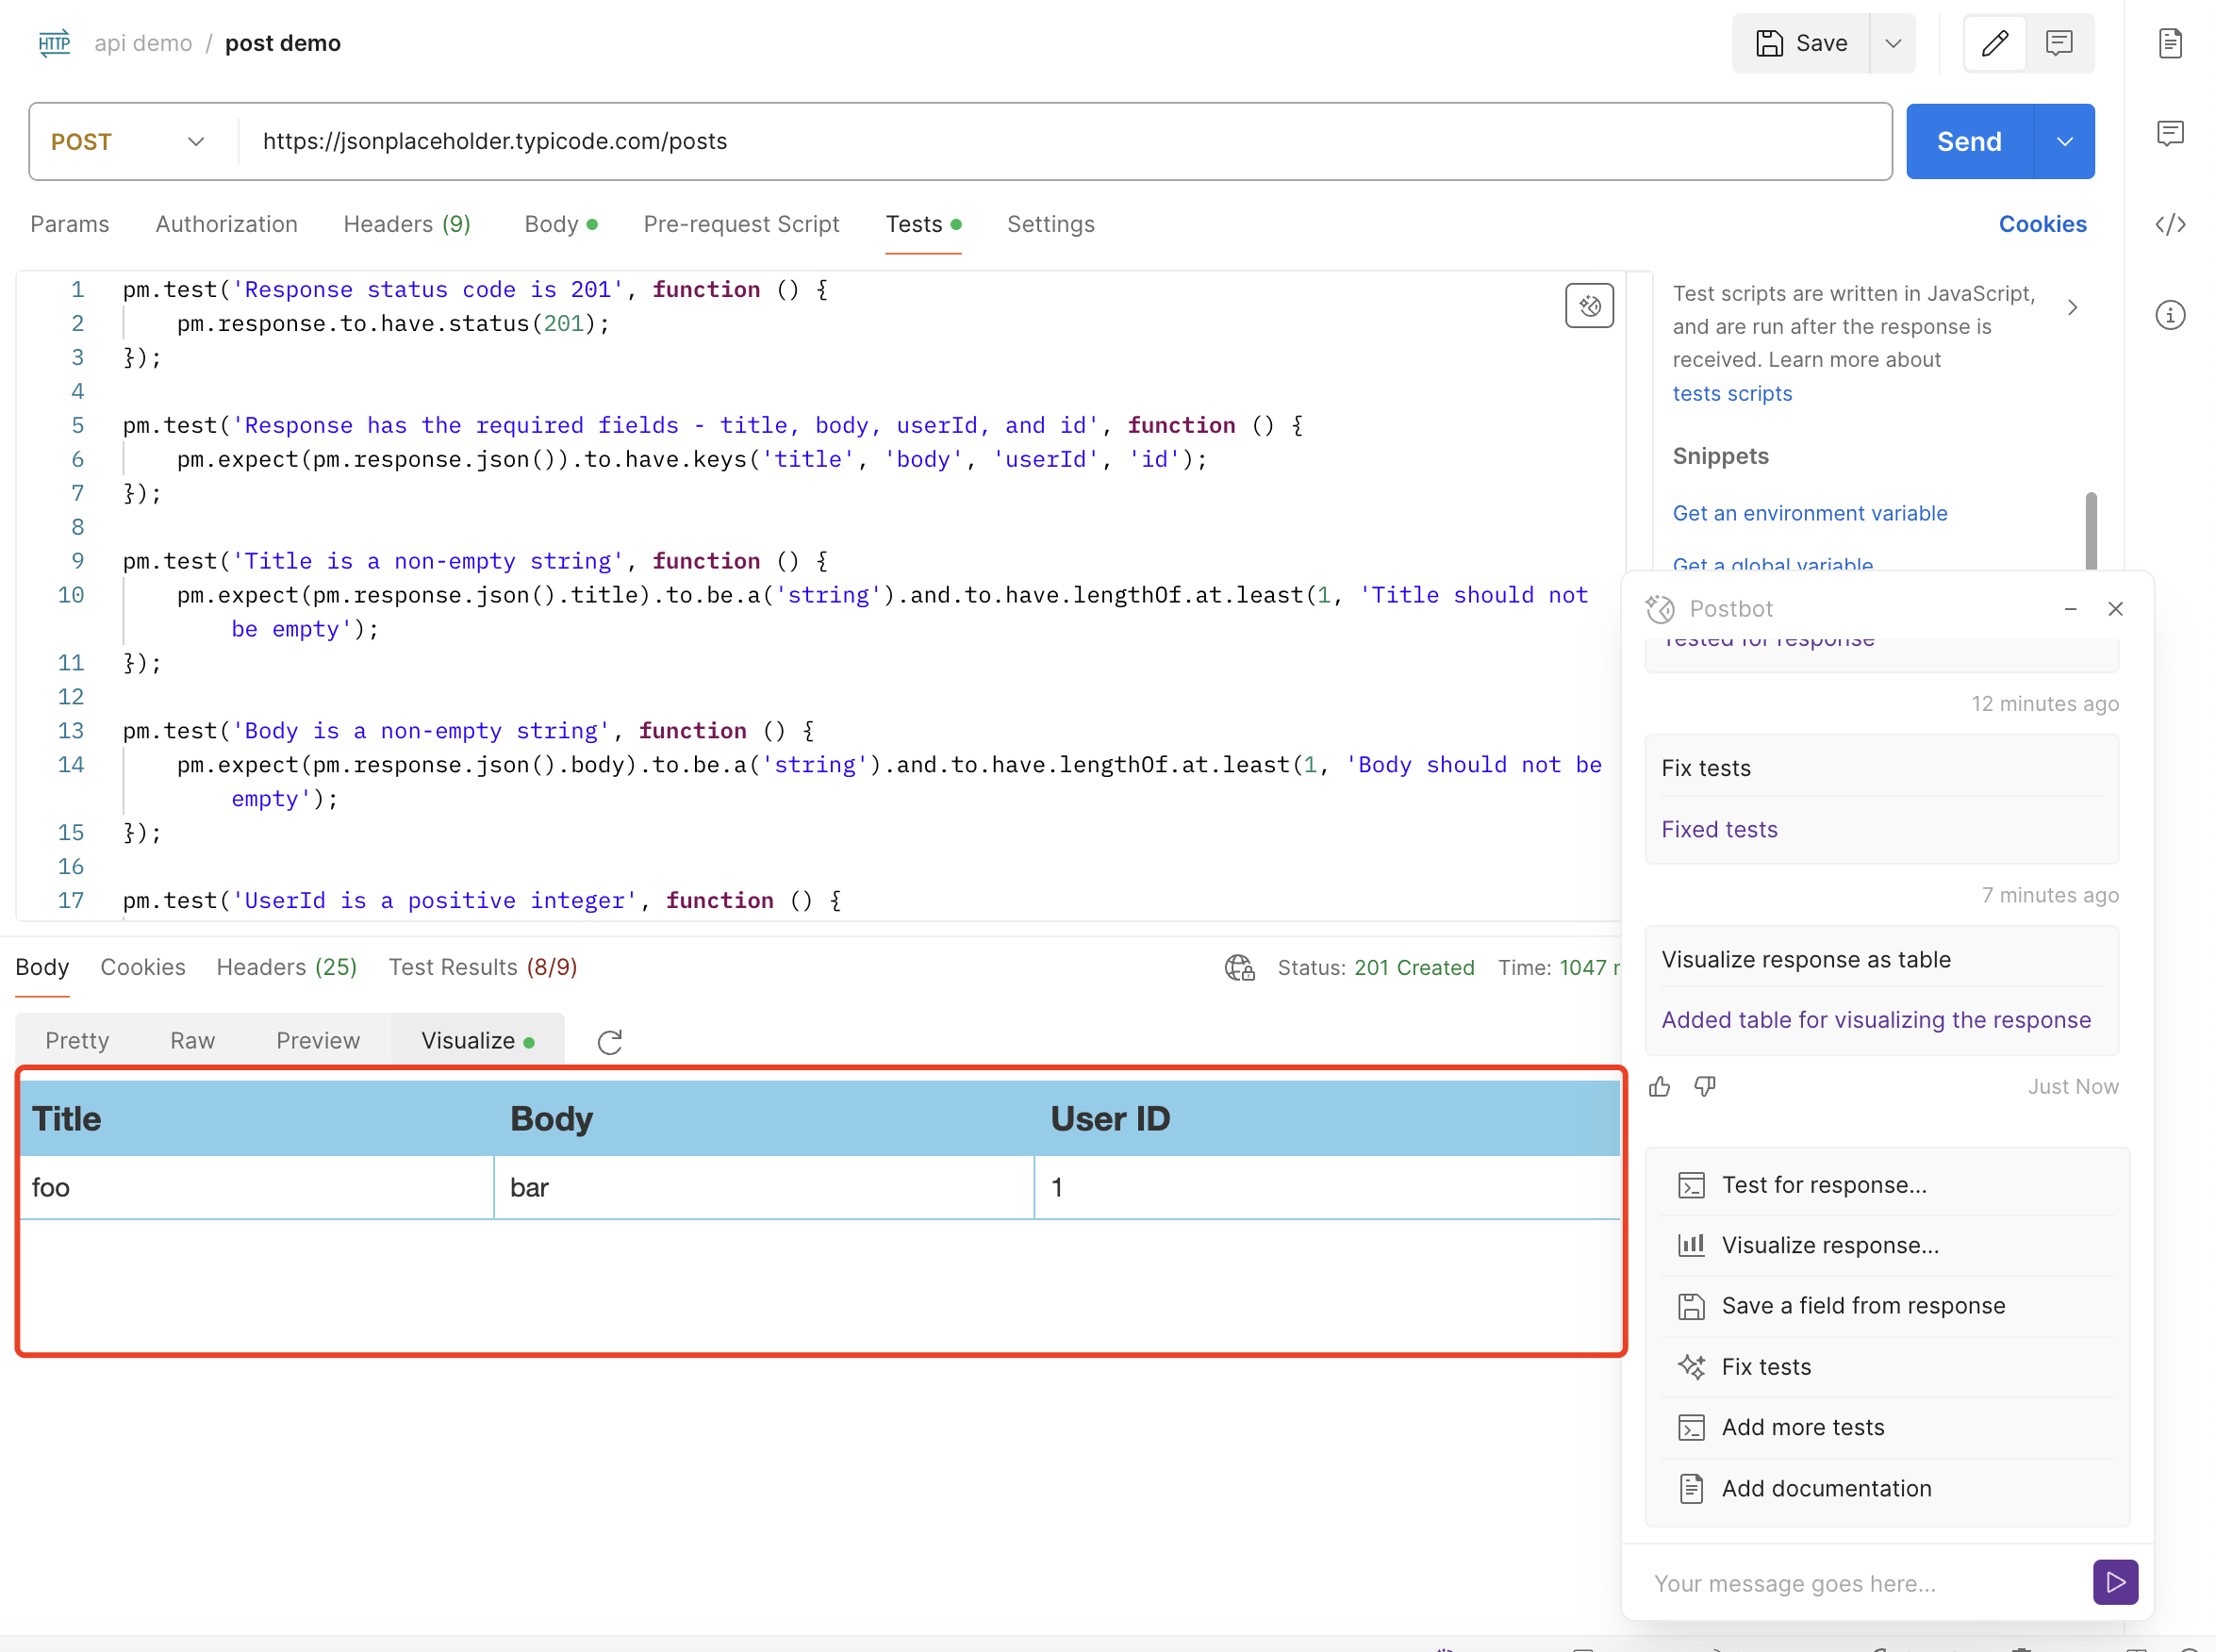
This table instantiation of the response is achieved by generating a script under tests, and the specific script is as follows:
var template = `
<style type="text/css">
    .tftable {font-size:14px;color:#333333;width:100%;border-width: 1px;border-color: #87ceeb;border-collapse: collapse;}
    .tftable th {font-size:18px;background-color:#87ceeb;border-width: 1px;padding: 8px;border-style: solid;border-color: #87ceeb;text-align:left;}
    .tftable tr {background-color:#ffffff;}
    .tftable td {font-size:14px;border-width: 1px;padding: 8px;border-style: solid;border-color: #87ceeb;}
    .tftable tr:hover {background-color:#e0ffff;}
</style>

<table class="tftable" border="1">
    <tr>
        <th>Title</th>
        <th>Body</th>
        <th>User ID</th>
        <th>ID</th>
    </tr>
    <tr>
        <td>{{response.title}}</td>
        <td>{{response.body}}</td>
        <td>{{response.userId}}</td>
        <td>{{response.id}}</td>
    </tr>
</table>
`;

function constructVisualizerPayload() {
    return {response: pm.response.json()}
}
pm.visualizer.set(template, constructVisualizerPayload());
I haven’t found where the Visualize response feature helps API testing yet.
Using Save a field from response
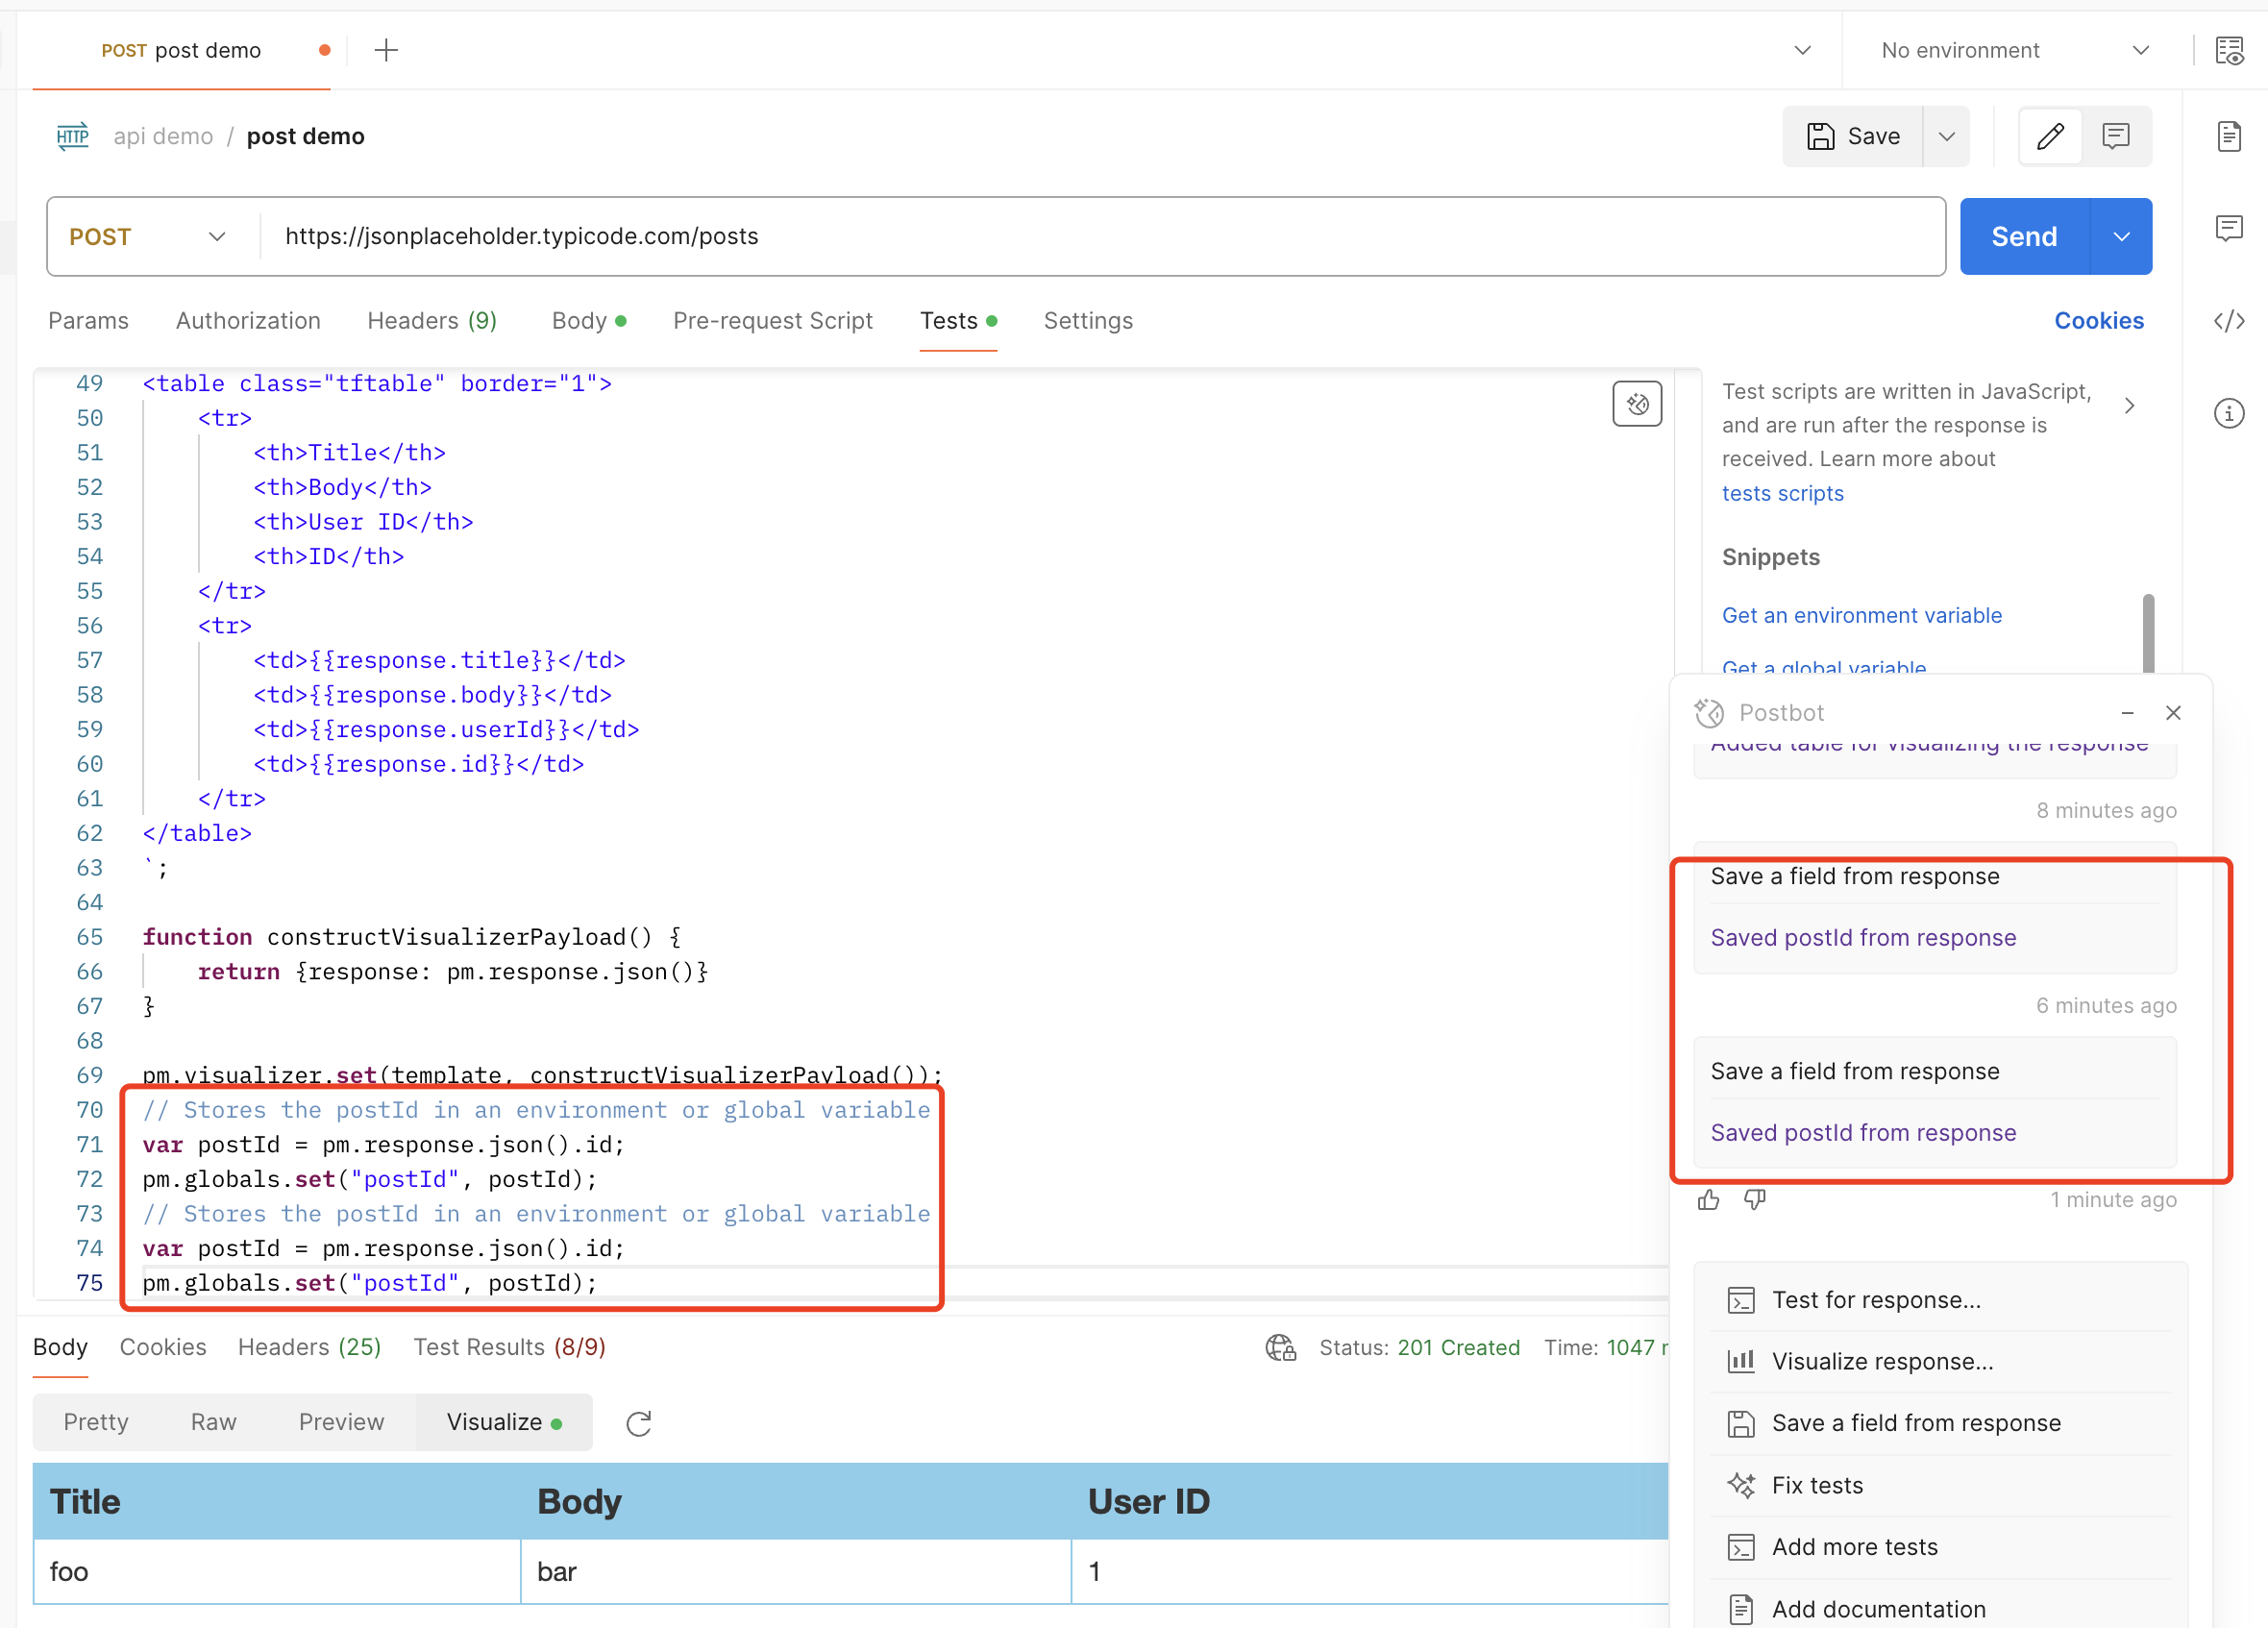
After clicking Save a field from response in the Postbot interface, Postbot will generate a test script to store the id from the response as an environment variable, as follows:
// Stores the postId in an environment or global variable
var postId = pm.response.json().id;
pm.globals.set("postId", postId);
Then I clicked Postbot’s Save a field from response command again and found that Postbot still generated a test script to store the id from the response as an environment variable, instead of generating a test script to store other fields from the response as environment variables.
Trying Add documentation
After clicking the Add documentation command in the Postbot interface, Postbot will generate a very detailed interface document on the right side of the postman interface, as shown below.
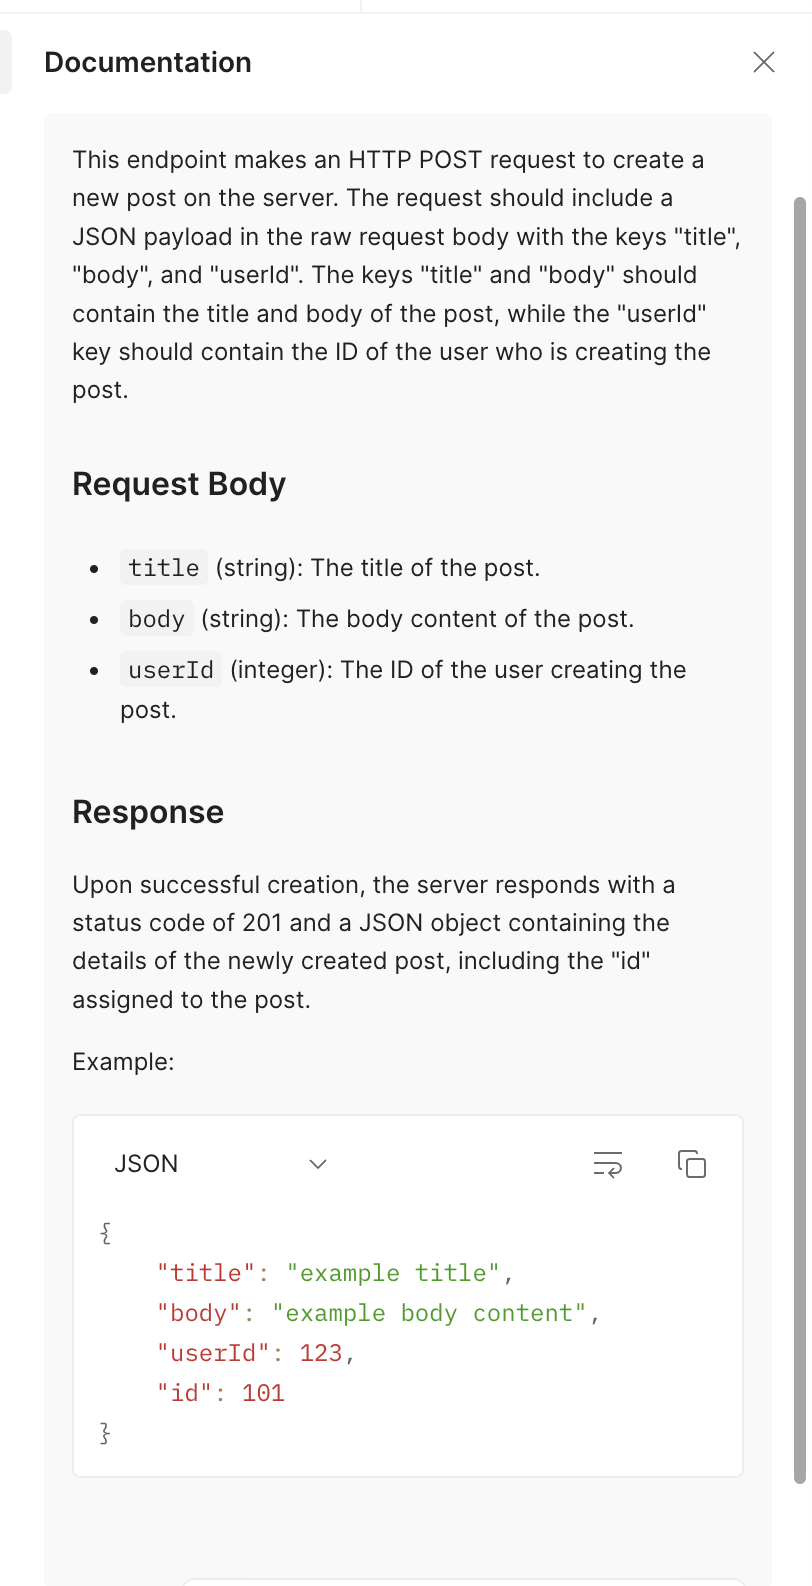
The interface document describes very detailed interface-related information, such as interface request information, request field definitions, response examples, etc.
3. About Sharing My Thoughts
After trying the AI Assistant Postbot tool provided by postman, the functions provided by Postbot for adding test cases for request and response are quite convenient, and can quickly generate mostly usable interface response verification test scripts with high coverage. Although there are errors in the generated test scripts that need to be manually fixed, Postbot can quickly generate test scripts to improve the efficiency of interface testing.
In addition, Postbot’s interface documentation generation is also quite useful. After developers add the request in postman, Postbot can quickly generate relatively detailed interface documentation, which can improve R&D efficiency and interface document quality to some extent.
However, Postbot currently does not seem to support custom commands. I want to try to output different types of test cases for the demo interface through Postbot, such as empty request body interface test cases, illegal request body interface test cases, etc., but Postbot cannot give the correct response.
About Event
The “30 Days of AI in Testing Challenge” is an initiative by the Ministry of Testing community. The last time I came across this community was during their “30 Days of Agile Testing” event.
Community Website: https://www.ministryoftesting.com
Event Link: https://www.ministryoftesting.com/events/30-days-of-ai-in-testing
Challenges:
- Day 1: Introduce yourself and your interest in AI
- Day 2: Read an introductory article on AI in testing and share it
- Day 3: List ways in which AI is used in testing
- Day 4: Watch the AMA on Artificial Intelligence in Testing and share your key takeaway
- Day 5:Identify a case study on AI in testing and share your findings
- Day 6:Explore and share insights on AI testing tools
- Day 7: Research and share prompt engineering techniques
- Day 8: Craft a detailed prompt to support test activities
- Day 9: Evaluate prompt quality and try to improve it
- Day 10: Critically Analyse AI-Generated Tests
- Day 11: Generate test data using AI and evaluate its efficacy
- Day 12: Evaluate whether you trust AI to support testing and share your thoughts
- Day 13: Develop a testing approach and become an AI in testing champion
Recommended Readings
- API Automation Testing Tutorial
- Bruno API Automation Testing Tutorial
- Gatling Performance Testing Tutorial
- K6 Performance Testing Tutorial
- Postman API Automation Testing Tutorial
- Pytest API Automation Testing Tutorial
- REST Assured API Automation Testing Tutorial
- SuperTest API Automation Testing Tutorial
- 30 Days of AI in Testing Challenge