Day 23: Assess AI effectiveness in visual testing and discuss the advantages
Welcome to Day 23! Today, we’ll assess the effectiveness of AI in visual testing compared to non-AI visual testing methods. The use of AI to detect visual anomalies within graphical user interfaces (GUIs) has great promise. So, let’s explore the potential advantages and pitfalls of adopting an AI-assisted visual testing approach.
Task Steps
Let’s begin this investigation by selecting one of two options based on your current experience and access to visual testing tools:
Option 1 - For those actively using or looking to get hands-on with visual testing tools
- Select a tool and examine the capabilities: Select a tool or platform that boasts AI-powered visual testing capabilities. Review the documentation or marketing materials to understand the AI approach and their anomaly detection claims.
- Test the claims: Design a time-boxed test (e.g., 30 minutes) to evaluate one of the tool’s AI-powered visual testing capabilities. For instance, if it claims to detect layout changes, intentionally modify the GUI and see how well the tool identifies the anomaly.
- Consider failure scenarios: Assuming the tool performed well in your test, construct a scenario where you think it might fail to detect a visual anomaly.
- Share your findings: In reply to this post, share your insights on AI-powered visual testing. Consider including
- Which option you selected
- Which tool you selected and the AI visual testing capabilities it claimed
- Your findings from your timeboxed experiment
- The potential advantages and risks of using AI for visual testing.
- How likely you are to continue using the AI-powered visual testing tool.
Option 2 - For those new to visual testing or without access to tools.
- Research AI visual testing: Find resources (research papers, blog posts, documentation, video demos) discussing how AI is used for visual testing and GUI anomaly detection.
- Critique the AI approach: Try to identify the core benefits AI brings to visual testing and the techniques used by AI systems to analyse GUI images/screenshots and identify visual anomalies. Then hypothesise scenarios where an AI system might struggle to detect a visual anomaly.
- Assess if AI visual testing is for you: Consider whether an AI-powered visual testing solution would benefit your team based on the challenges you currently face.
- Share your findings: In reply to this post, share your insights on AI-powered visual testing. Consider including
- Which option you selected,
- A summary of what problems AI-powered visual testing claims to solve and how
- The potential advantages and risks of adopting an AI visual testing approach
- How likely you are to adopt AI-powered visual testing tools.
Why Take Part
- Deepen your knowledge: Maintaining robust visual testing as UIs evolve can be challenging. This task helps you understand how AI could potentially streamline this process.
- Develop a critical mindset: When evaluating new testing tools or approaches, it’s crucial to think critically about their capabilities, limitations, and impacts on your team. Today’s task hones that skill.
Task Link
My Day 23 Task
For today’s task, based on the goal of continuous learning of AI testing tools, I’ve chosen Option 2 to trial a new AI visual testing tool.
1. About Choosing the Tool and Checking Its Features
Having previously tried Applitools Eyes in an earlier challenge, this time I opted for a different AI visual testing tool, Percy, to learn about its capabilities.
Percy’s official introduction highlights:
- Eliminating the risk of shipping visual errors by getting visual coverage of your entire UI and confidently releasing every version.
- Rapidly performing comprehensive visual reviews by running visual tests with every commit and getting fast, deterministic results to efficiently debug.
- Cross-browser and platform rendering: Percy renders the same pages across different browsers and platforms (desktop and mobile), highlighting visual differences specific to each browser and platform. Percy captures DOM snapshots and resources, renders them, and compares them to previously generated snapshots to detect visual changes.
- Responsive differences: Percy highlights visual differences by rendering pages at configurable responsive widths and grouping visual changes while ignoring noise, facilitating faster, more accurate visual reviews.
- Snapshot stability: Percy’s proprietary snapshot stabilization technology automatically freezes animations and other dynamic elements to minimize false positives. Percy ensures the consistency and determinacy of page rendering.
However, initially, there seemed to be no mention of AI in the promotion. Soon enough, I found another official promotional piece about Percy: Introducing App Percy: An AI-driven Automated Visual Testing Platform for Native Applications.
- AI-driven visual testing: With App Percy, you can automatically detect visual defects across devices and screen sizes with every commit, ensuring your UI meets every customer’s expectations from day one. App Percy’s lightning-fast infrastructure captures screenshots from selected devices with every code push and compares them to the baseline to discover visual defects. The key here is our underlying computer vision-driven algorithm — the Percy Visual Engine — which reduces false positives, such as those caused by dynamic elements, and highlights only those visual deviations discernible to the human eye.
- Percy Visual Engine: The powerful AI algorithms of App Percy detect changes users truly care about. It aids in reducing noise and simplifying image comparisons by detecting page shifts, handling anti-aliasing noise, stabilizing intelligent texts, and ignoring regions. Learn more about the Percy Visual Engine.
2. About Testing the Statement
Since Percy is a commercial tool, I registered for a trial account.
Introduction to Using Percy
After registering and email verification, I could start a trial with a new project, similar to the steps with Applitools Eyes.
- New project setup: options for web or mobile app projects and choice of code management tools like git or GitHub.
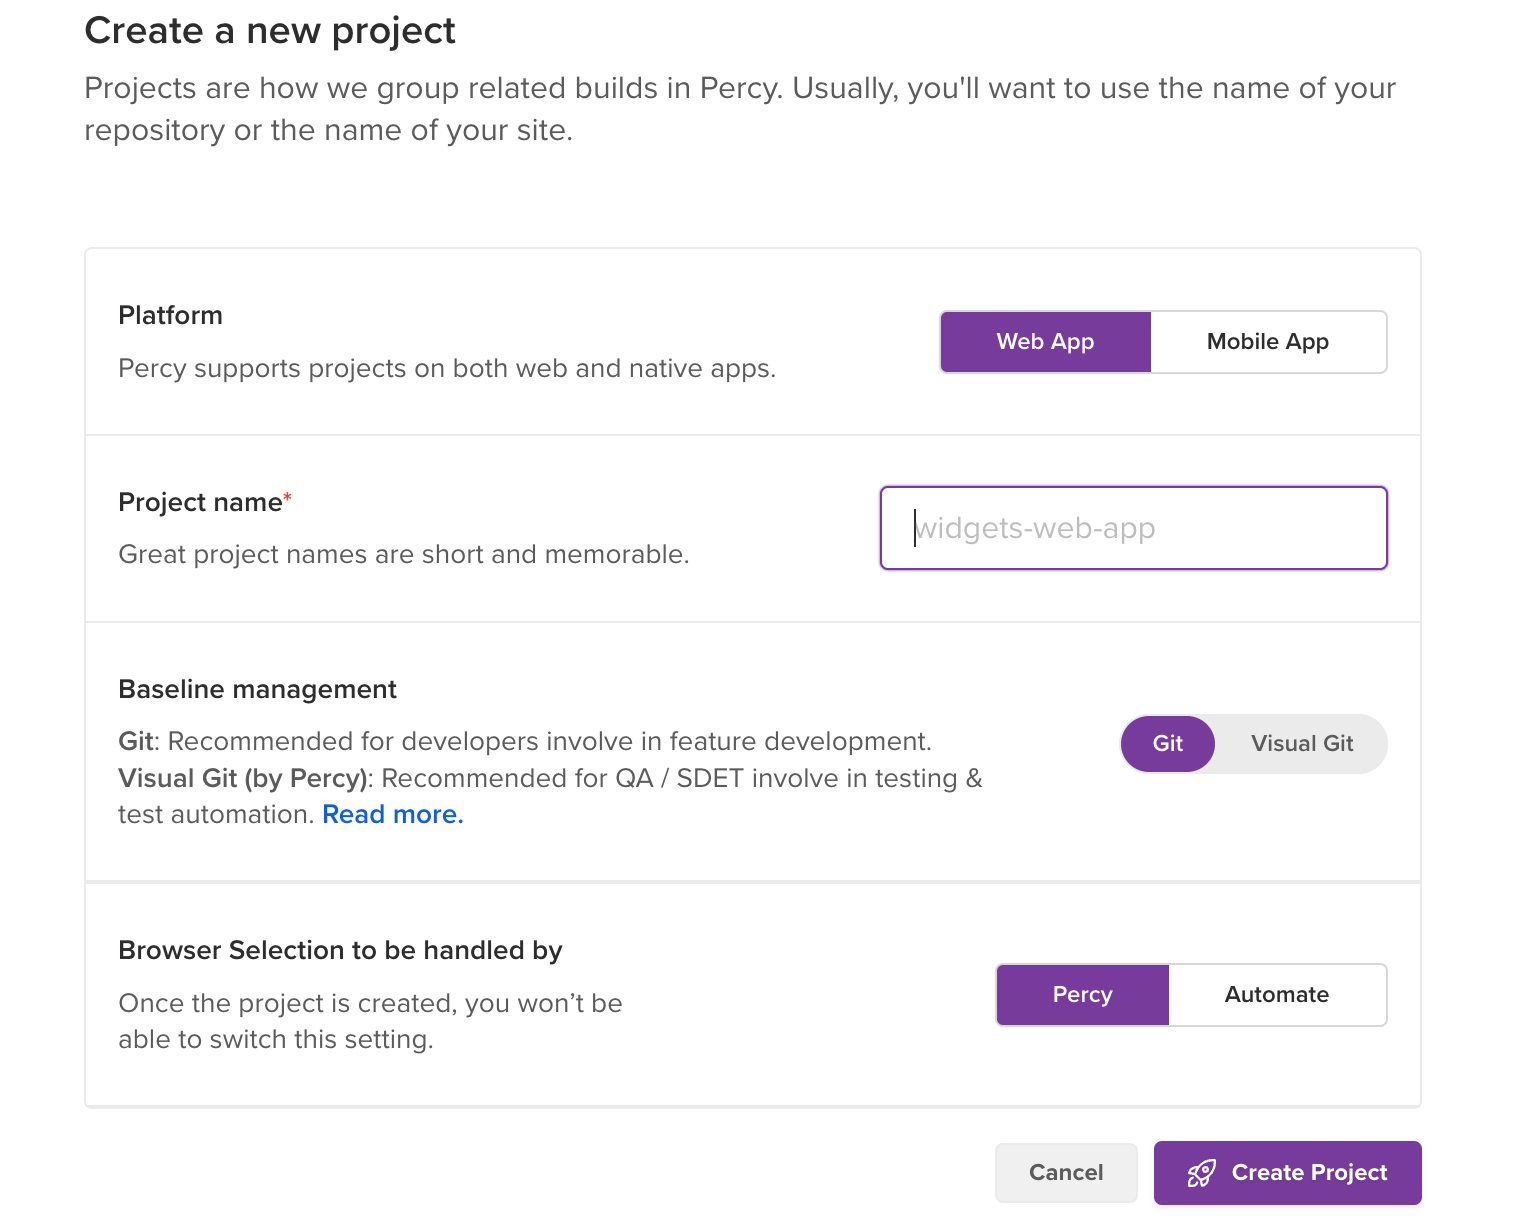
- Selecting code writing tool.
- Obtaining Percy token.
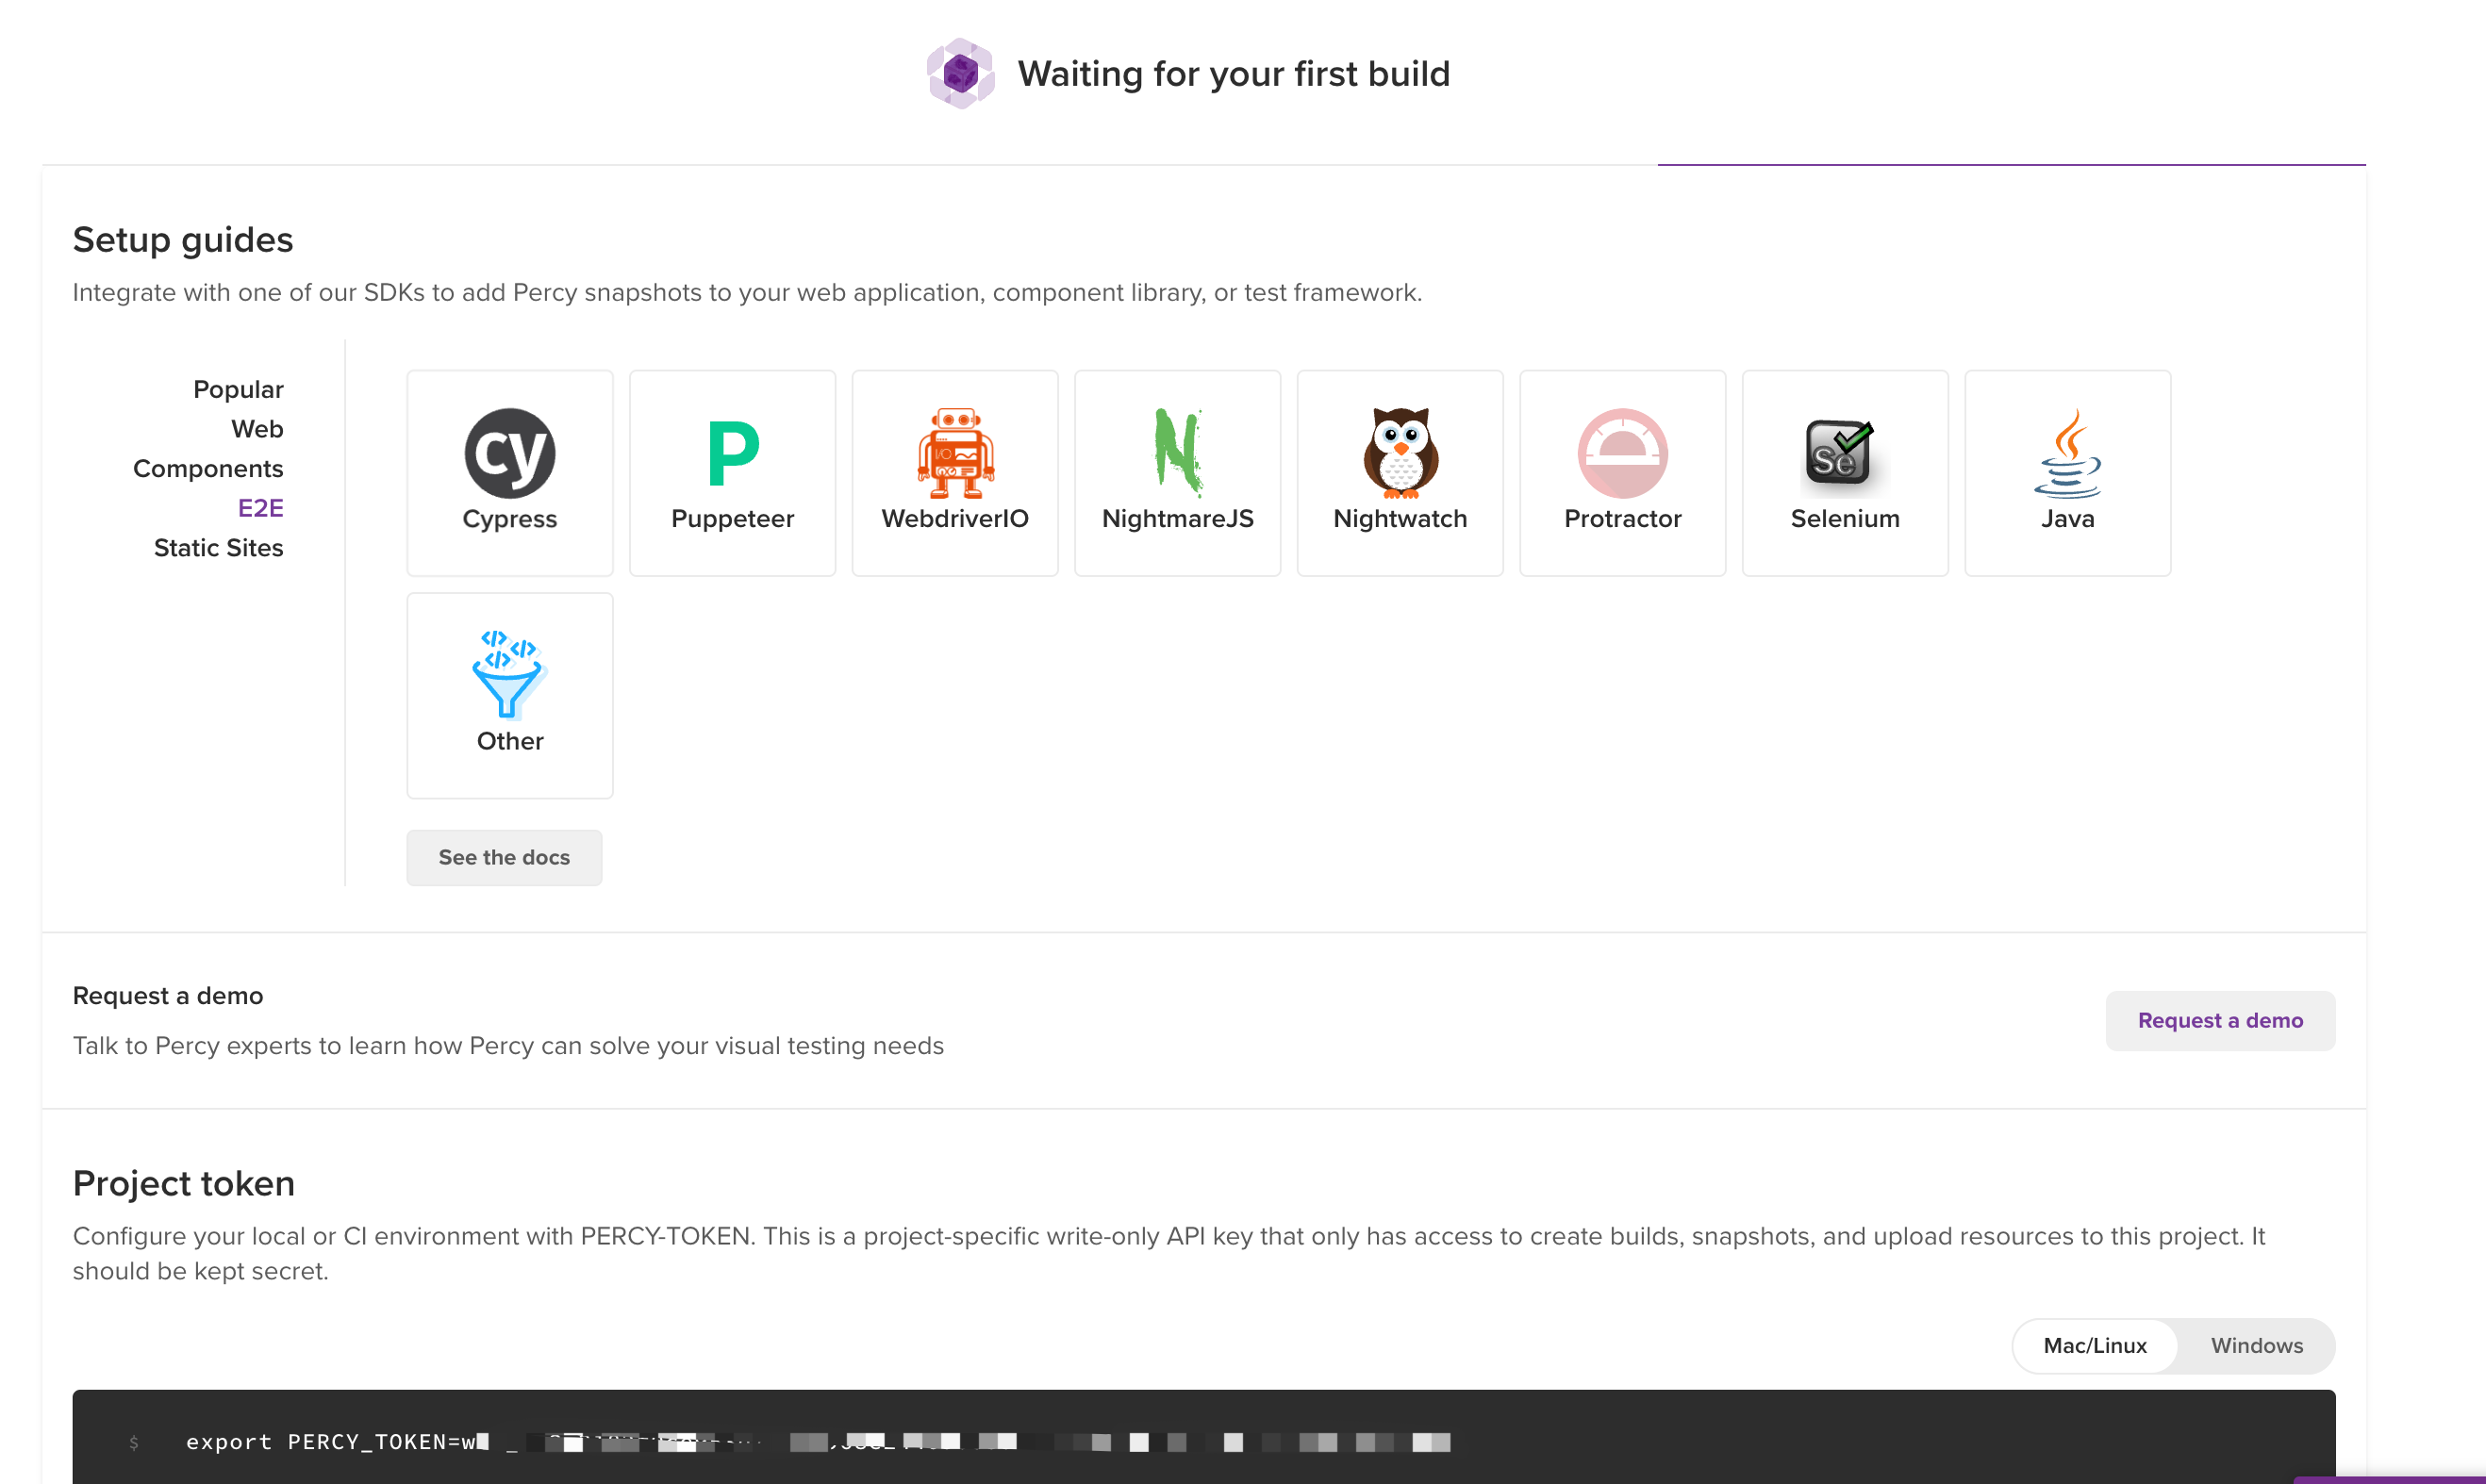
- Setting up Percy local environment.
- Writing tests.
- Running tests.
- Viewing reports on the Percy platform.
Starting the Percy Trial
This time, I chose Percy’s cypress sdk for a demo project trial with the following steps:
- Node project initialization in a local folder via command line.
npm init
- Cypress project initialization.
npm install cypress --save-dev
- Installing Percy dependencies.
npm install --save-dev @percy/cli @percy/cypress
- Configuring Percy token.
export PERCY_TOKEN="<your token here>"
- Writing demo test code: visual testing my blog’s homepage.
import '@percy/cypress';

describe('Integration test with visual testing', function() {
    it('Loads the homepage', function() {
      // Load the page or perform any other interactions with the app.
      cy.visit("http://localhost:1313/");
      cy.percySnapshot('Login page responsive test', { widths: [768, 992, 1200] });
    });
  });
- Running the test.
npx percy exec -- cypress run
- Viewing command line results.
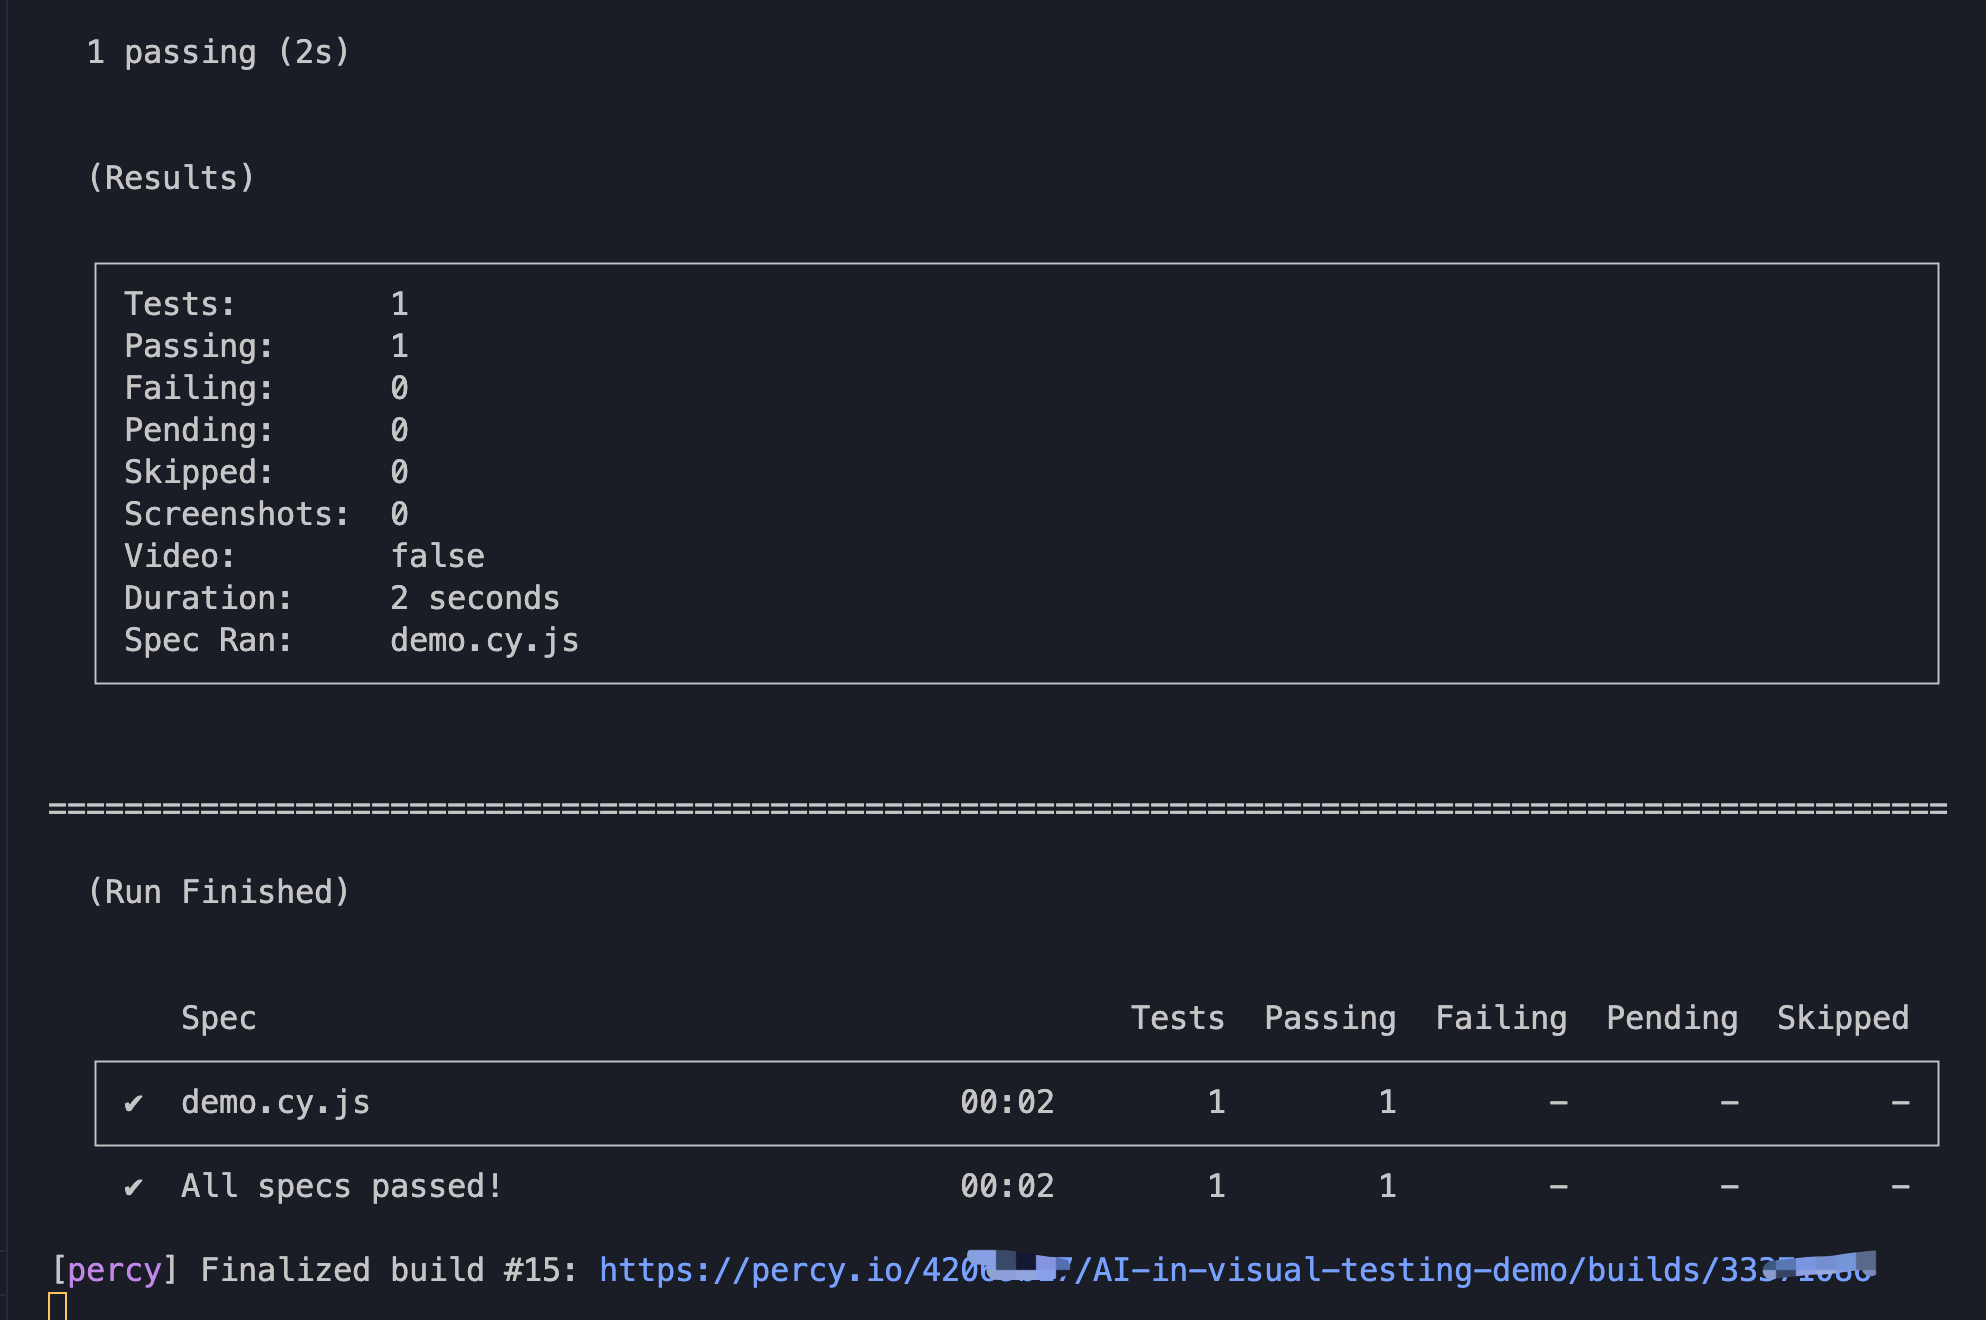
After the test runs successfully, the command line displays a link to the Percy platform for detailed visual verification results.
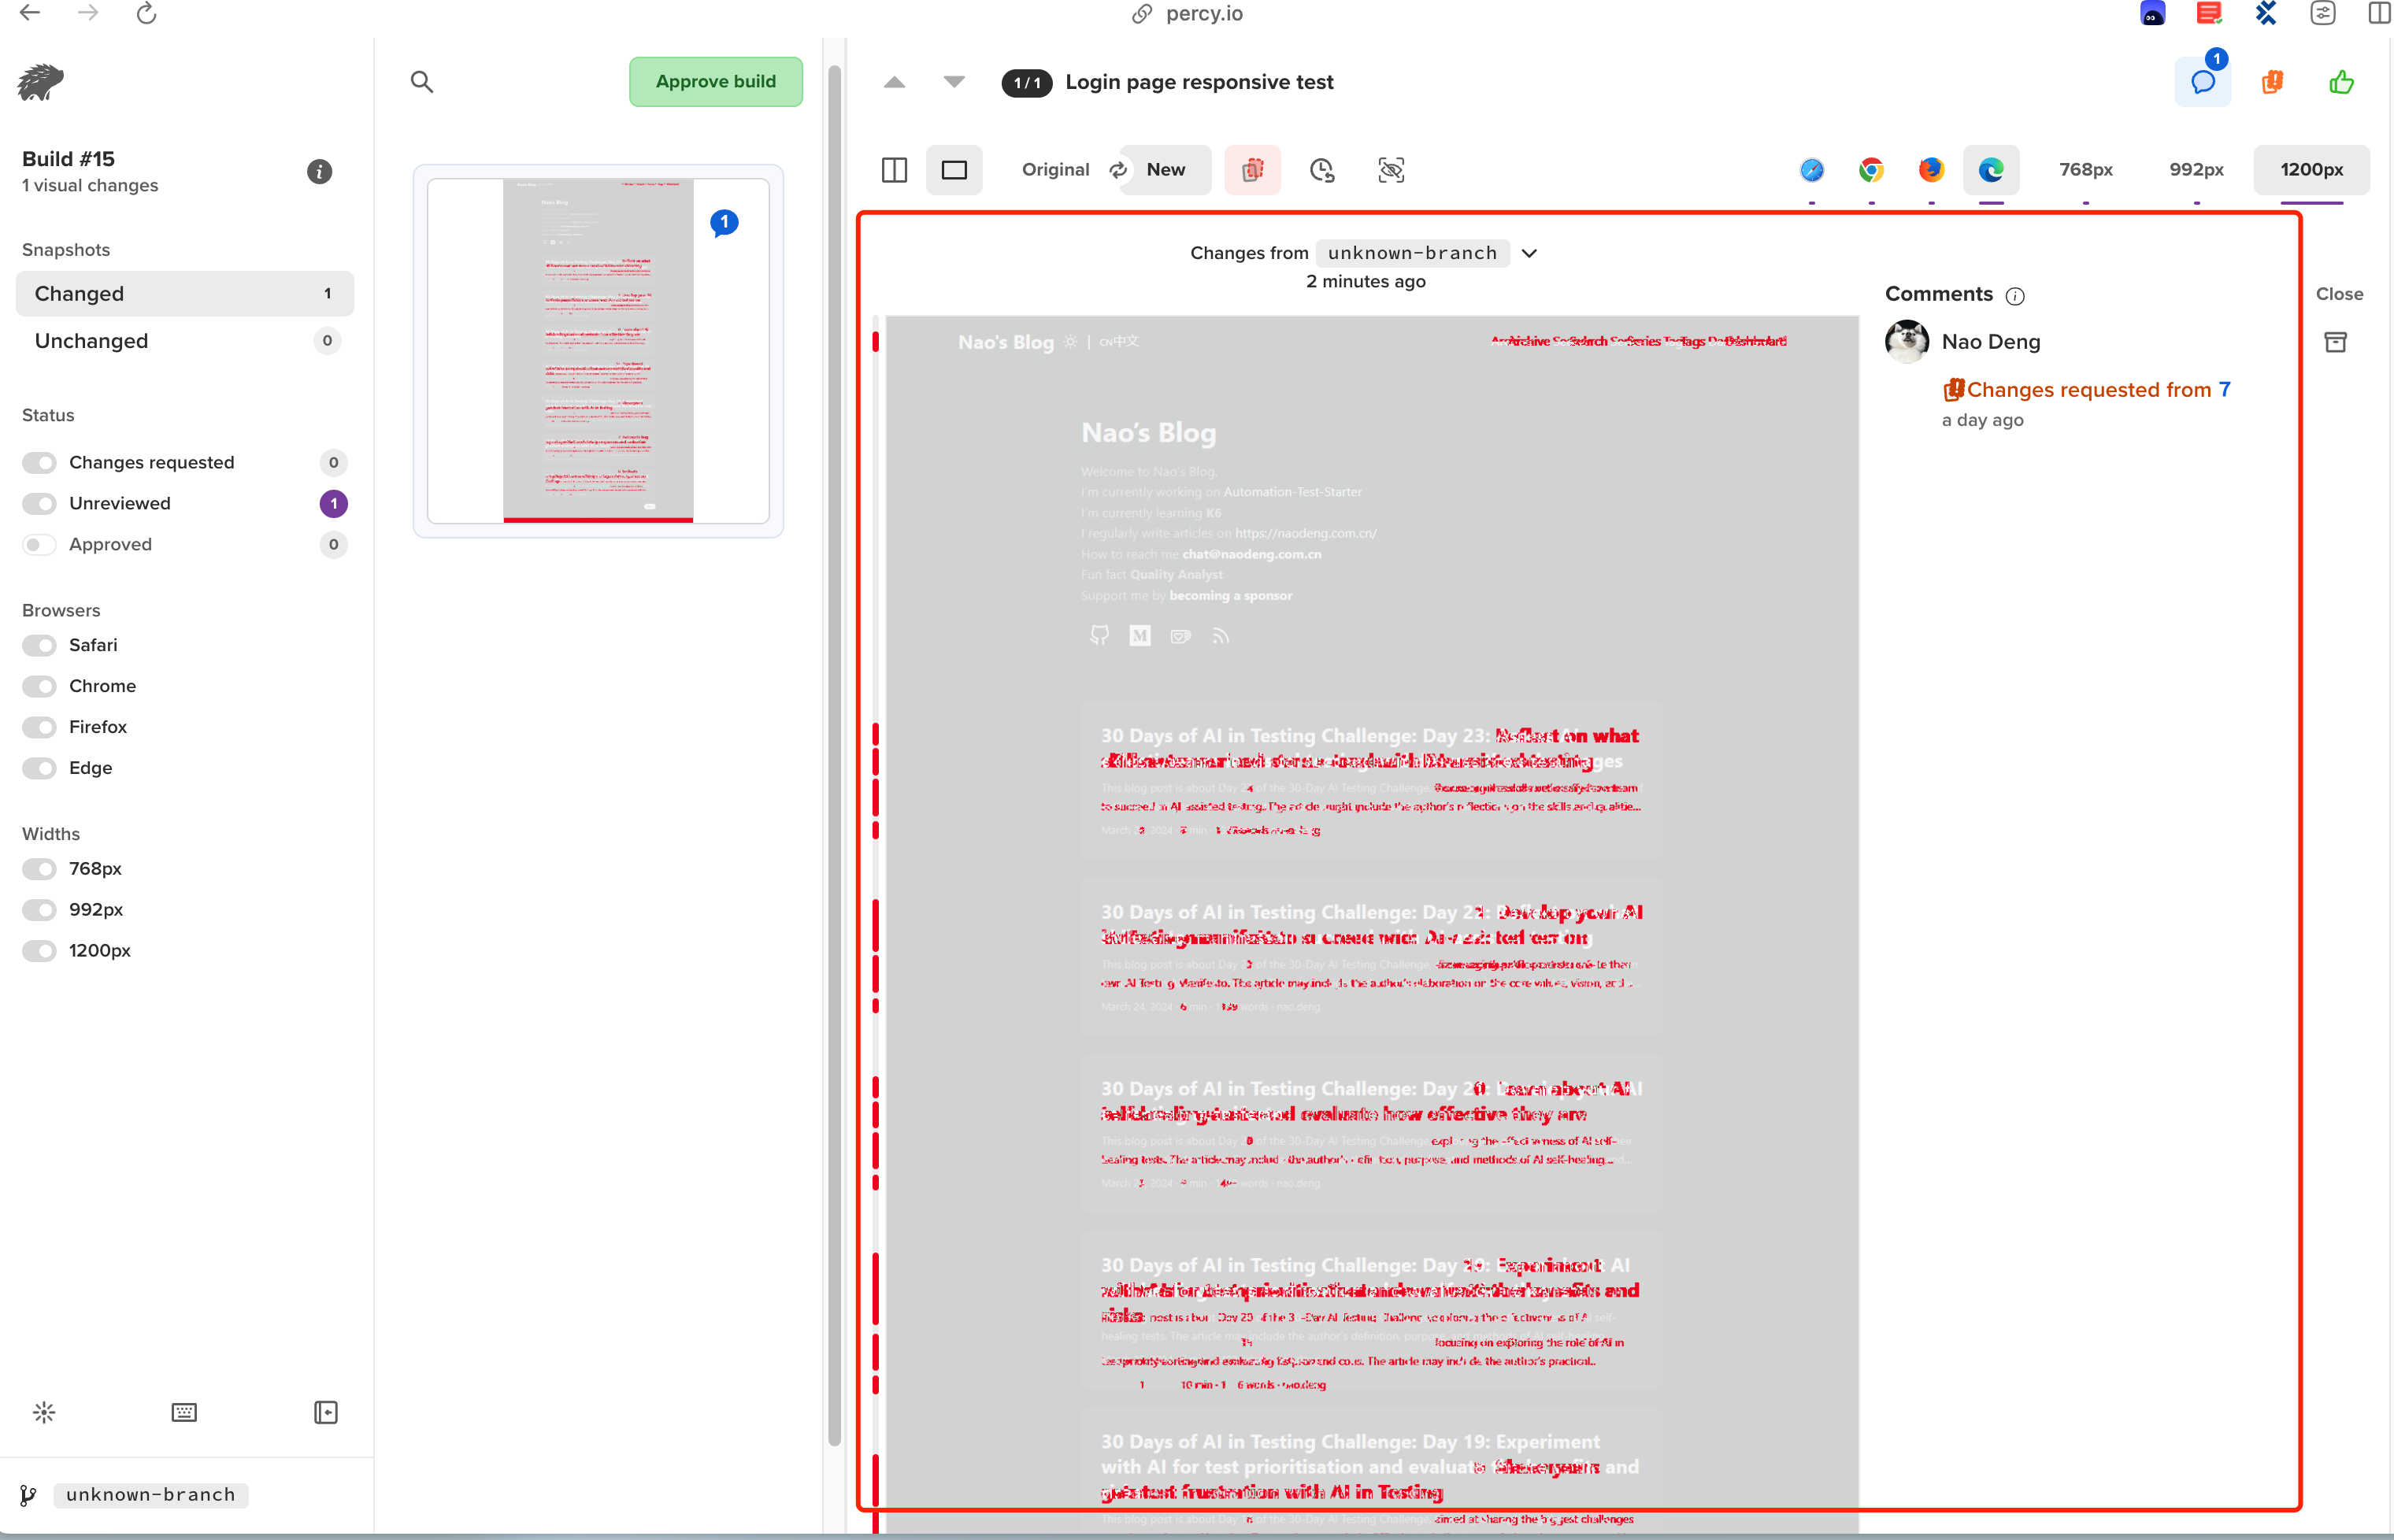
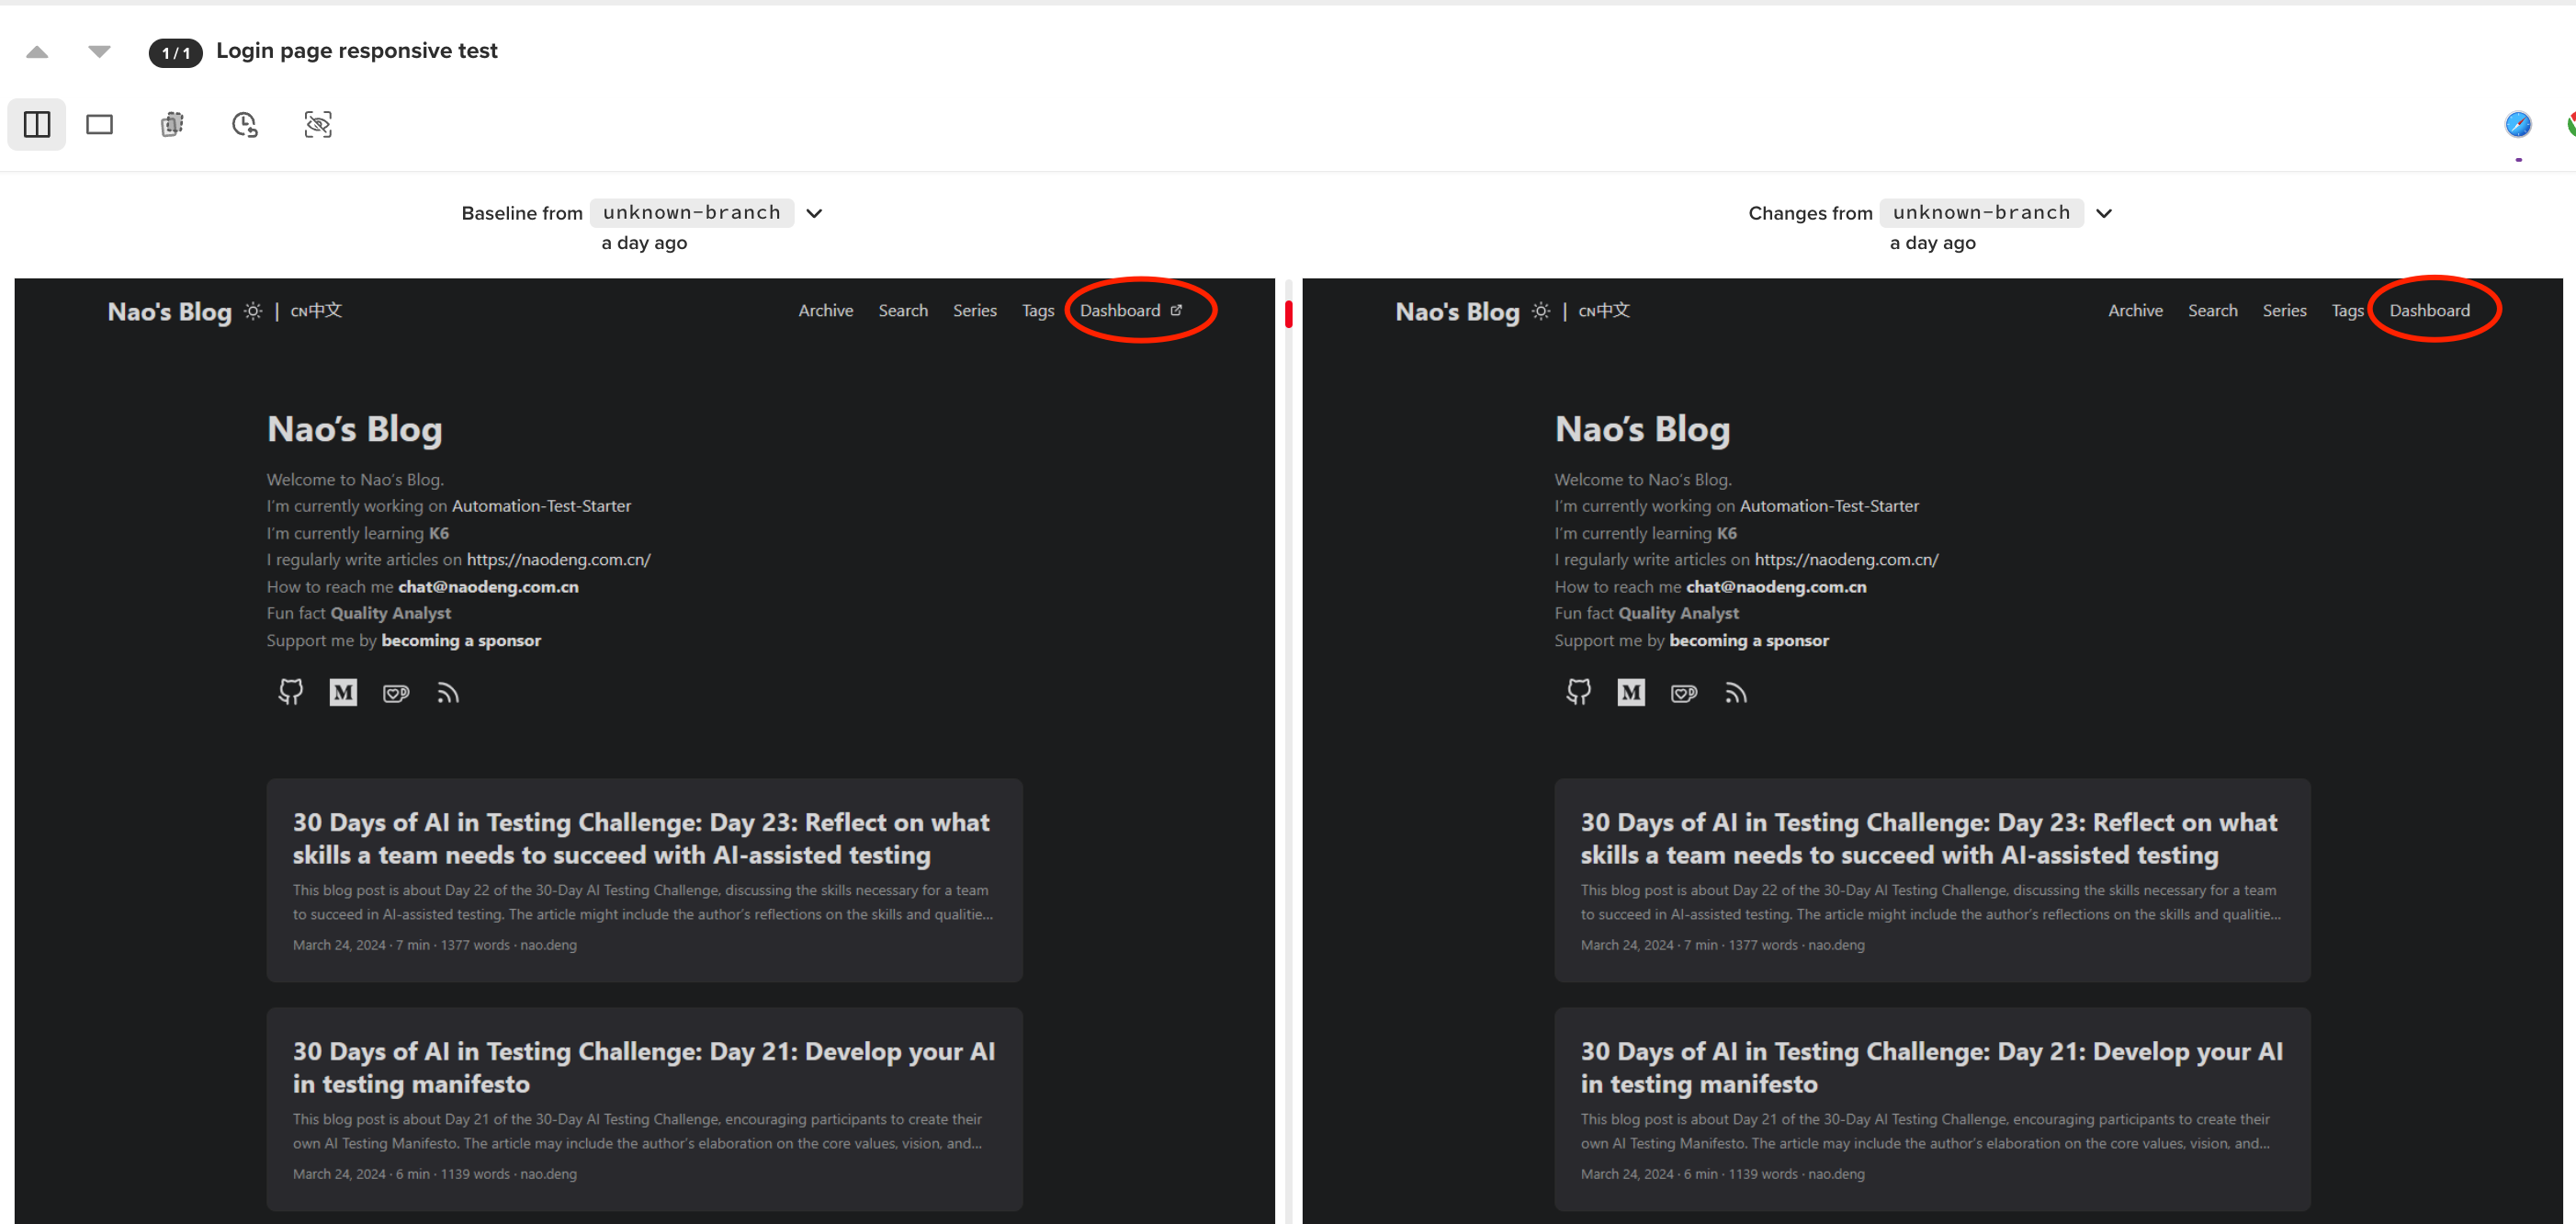
Test Scenario 1: Multiple Visual Difference Recognition on a Page
- Test preparation: Changes to the top content of my blog’s homepage.
- Rerunning the demo test.
- Viewing Percy recognition results.

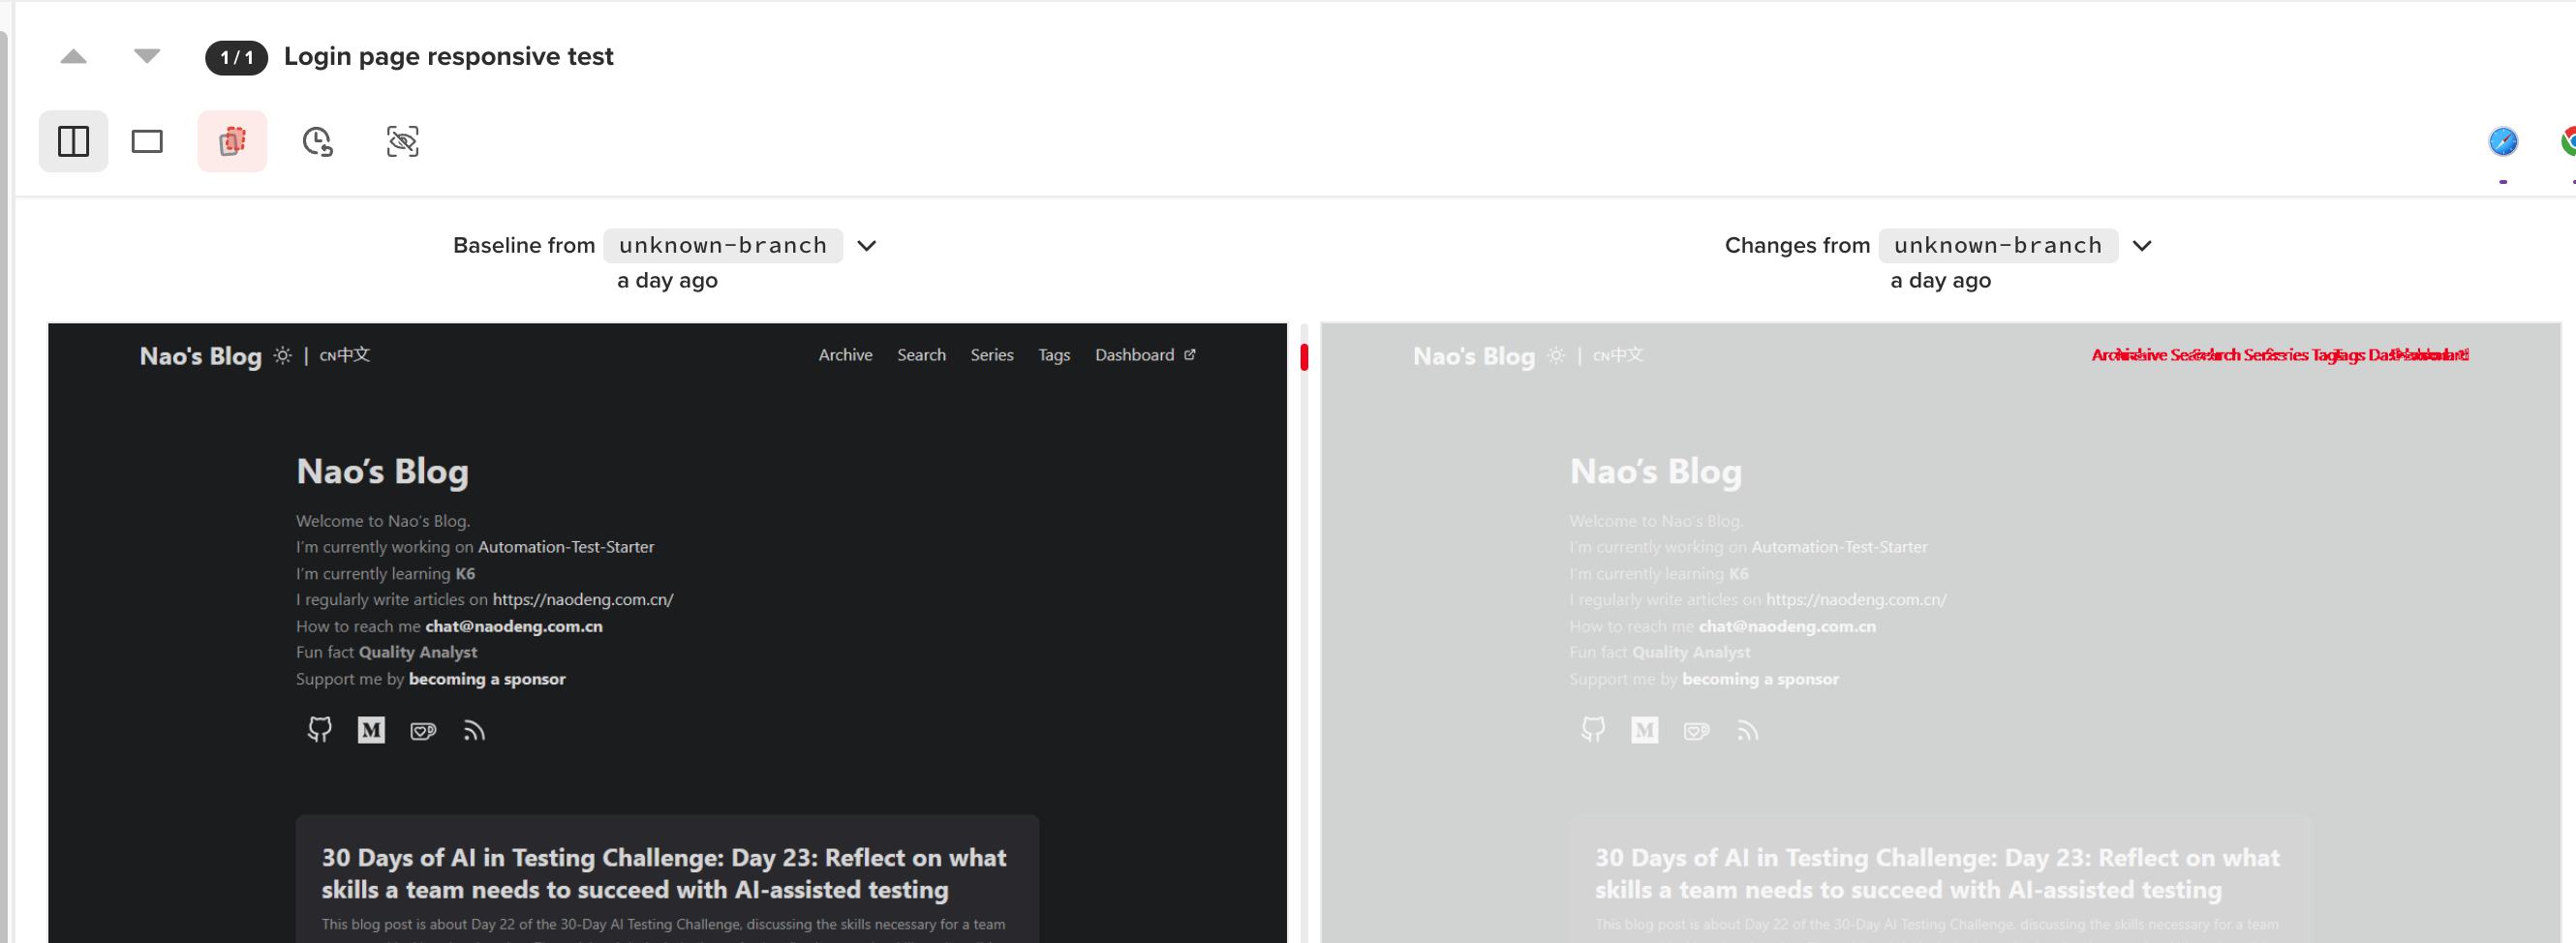
Test Scenario 2: Small Icon Visual Difference Recognition
- Test preparation: Removing an external link icon from my blog’s homepage menu.
- Rerunning the demo test.
- Viewing Percy recognition results.
3. About Considering Failure Scenarios
Continuous recognition verification on multiple page changes was successful, with no failure scenarios encountered yet. Potential failure scenarios might include subtle color differences and minor variations in font styles.
4. About the Potential Advantages and Risks of Using AI for Visual Testing
- Potential Advantages: A professional AI visual testing tool can significantly improve project visual testing efficiency and ensure quality.
- Potential Risks and Limitations: Using an AI tool, especially for an unreleased product, comes with risks associated with data privacy, security, and result bias uncertainty. Another concern is Percy’s use of a token to upload local test data to view visual test reports on the Percy platform, posing a potential data privacy risk.
5. About the Likelihood of Adopting AI-driven Visual Testing Tools
It’s currently unlikely for the project I’m working on to adopt AI-driven visual testing tools, but I’m open to trying and learning about new AI-driven visual testing tools for personal projects.
About Event
The “30 Days of AI in Testing Challenge” is an initiative by the Ministry of Testing community. The last time I came across this community was during their “30 Days of Agile Testing” event.
Community Website: https://www.ministryoftesting.com
Event Link: https://www.ministryoftesting.com/events/30-days-of-ai-in-testing
Challenges:
- Day 1: Introduce yourself and your interest in AI
- Day 2: Read an introductory article on AI in testing and share it
- Day 3: List ways in which AI is used in testing
- Day 4: Watch the AMA on Artificial Intelligence in Testing and share your key takeaway
- Day 5:Identify a case study on AI in testing and share your findings
- Day 6:Explore and share insights on AI testing tools
- Day 7: Research and share prompt engineering techniques
- Day 8: Craft a detailed prompt to support test activities
- Day 9: Evaluate prompt quality and try to improve it
- Day 10: Critically Analyse AI-Generated Tests
- Day 11: Generate test data using AI and evaluate its efficacy
- Day 12: Evaluate whether you trust AI to support testing and share your thoughts
- Day 13: Develop a testing approach and become an AI in testing champion
- Day 14: Generate AI test code and share your experience
- Day 15: Gauge your short-term AI in testing plans
- Day 16: Evaluate adopting AI for accessibility testing and share your findings
- Day 17: Automate bug reporting with AI and share your process and evaluation
- Day 18: Share your greatest frustration with AI in Testing
- Day 19: Experiment with AI for test prioritisation and evaluate the benefits and risks
- Day 20: Learn about AI self-healing tests and evaluate how effective they are
- Day 21: Develop your AI in testing manifesto
- Day 22: Reflect on what skills a team needs to succeed with AI-assisted testing
Recommended Readings
- API Automation Testing Tutorial
- Bruno API Automation Testing Tutorial
- Gatling Performance Testing Tutorial
- K6 Performance Testing Tutorial
- Postman API Automation Testing Tutorial
- Pytest API Automation Testing Tutorial
- REST Assured API Automation Testing Tutorial
- SuperTest API Automation Testing Tutorial
- 30 Days of AI in Testing Challenge