进阶用法
以下会介绍 Postman 和 Newman 的一些进阶用法,包括测试数据、测试脚本、测试报告和测试报告集成等。 也会介绍如何将 Postman 和 Newman 集成到 CI/CD 流程中,以实现自动化测试。
输出 html 测试报告
demo 会以集成newman-reporter-htmlextra为例,介绍如何输出 html 测试报告。
安装 newman-reporter-htmlextra 依赖包
npm install newman-reporter-htmlextra --save-dev
注意:目前 newman 最新 V6 版本在 html 测试报告的一些包兼容性上有问题,所以这里使用 5.1.2 版本
调整 package.json
在 package.json 文件中,更新测试测试脚本,用于运行测试用例并输出 html 测试报告:
"test": "newman run Testcase/demo.postman_collection.json -e Env/DemoEnv.postman_environment.json -r htmlextra --reporter-htmlextra-export ./Report/Postman-newman-demo-api-testing-report.html"
指定输出 html 测试报告的路径为 Report/Postman-newman-demo-api-testing-report.html
运行测试用例输出 html 报告
- 运行测试用例
npm run test
- 检查报告文件
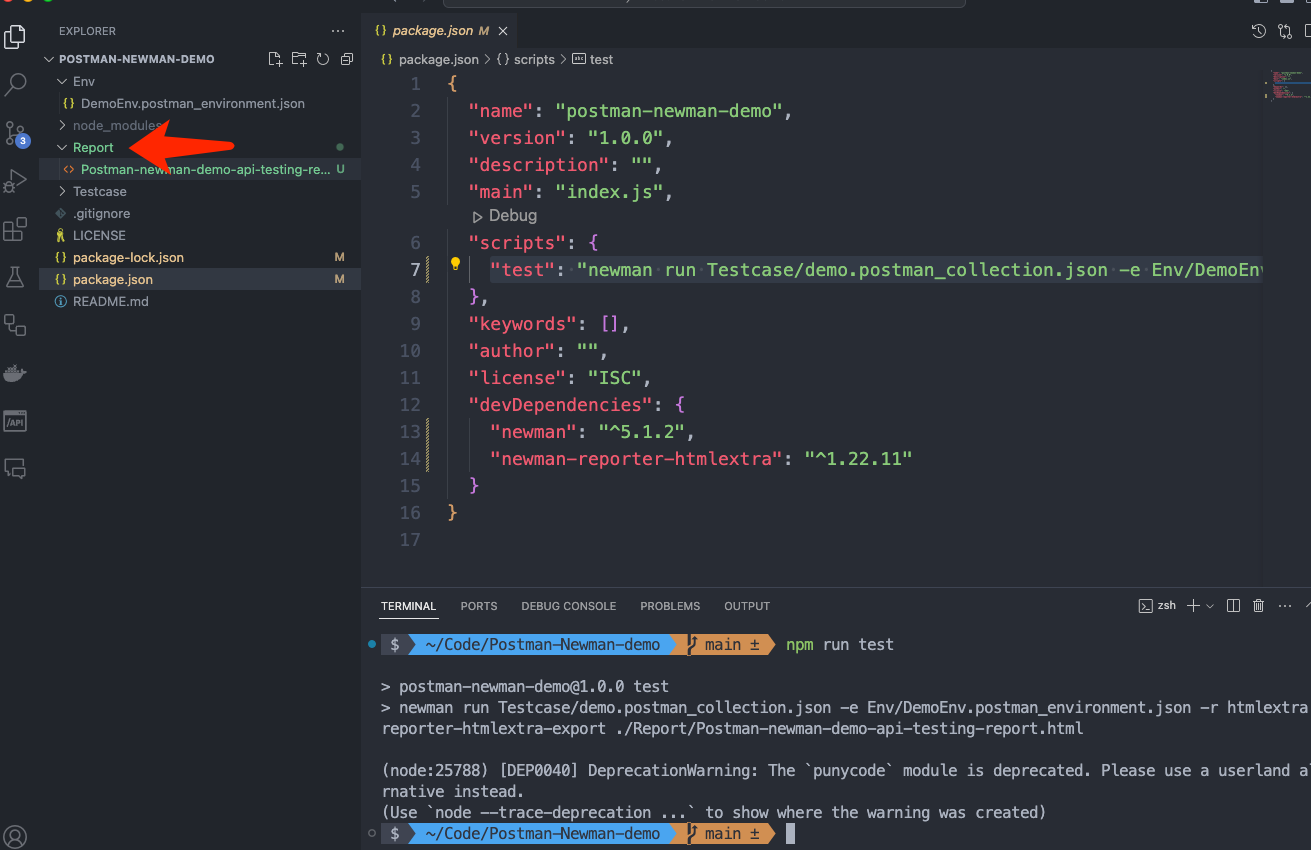
- 浏览器打开报告文件
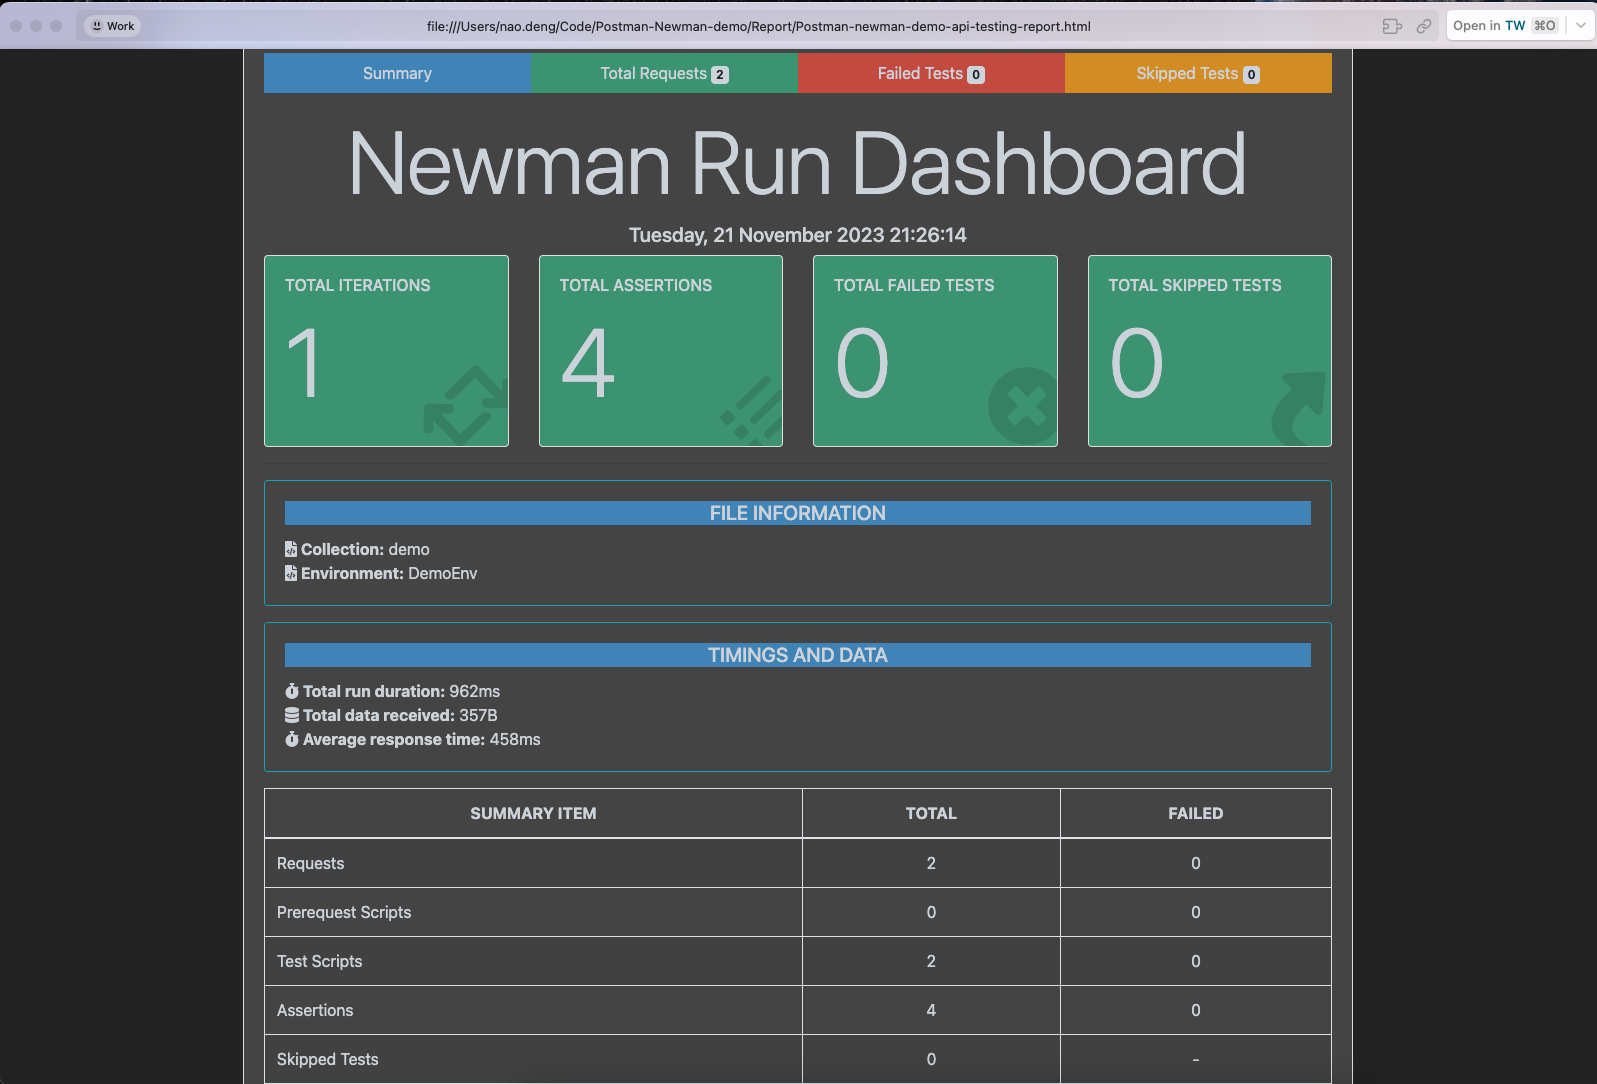
输出多种格式的测试报告
前面的配置是输出 html 格式的测试报告,如果想要输出多种格式的测试报告,如命令行 cli 的报告,可以在 package.json 文件中添加以下脚本:
"test": "newman run Testcase/demo.postman_collection.json -e Env/DemoEnv.postman_environment.json -r cli,htmlextra --reporter-htmlextra-export ./Report/Postman-newman-demo-api-testing-report.html"
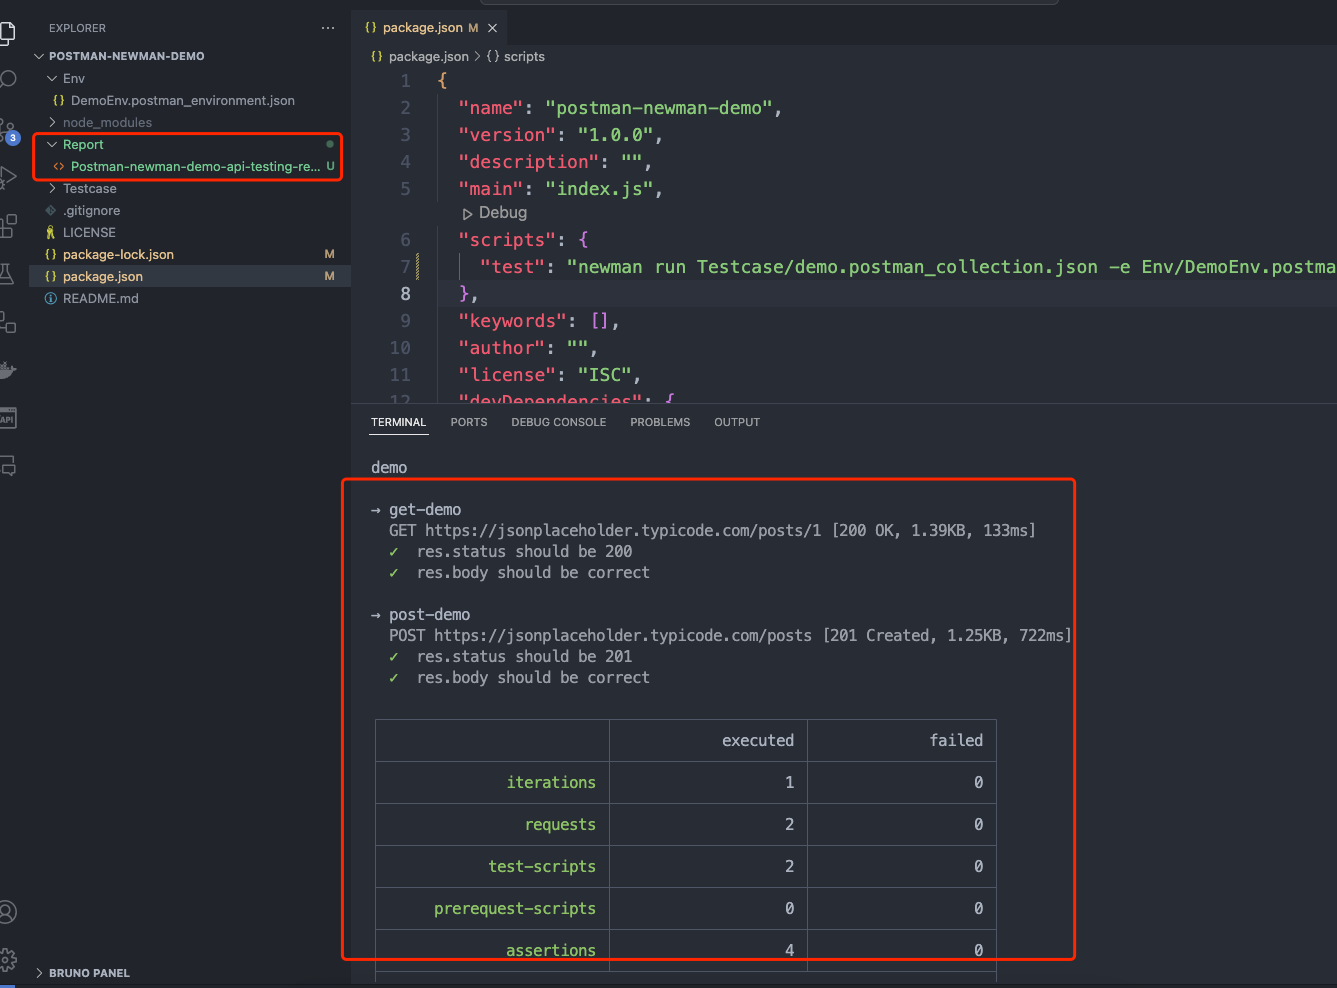
再次运行测试用例,可以看到在 Report 文件夹下,除了 html 格式的测试报告,还有 cli 格式的测试报告。
CI/CD 持续集成
将接口自动化测试的代码集成到 CI/CD 流程中,可以实现自动化测试,提高测试效率。
接入 github action
以 github action 为例,其他 CI 工具类似
可参考 demo:https://github.com/Automation-Test-Starter/Postman-Newman-demo
创建.github/workflows 目录:在你的 GitHub 仓库中,创建一个名为 .github/workflows 的目录。这将是存放 GitHub Actions 工作流程文件的地方。
创建工作流程文件:在.github/workflows 目录中创建一个 YAML 格式的工作流程文件,例如 postman.yml。
编辑 postman.yml 文件:将以下内容复制到文件中
name: RUN Postman API Test CI

on:
  push:
    branches: [ "main" ]
  pull_request:
    branches: [ "main" ]

jobs:
  RUN-Postman-API-Test:

    runs-on: ubuntu-latest

    strategy:
      matrix:
        node-version: [ 18.x]
        # See supported Node.js release schedule at https://nodejs.org/en/about/releases/

    steps:
      - uses: actions/checkout@v3
      - name: Use Node.js ${{ matrix.node-version }}
        uses: actions/setup-node@v3
        with:
          node-version: ${{ matrix.node-version }}
          cache: 'npm'

      - name: Installation of related packages
        run: npm ci

      - name: RUN SuperTest API Testing
        run: npm test

      - name: Archive Postman test report
        uses: actions/upload-artifact@v3
        with:
          name: Postman-test-report
          path: Report

      - name: Upload Postman report to GitHub
        uses: actions/upload-artifact@v3
        with:
          name: Postman-test-report
          path: Report
- 提交代码:将 postman.yml 文件添加到仓库中并提交。
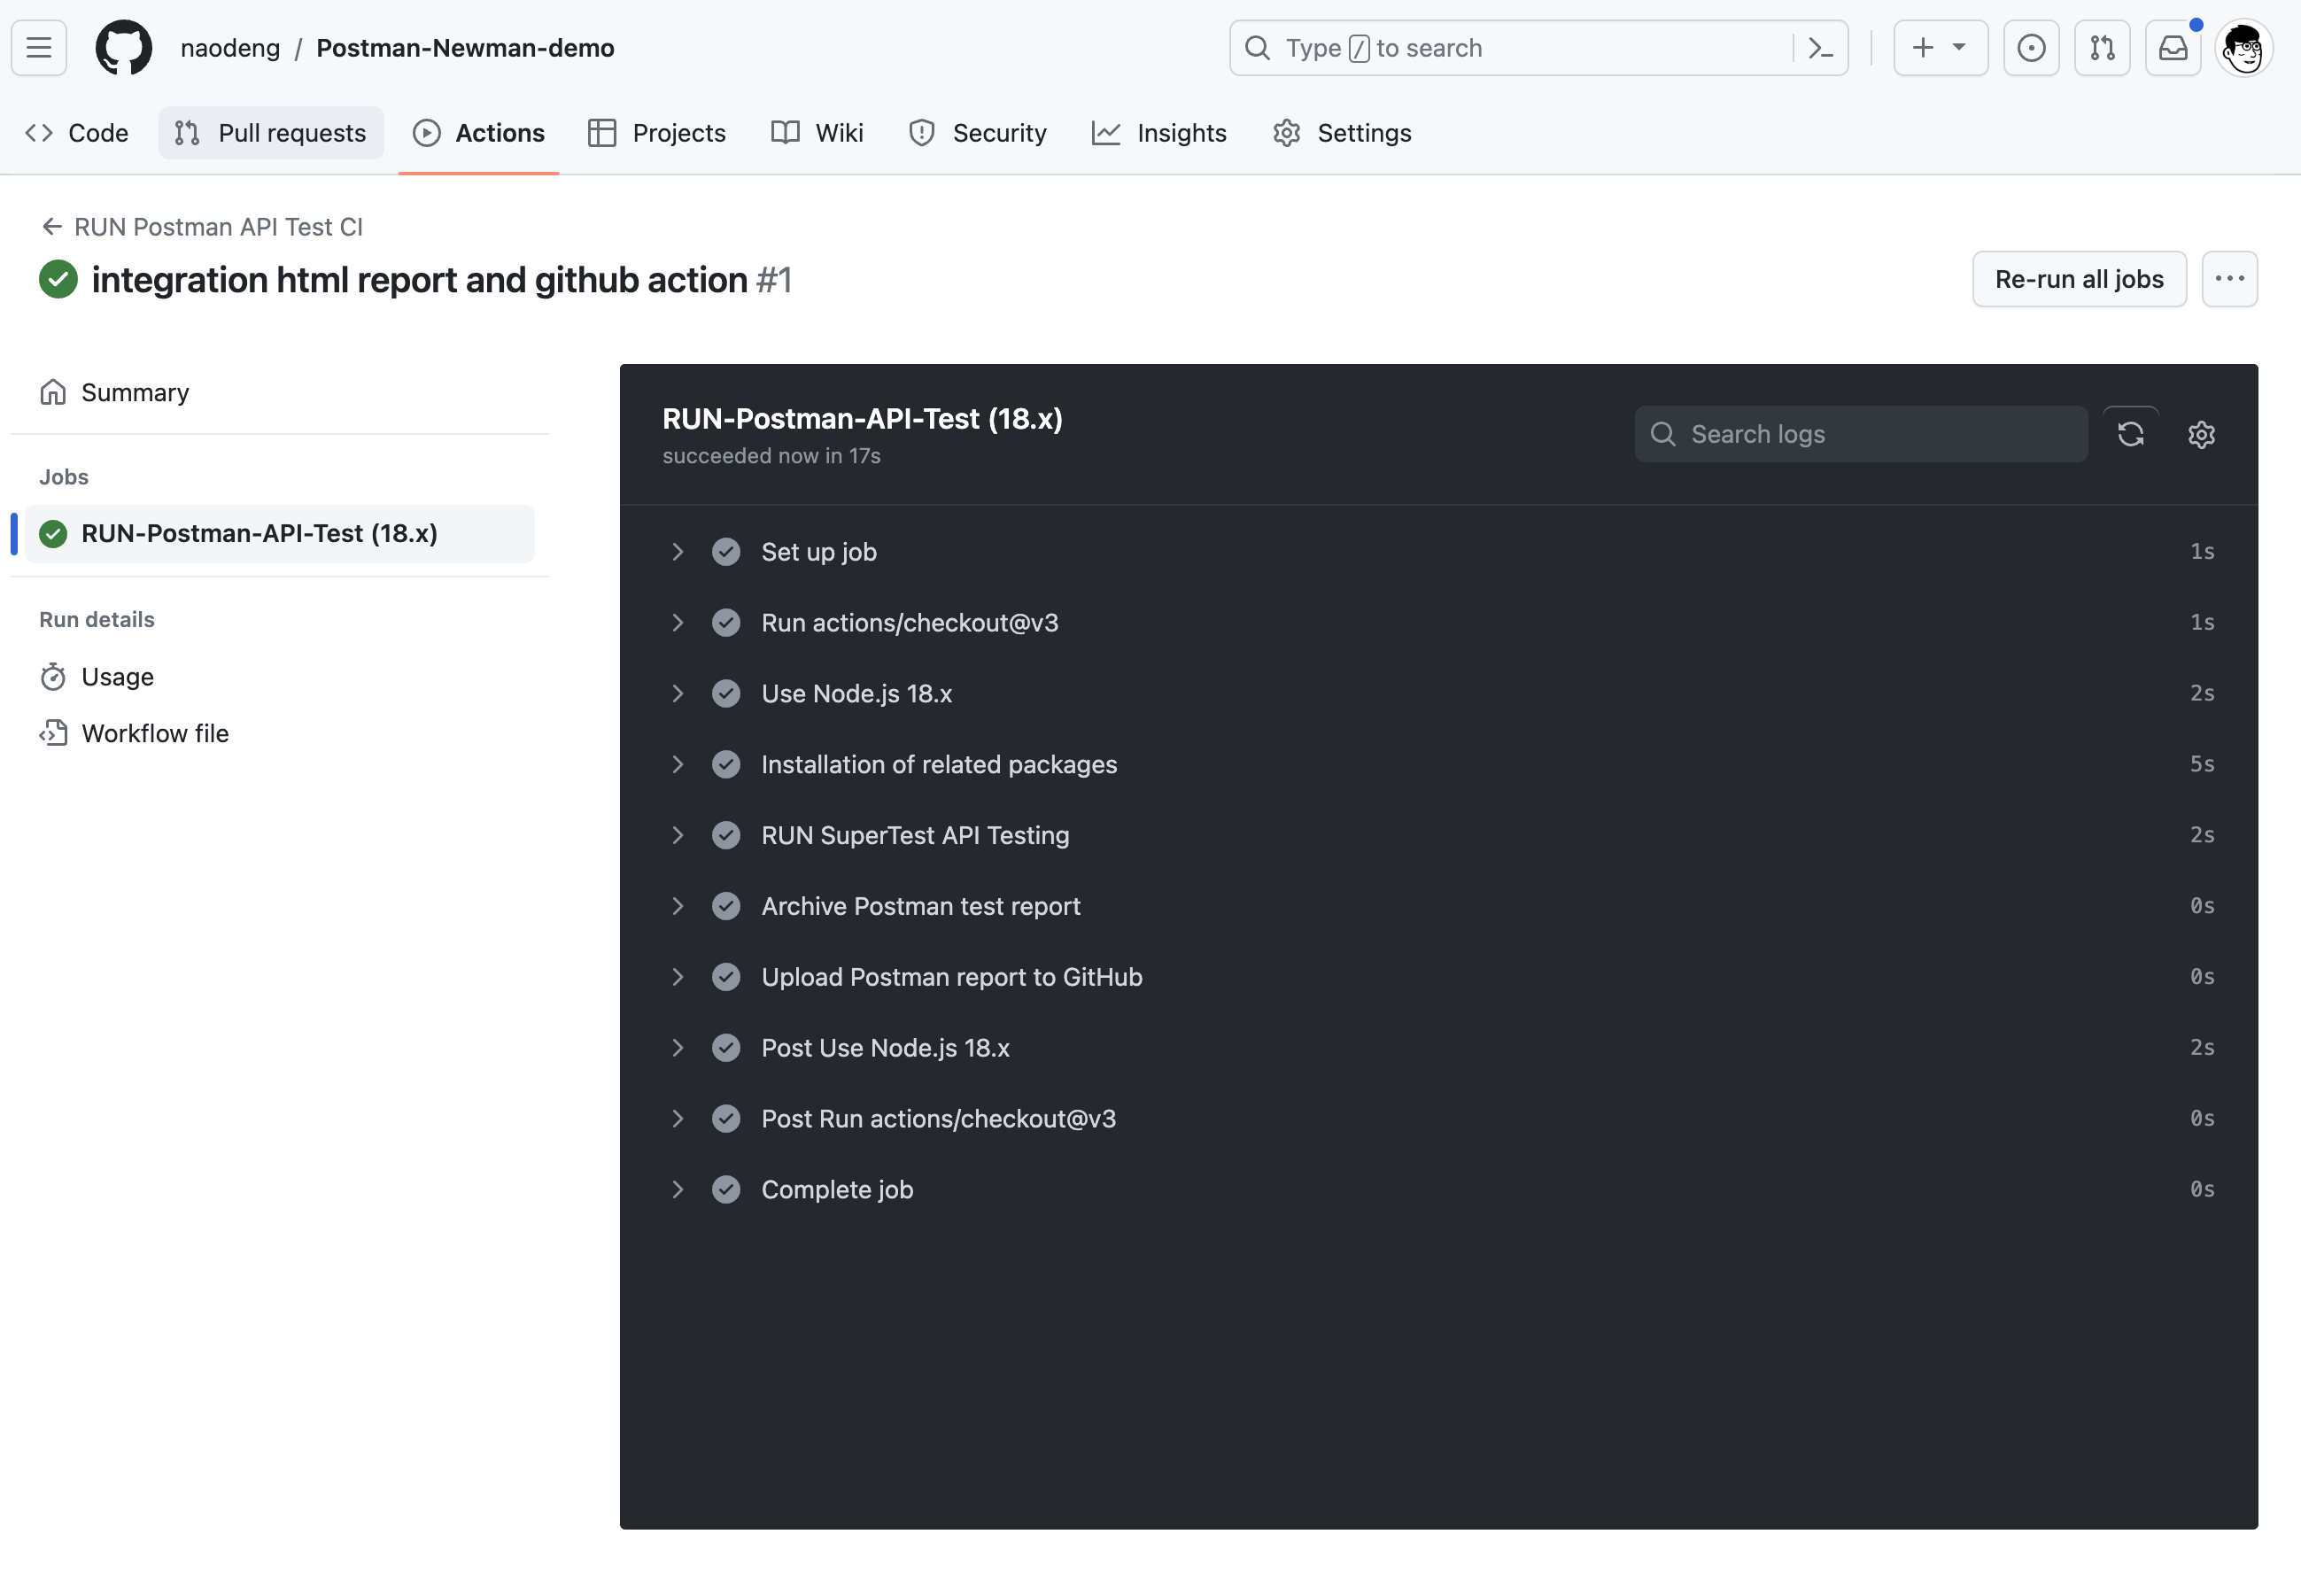
- 查看测试报告:在 GitHub 中,导航到你的仓库。单击上方的 Actions 选项卡,然后单击左侧的 RUN-Postman-API-Test 工作流。你应该会看到工作流正在运行,等待执行完成,就可以查看结果。
集成 allure 测试报告
allure 是一个轻量级的、灵活的、多语言支持的测试报告工具,可以生成各种各样的测试报告,包括饼图、柱状图、曲线图等,可以方便地查看测试结果。
安装 allure 测试报告依赖
npm install newman-reporter-allure --save-dev
调整 package.json 中输出 allure 测试报告的脚本
"test": "newman run Testcase/demo.postman_collection.json -e Env/DemoEnv.postman_environment.json -r cli,allure --reporter-allure-export ./allure-results"
调整 Postman 测试用例
- 调整 get-demo 的 Tests 脚本,添加以下脚本,用于生成 allure 测试报告:
// @allure.label.suite=postman-new-api-testing-demo
// @allure.label.story="Verify-the-get-api-return-correct-data"
// @allure.label.owner="naodeng"
// @allure.label.tag="GETAPI"

pm.test("res.status should be 200", function () {
  pm.response.to.have.status(200);
});
pm.test("res.body should be correct", function() {
  var data = pm.response.json();
  pm.expect(data.id).to.equal(1);
  pm.expect(data.title).to.contains('provident');
});
- 调整 post-demo 的 Tests 脚本,添加以下脚本,用于生成 allure 测试报告:
// @allure.label.suite=postman-new-api-testing-demo
// @allure.label.story="Verify-the-post-api-return-correct-data"
// @allure.label.owner="naodeng"
// @allure.label.tag="POSTAPI"

pm.test("res.status should be 201", function () {
  pm.response.to.have.status(201);
});
pm.test("res.body should be correct", function() {
  var data = pm.response.json();
  pm.expect(data.id).to.equal(101);
  pm.expect(data.title).to.equal('foo');
});
- 保存更改后的 postman 测试用例,重新导出测试用例文件并替换原来的测试用例文件。
运行测试用例输出 allure 报告
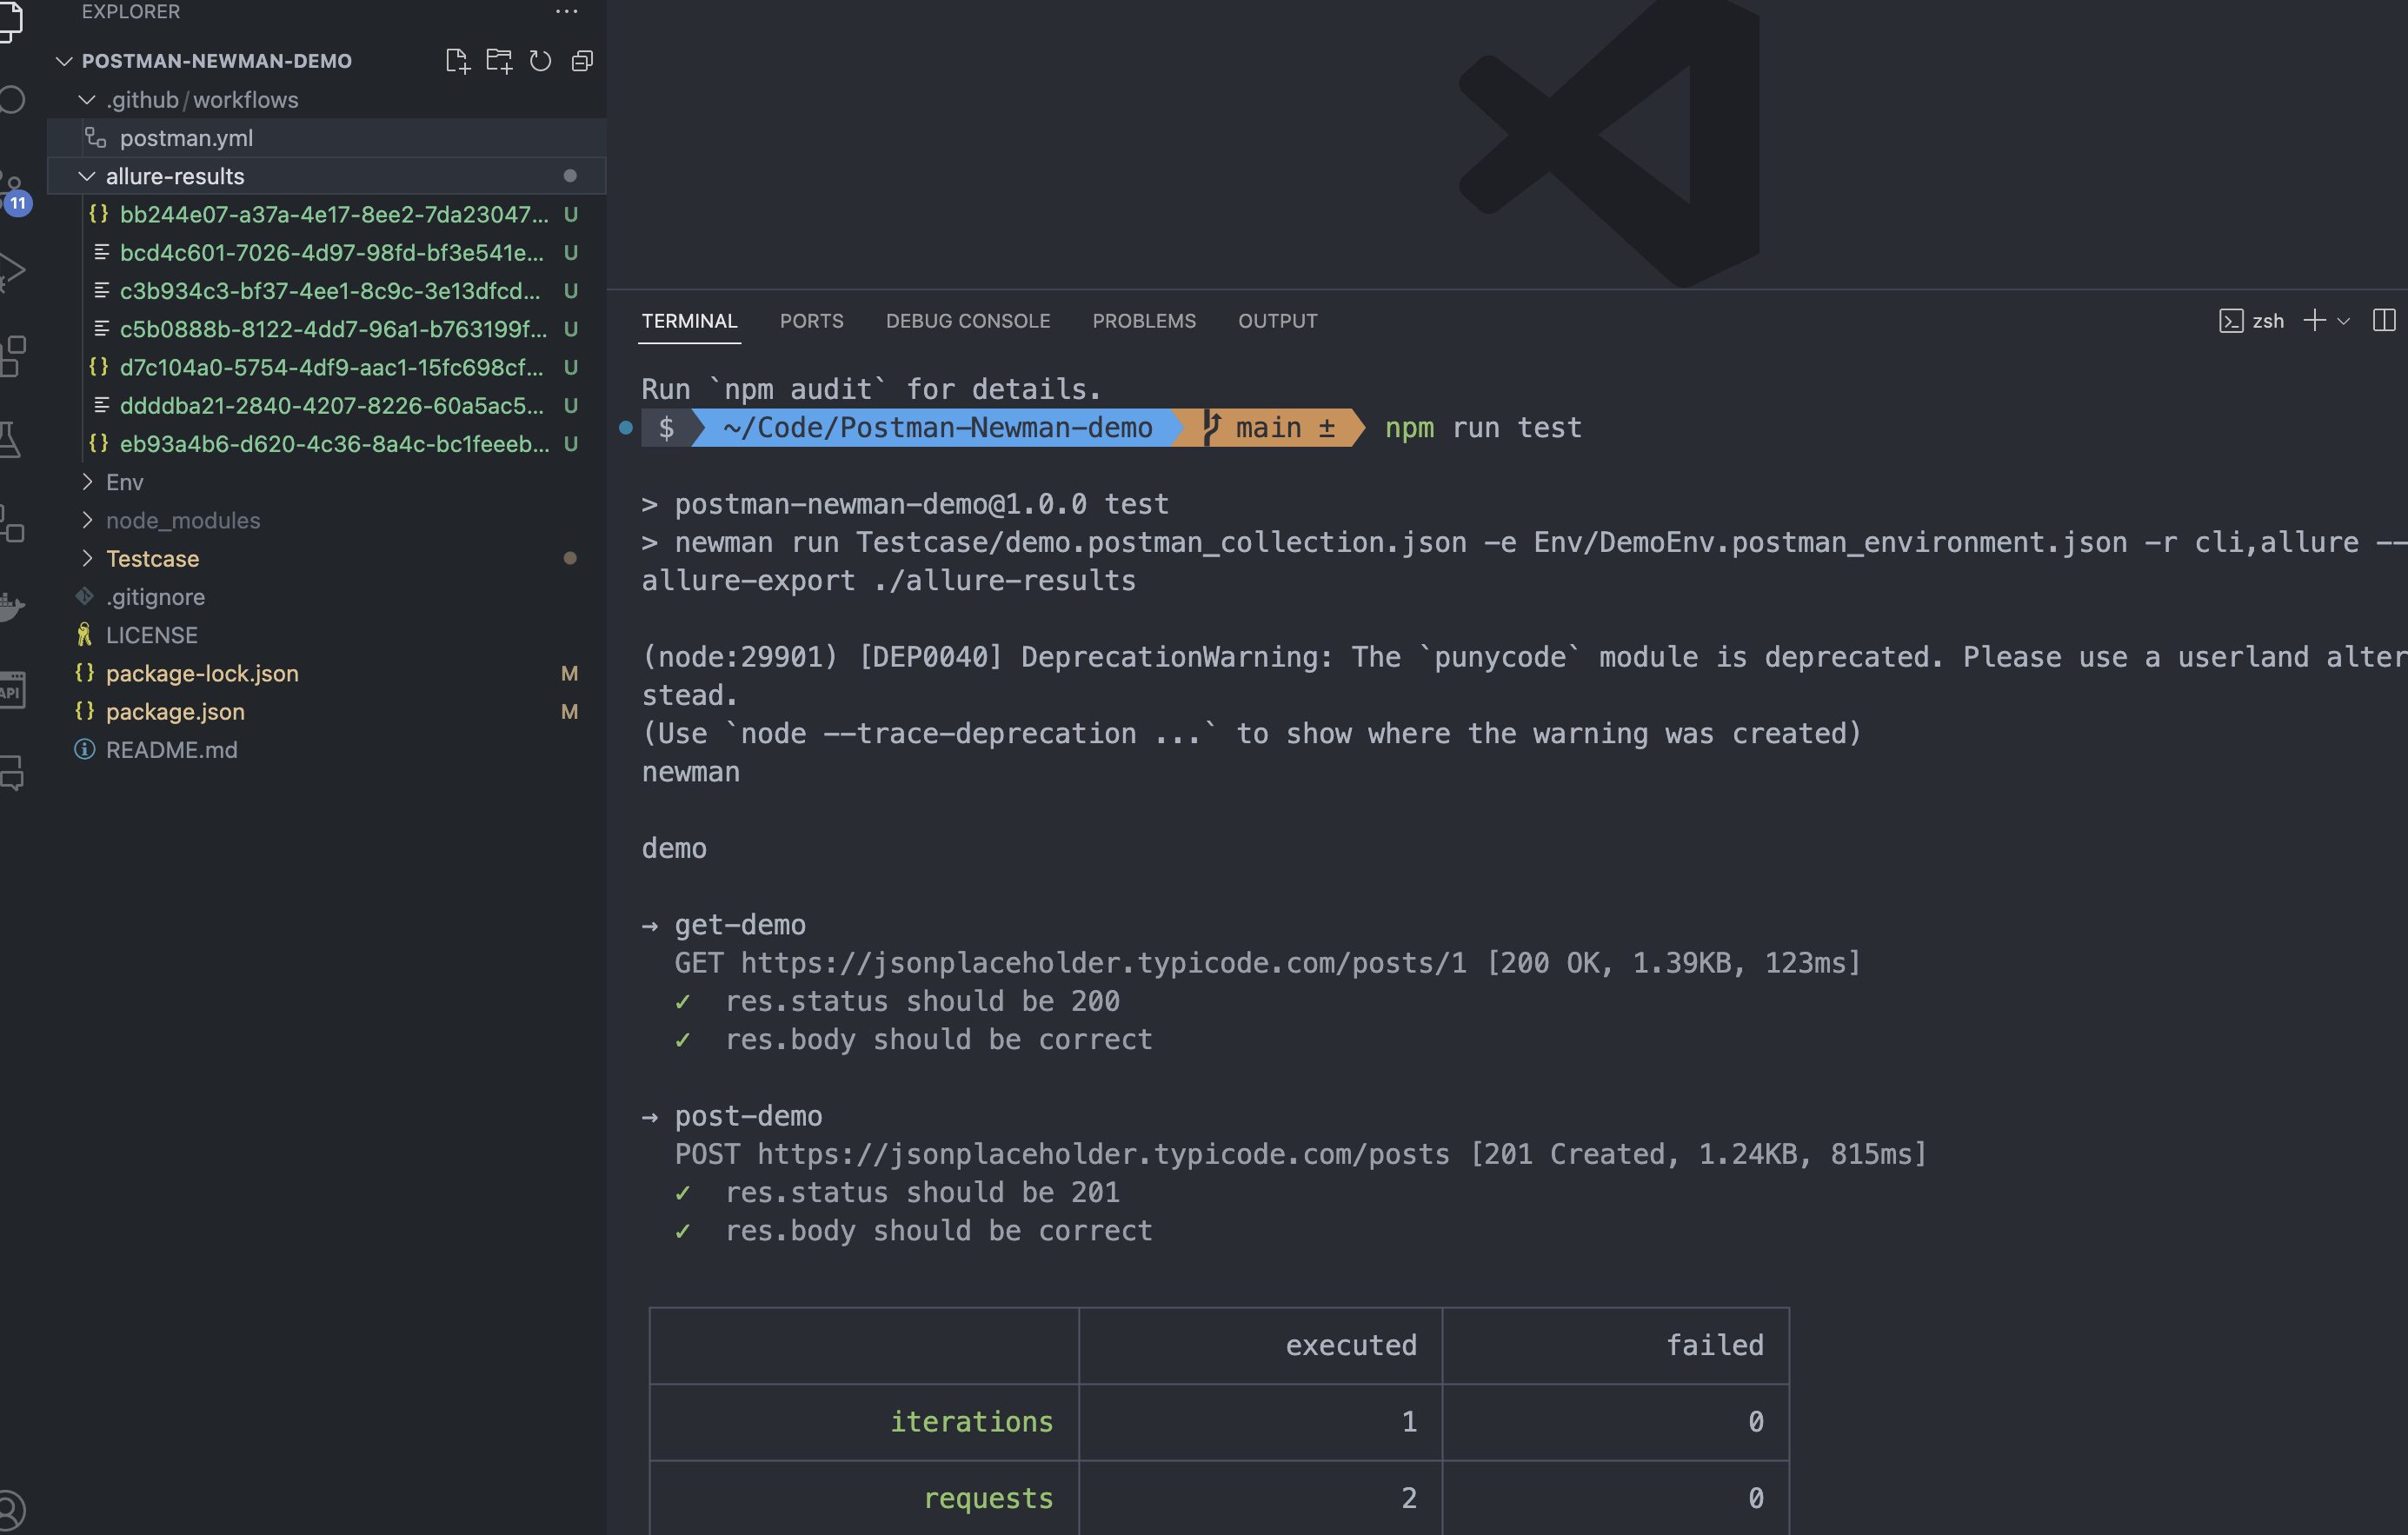
- 运行测试用例
npm run test
会在项目文件夹下生成 allure-results 文件夹,里面包含了测试用例的执行结果。
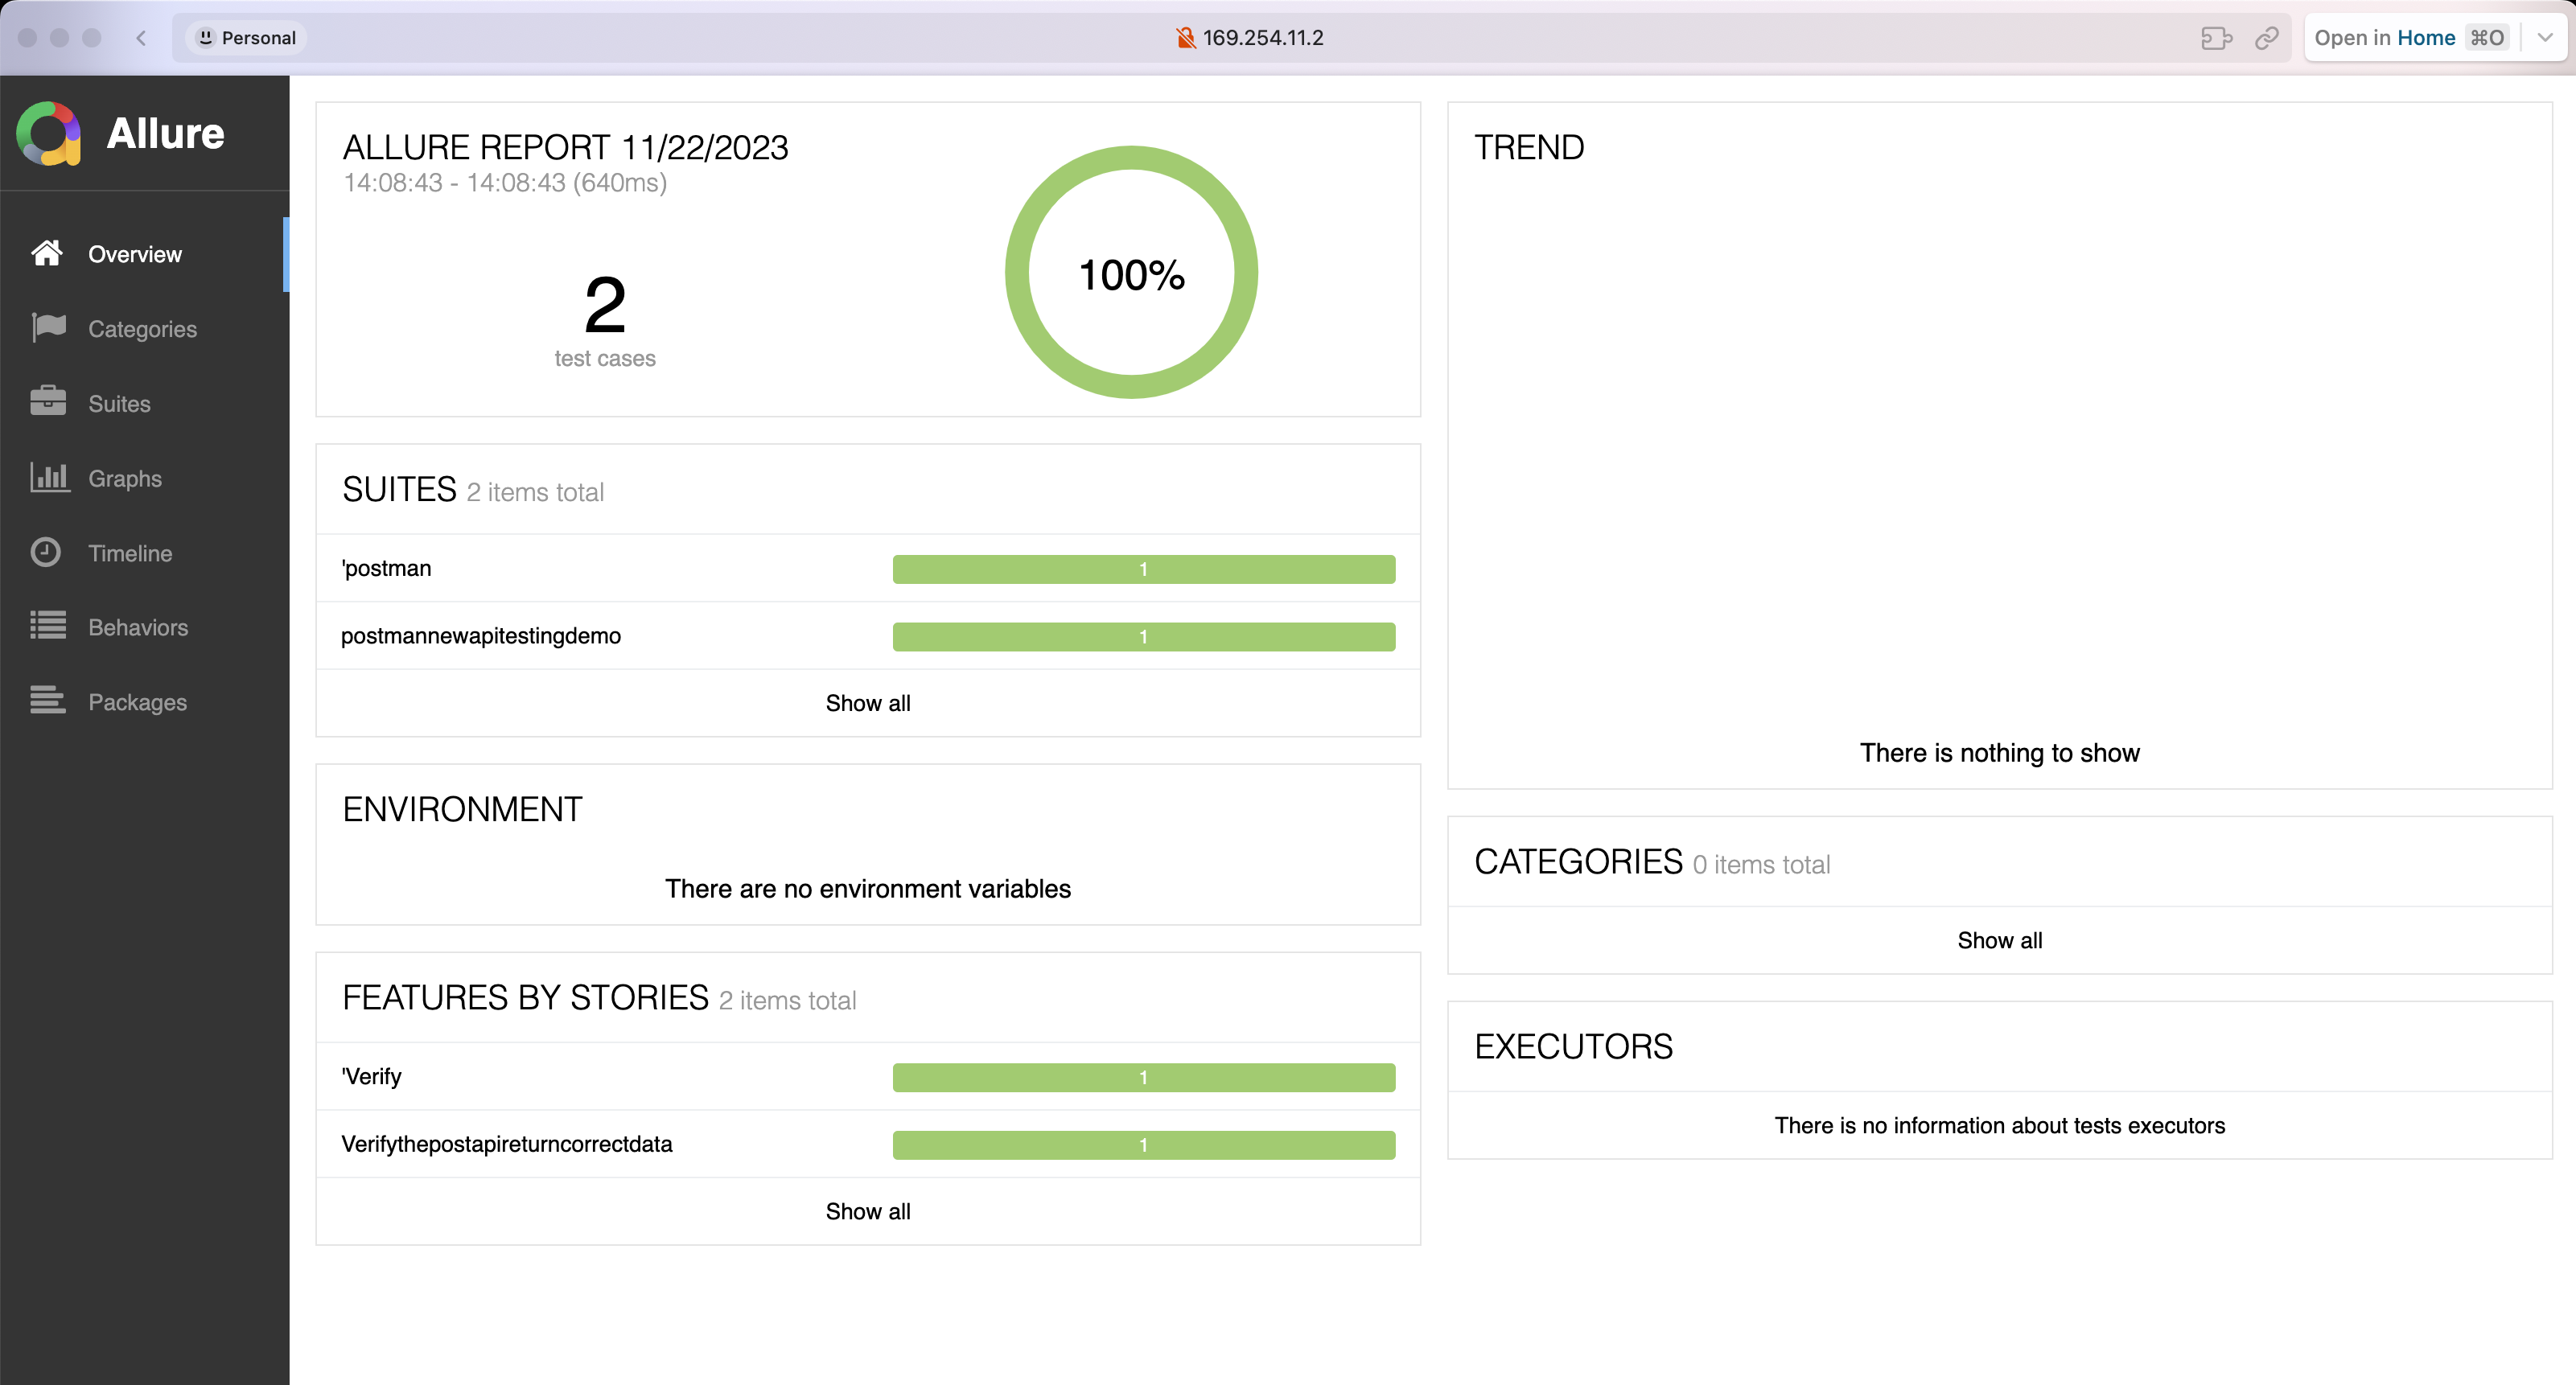
- 预览 allure 测试报告
allure serve
参考文档
欢迎关注软件测试同学的公众号“软件测试同学”,原创 QA 技术文章第一时间推送。
