第 14 天:生成 AI 测试代码并分享你的体验
我们即将到达挑战的一半!在第 14 天,我们将聚焦于 AI 如何用于构建自动化测试。近期,利用 AI 来简化测试代码的创建或改善,或者几乎完全消除对编码知识的需求(所谓的低代码或无代码工具)的自动化工具数量有所增加。它们可能代表了一种不同的构建自动化的方式,这可能更快、更稳定。
在今天的任务中,让我们专注于构建功能测试的测试代码……我们还有其他挑战将关注 AI 如何影响其他类型的测试和诸如自我修复测试等话题。
任务步骤
- 选择一个工具:在挑战的早期,我们列出了一些工具及其特性,所以请回顾那些帖子并找到一个你感兴趣的工具。以下是一些建议:
- 如果你不习惯构建自动化,可以选择一个无代码或低代码工具,尝试用它来创建自动化。一些例子可能包括:
- 如果你在构建自动化方面有经验,为什么不尝试使用像 CoPilot 或 Cody AI 这样的代码助手来帮你编写一些自动化代码。
- 如果你之前在挑战中已经评估过一个功能自动化工具,为什么不选择一个不同的工具进行比较呢?
- 创建一些测试代码:设定一个时间限制(比如 20-30 分钟),并尝试使用你选择的工具构建一个简单的自动化示例:
- 不确定用什么?尝试使用以下一些演示应用:
- Restful Booker https://automationintesting.online
- Evil Tester’s Web 测试和自动化练习应用页面
- Applitools ACME 演示应用
- Swag Labs https://www.saucedemo.com
- Petstore https://petstore.octoperf.com
- 不确定用什么?尝试使用以下一些演示应用:
- 分享你的看法:回复这篇帖子,分享你的发现和见解,比如:
- 你在功能自动化方面的经验水平。
- 你使用的工具以及你尝试创建的自动化内容。
- 你发现使用这个工具来构建和更新自动化的过程如何。
- 代码是否一次成功运行,还是需要进一步的完善?
- 你是否发现工具有任何限制或令人沮丧的地方?
为什么参加
- 更好地理解 AI 在自动化方向上的发展:在功能自动化领域,AI 的使用正在扩展,参与这个任务可以让你了解到这些新的自动化构建方式及其局限性。与社区分享你的体验可以使我们大家变得更加明智。
任务链接
我的第 14 天任务
1. 关于选择一个工具
这一次我选择了 Postman AI Assistant,因为项目中我正在实施 API 测试和 API 自动化回归测试,希望能从 Postman AI Assistant 工具的试用过程中得到一些使用 AI 提升 API 测试效率且能落地的实践。
关于 Postman 工具的使用:Postman 自从 2023 年 5 月宣布将逐步淘汰具有离线功能的 Scratch Pad 模型,大部分功能将转移到云端,需要必须登录才能使用 Postman 的全部功能后。我们公司已经通知要停止使用 Postman 并要迁移到其他的工具。之后我一直在调研和学习使用 Bruno,一个开源且能替代 postman 完成 API 测试和 API 自动化回归测试的好工具。最近也在项目团队中落地了 Bruno+github 的接口文档管理和接口自动化测试的实践,与开发人员一起使用 Bruno+github 协作完成 API 的管理和测试工作。
Postman AI Assistant 官方的介绍:
用于 API 工作流的 AI Assistant Postbot 将于 2023 年 5 月 22 日推出早期访问计划。
- 📅 可用性:早期访问计划于 2023 年 5 月 22 日启动。
- 🪄✨功能:人工智能驱动的自动完成、测试用例设计、文档编写、测试套件构建、数据报告汇总、API 调用调试。
- 💳 定价:从 2023 年 10 月 15 日起提供基本和专业计划,每用户每月 9 美元。
我下载 Postman 并使用常用的 demo 接口进行了 Postbot 的试用:
2. 关于创建一些测试代码
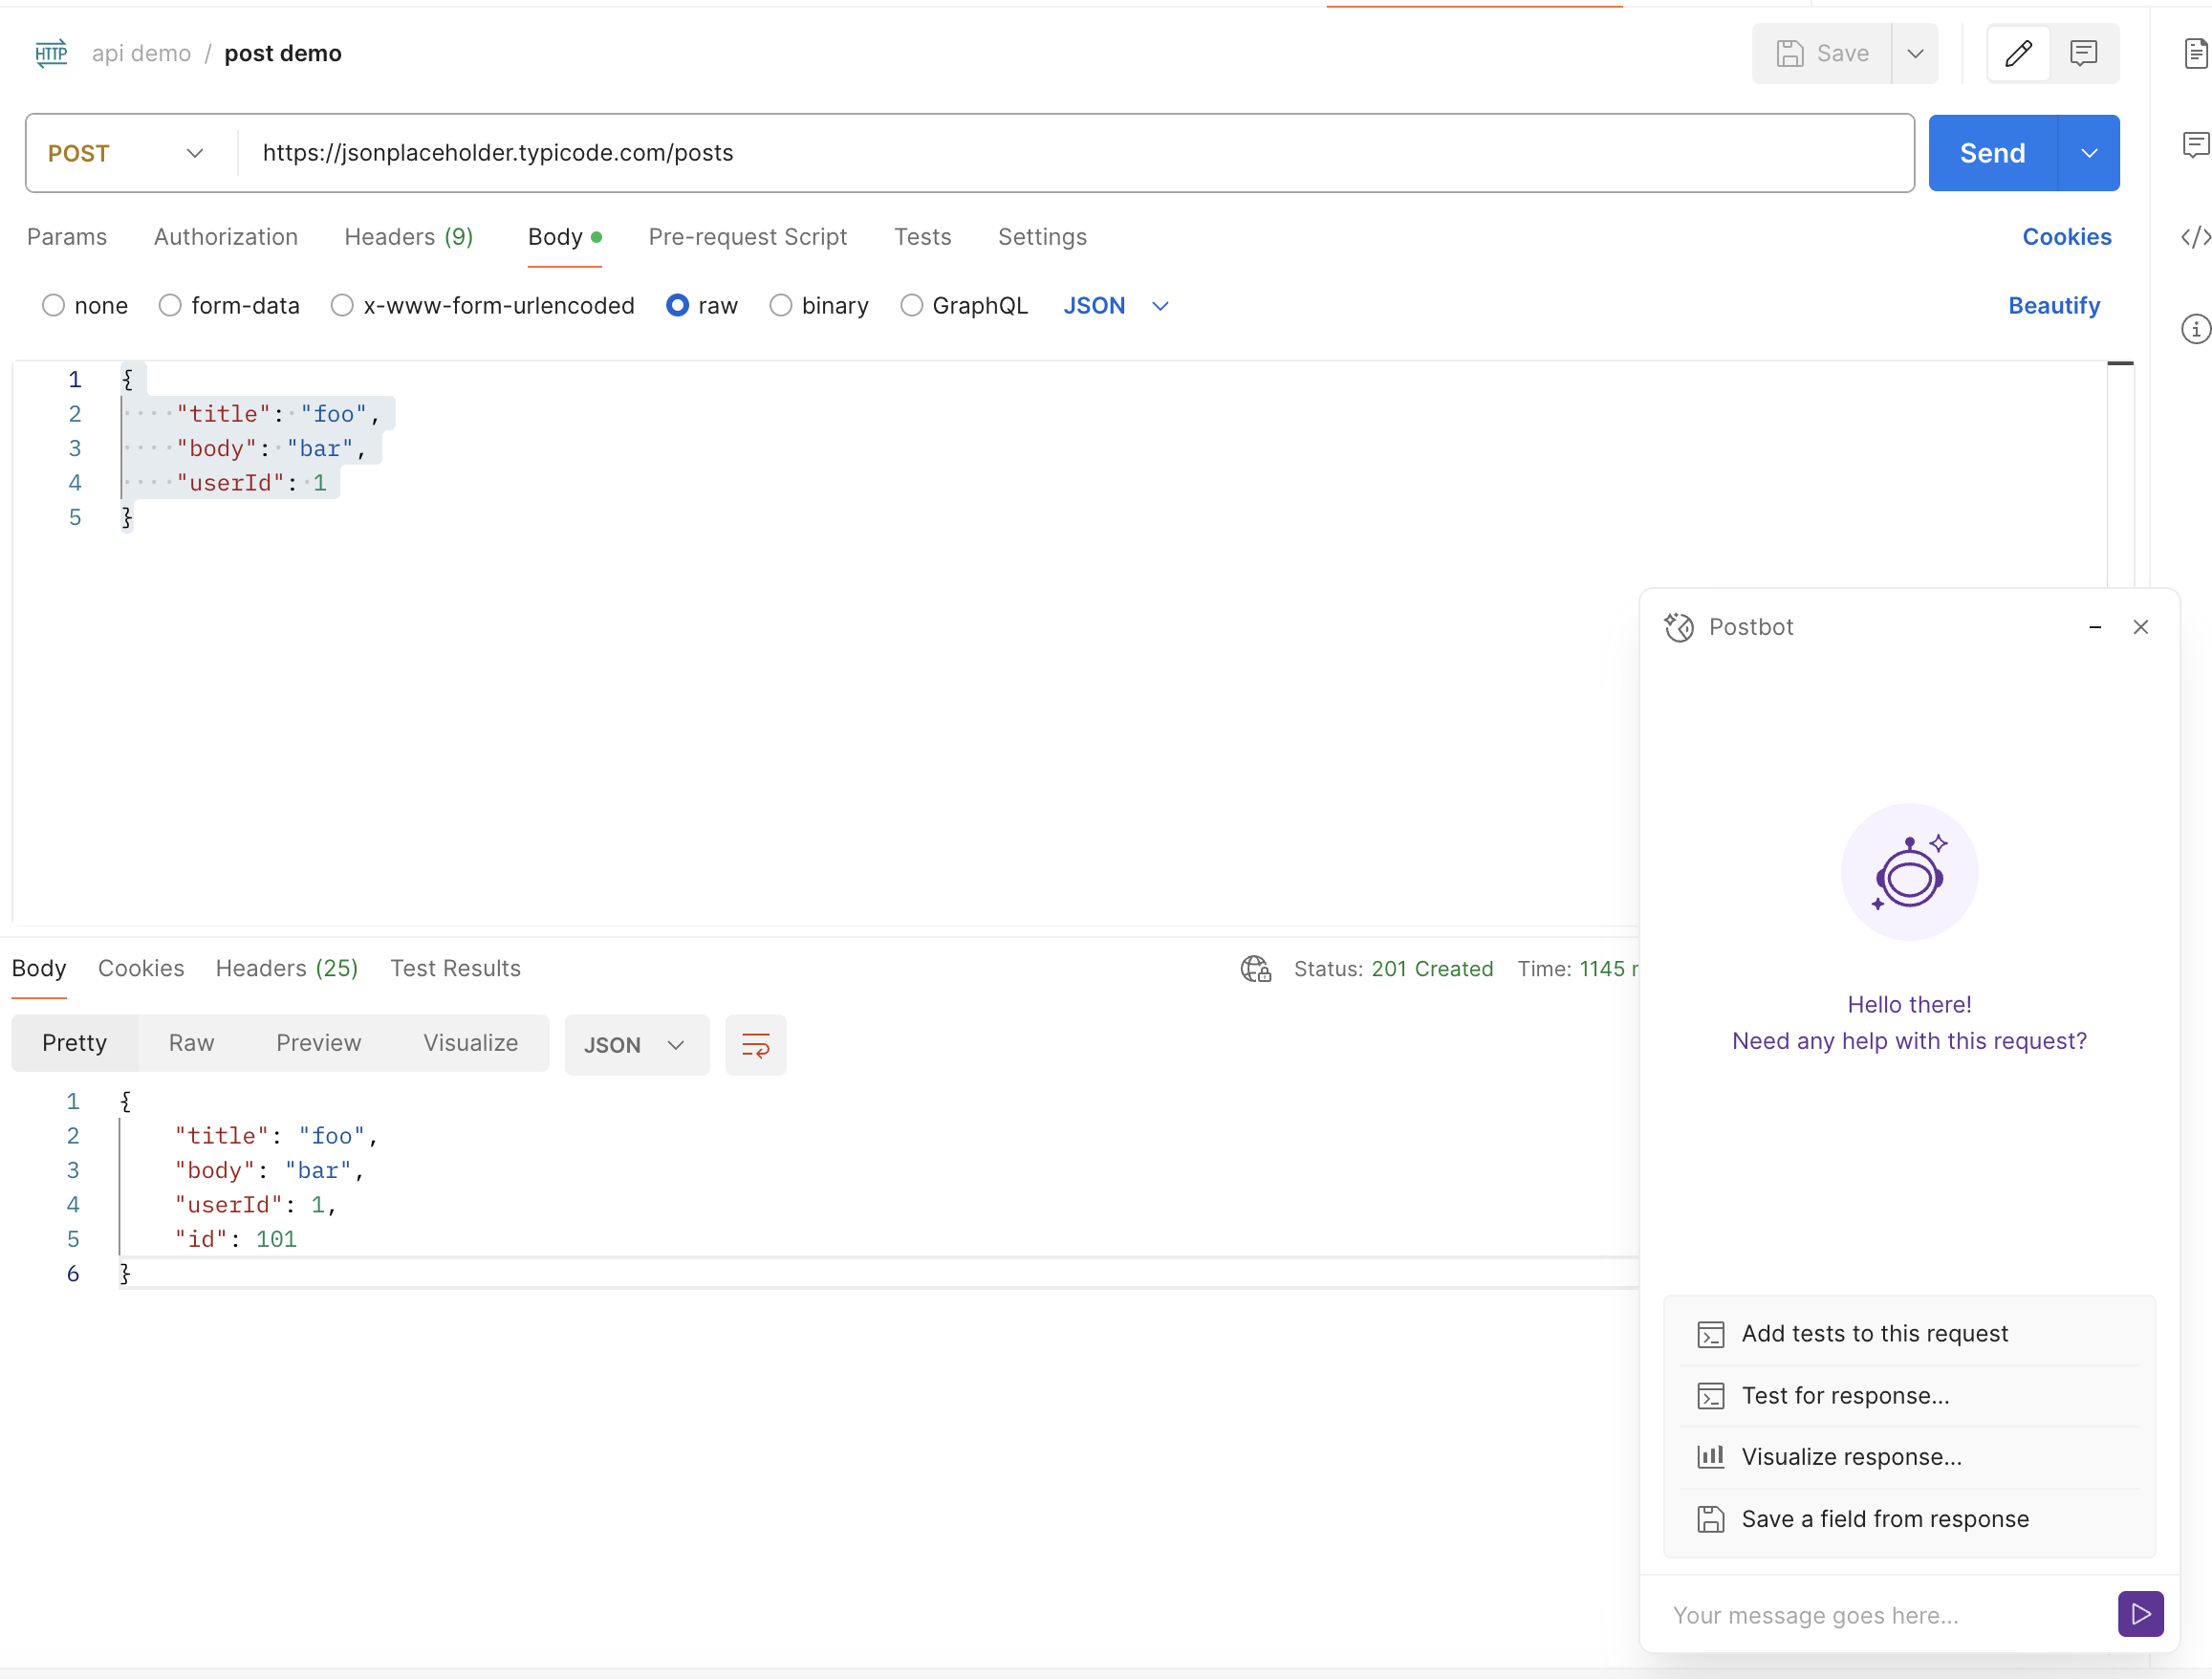
在 postman 界面上添加完 demo 接口的 request 后,点击界面底部菜单栏上的 Postbot 即可启动 Postman AI Assistant,Postbot 窗口上出现针对 request 的建议指令菜单,当前有如下几个推荐指令:
- Add tests to this request
- Test for response
- Visualize response
- Save a field from response
- Add documentation
接下来我会一个接一个的试用 Postbot 建议的功能。
试用Add tests to this request
在 Postbot 界面上点击Add tests to this request
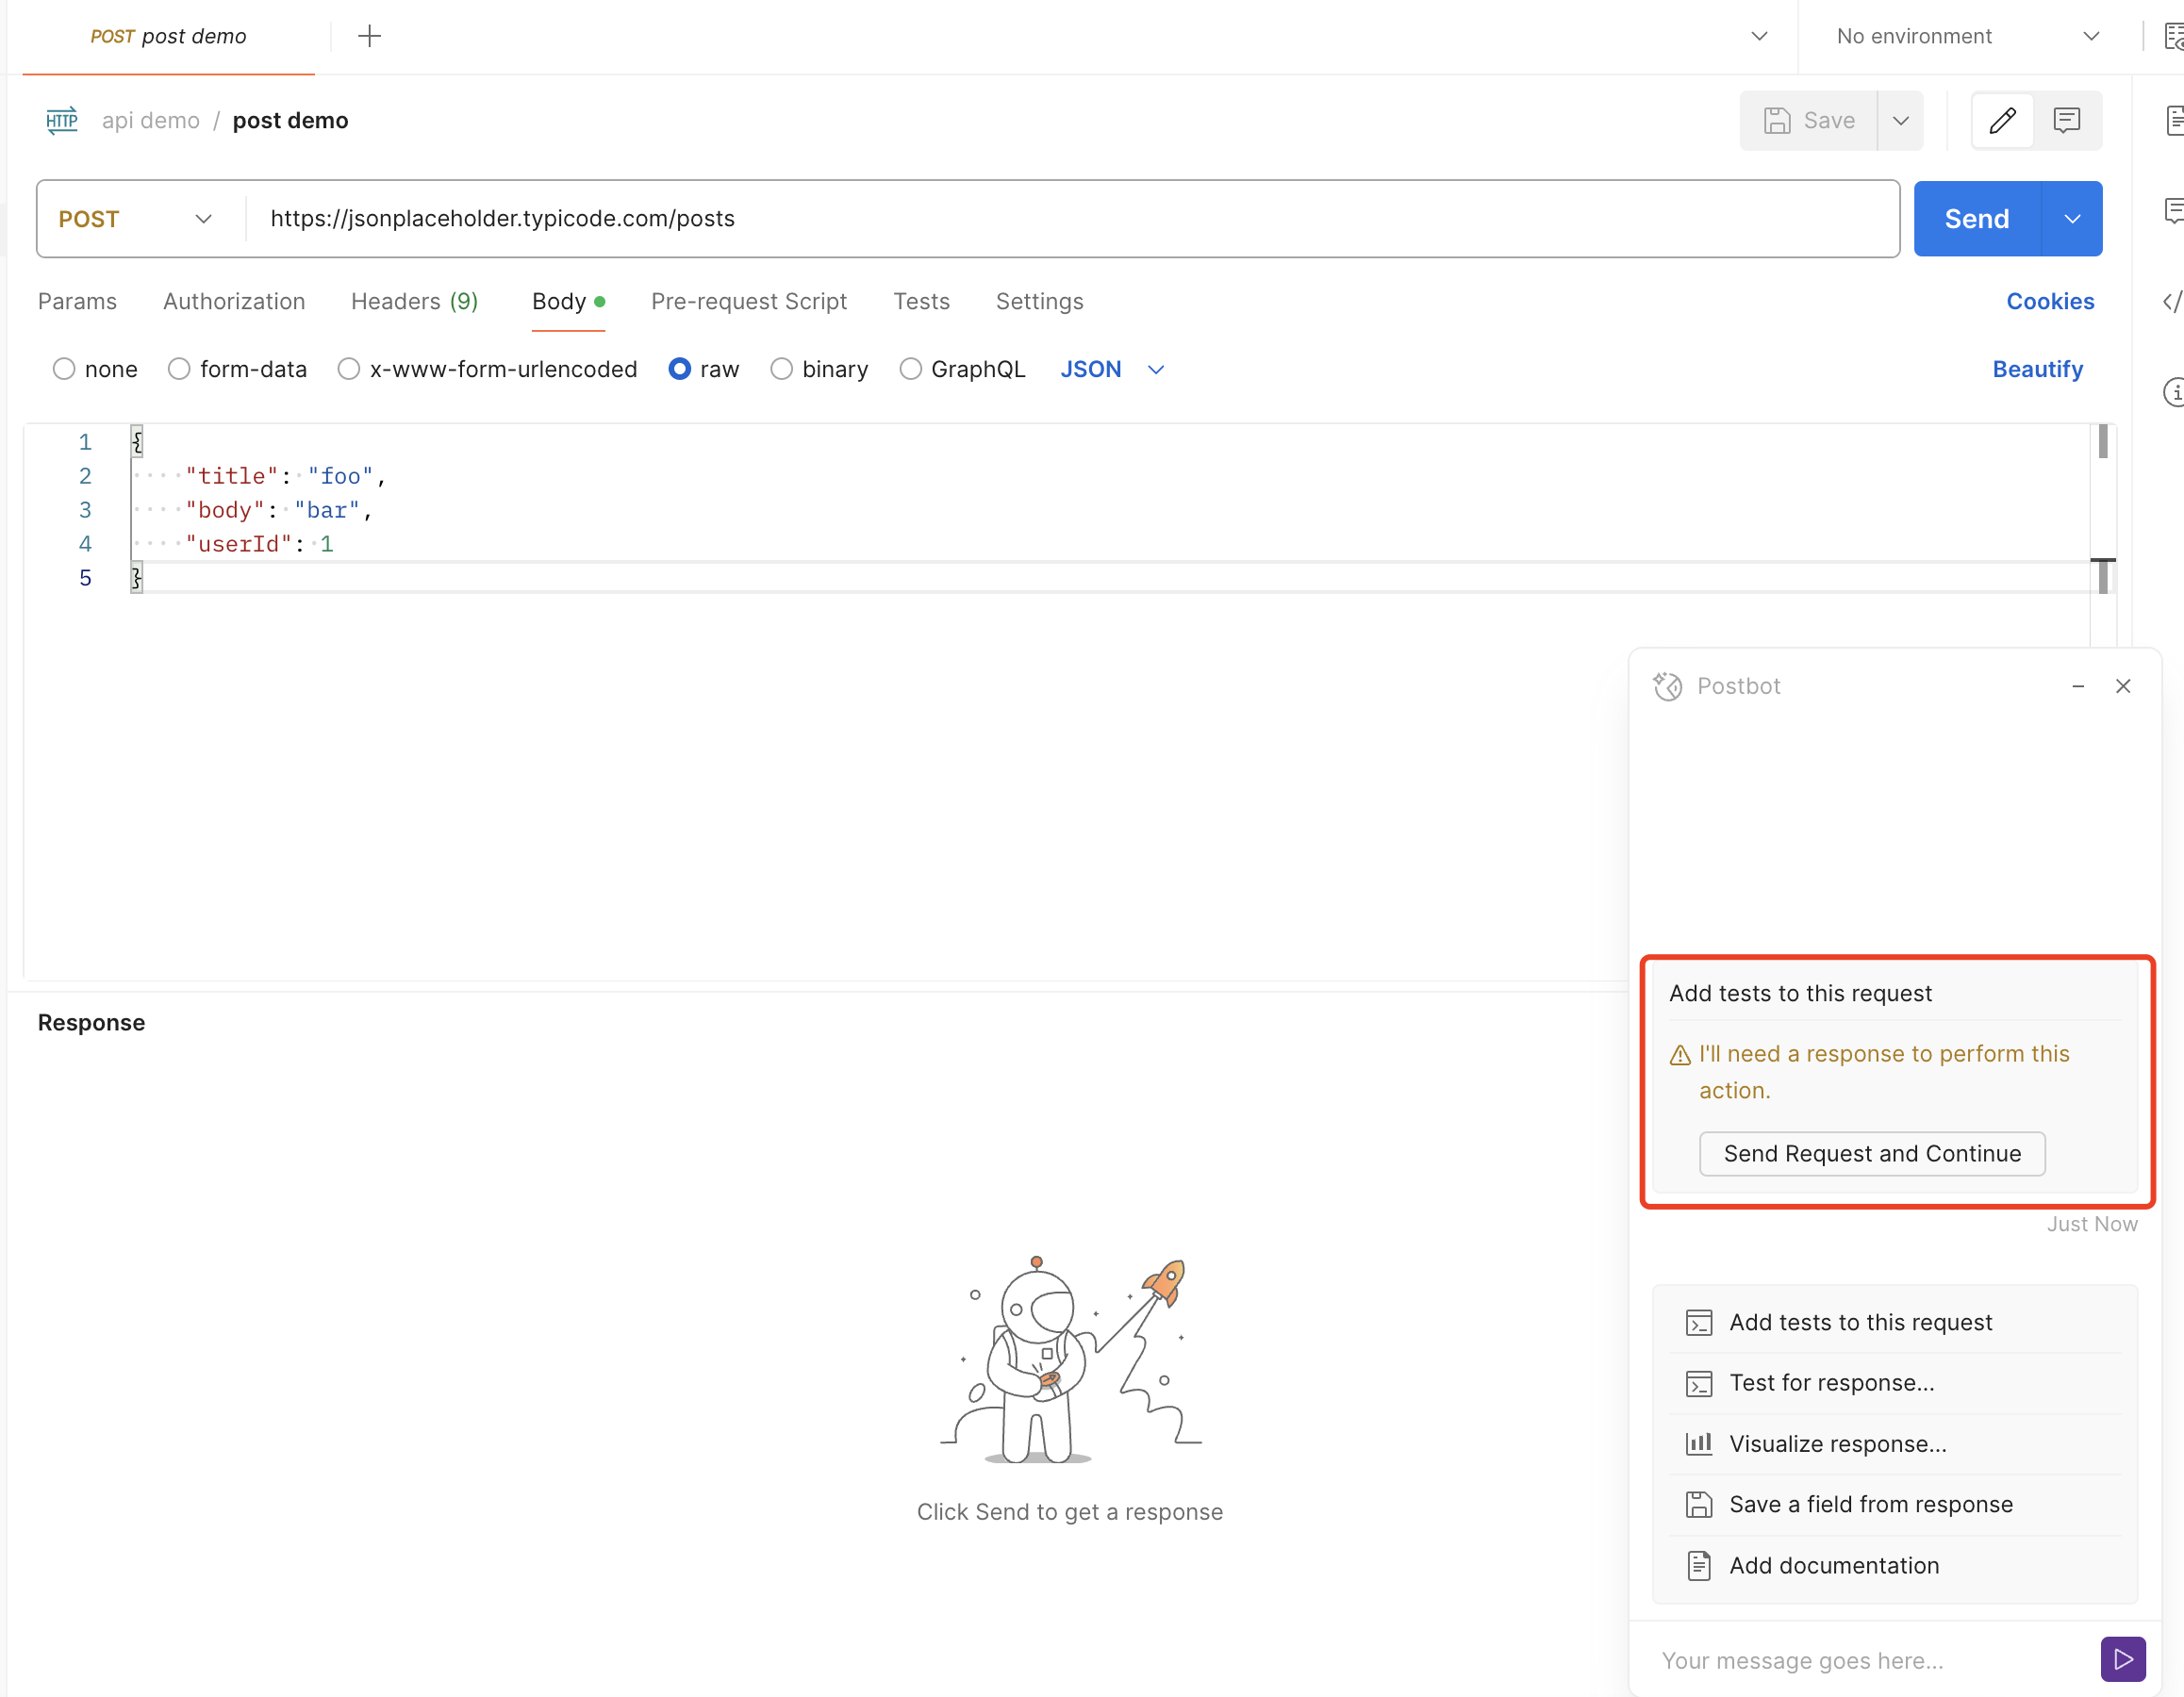
如果你添加了 request 后还没点击 send 运行过该 request, Postbot 会提示"I‘ll need a response to perform this action",然后 Postbot 也会给出快捷运行 request 输出 response 的菜单;点击"Send request and continue"按钮后 Postman 会自动运行 request 并编写测试脚本,如下图所示:
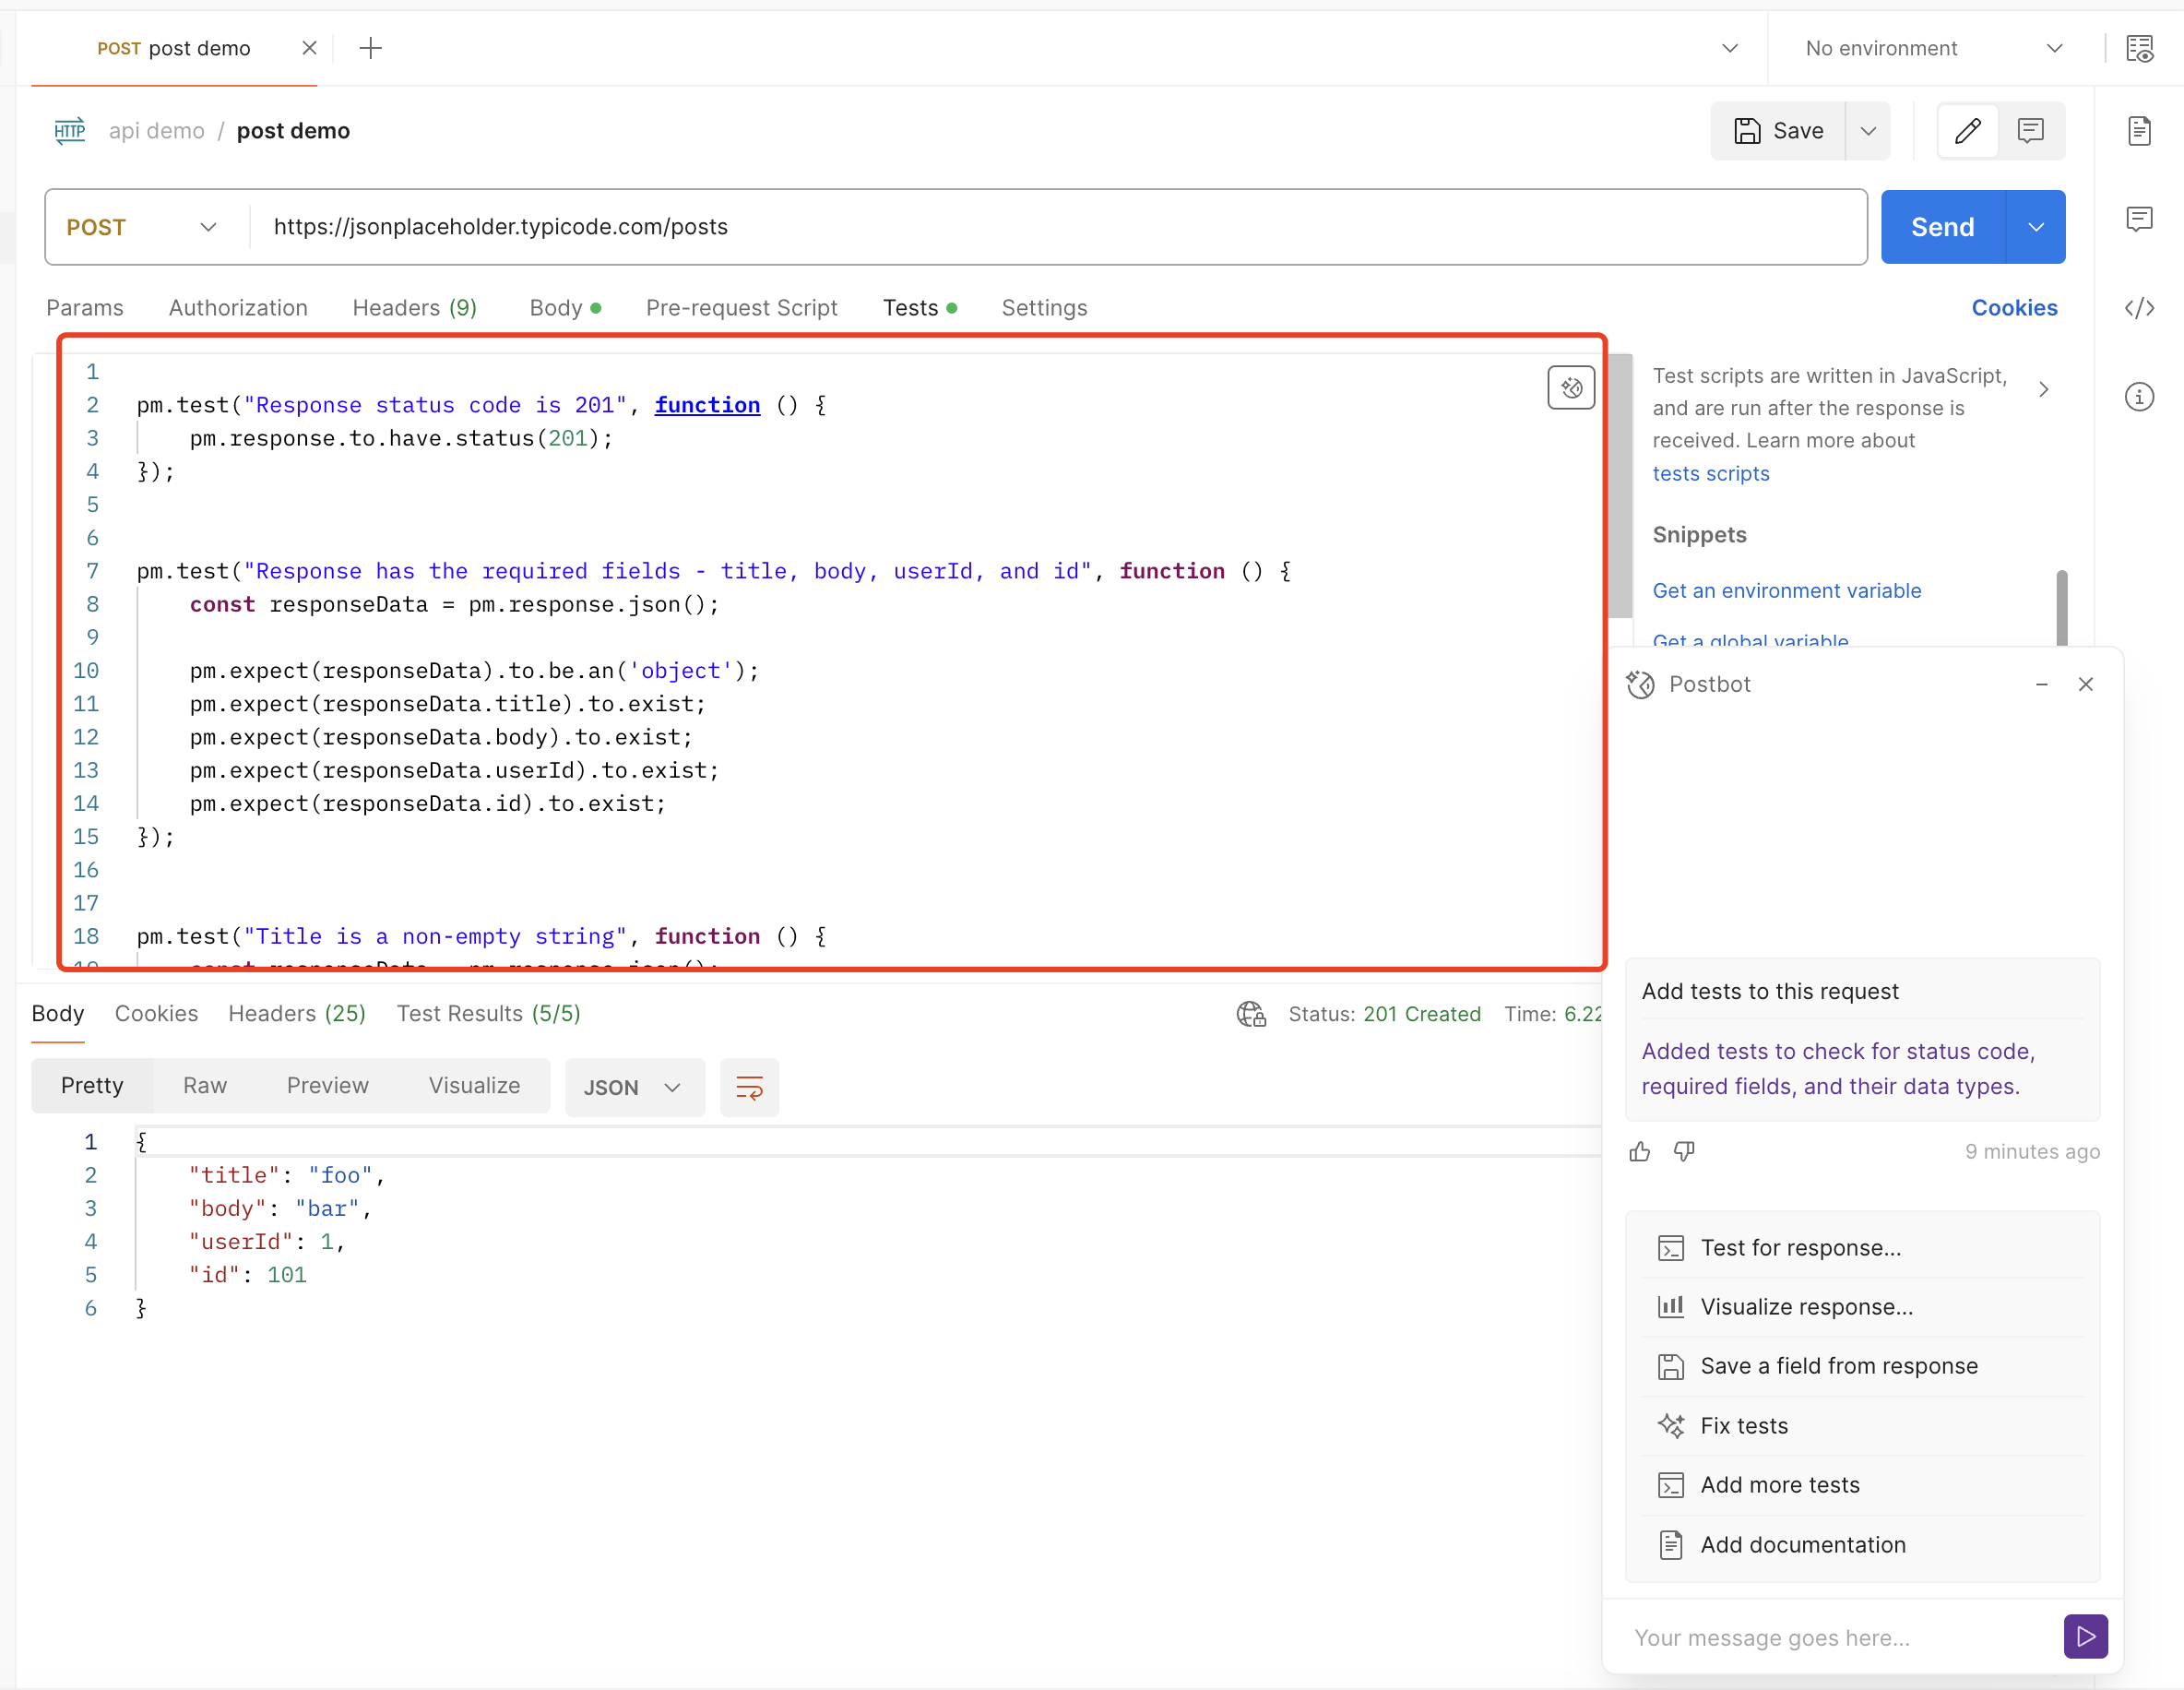
Postbot 针对 demo request 编写测试脚本如下:
pm.test("Response status code is 201", function () {
    pm.response.to.have.status(201);
});

pm.test("Response has the required fields - title, body, userId, and id", function () {
    const responseData = pm.response.json();
    pm.expect(responseData.title).to.exist;
    pm.expect(responseData.body).to.exist;
    pm.expect(responseData.userId).to.exist;
    pm.expect(responseData.id).to.exist;
});

pm.test("Title is a non-empty string", function () {
    const responseData = pm.response.json();
    pm.expect(responseData).to.be.an('object');
    pm.expect(responseData.title).to.be.a('string').and.to.have.lengthOf.at.least(1, "Title should not be empty");
});

pm.test("Body is a non-empty string", function () {
    const responseData = pm.response.json();
    pm.expect(responseData).to.be.an('object');
    pm.expect(responseData.body).to.be.a('string').and.to.have.lengthOf.at.least(1, "Body should not be empty");
});

pm.test("UserId is a positive integer", function () {
    const responseData = pm.response.json();
    pm.expect(responseData.userId).to.be.a('number');
    pm.expect(responseData.userId).to.be.above(0, "UserId should be a positive integer");
});
编写的测试覆盖了接口 response 的 status 判断 和 body 字段类型判断,也能运行通过。
这时我发现 Postbot 的建议菜单上新增了两个推荐指令
- Add more tests
- Fix test
我先尝试运行了“Add more tests”,然后 Postbot 也新增了几条测试
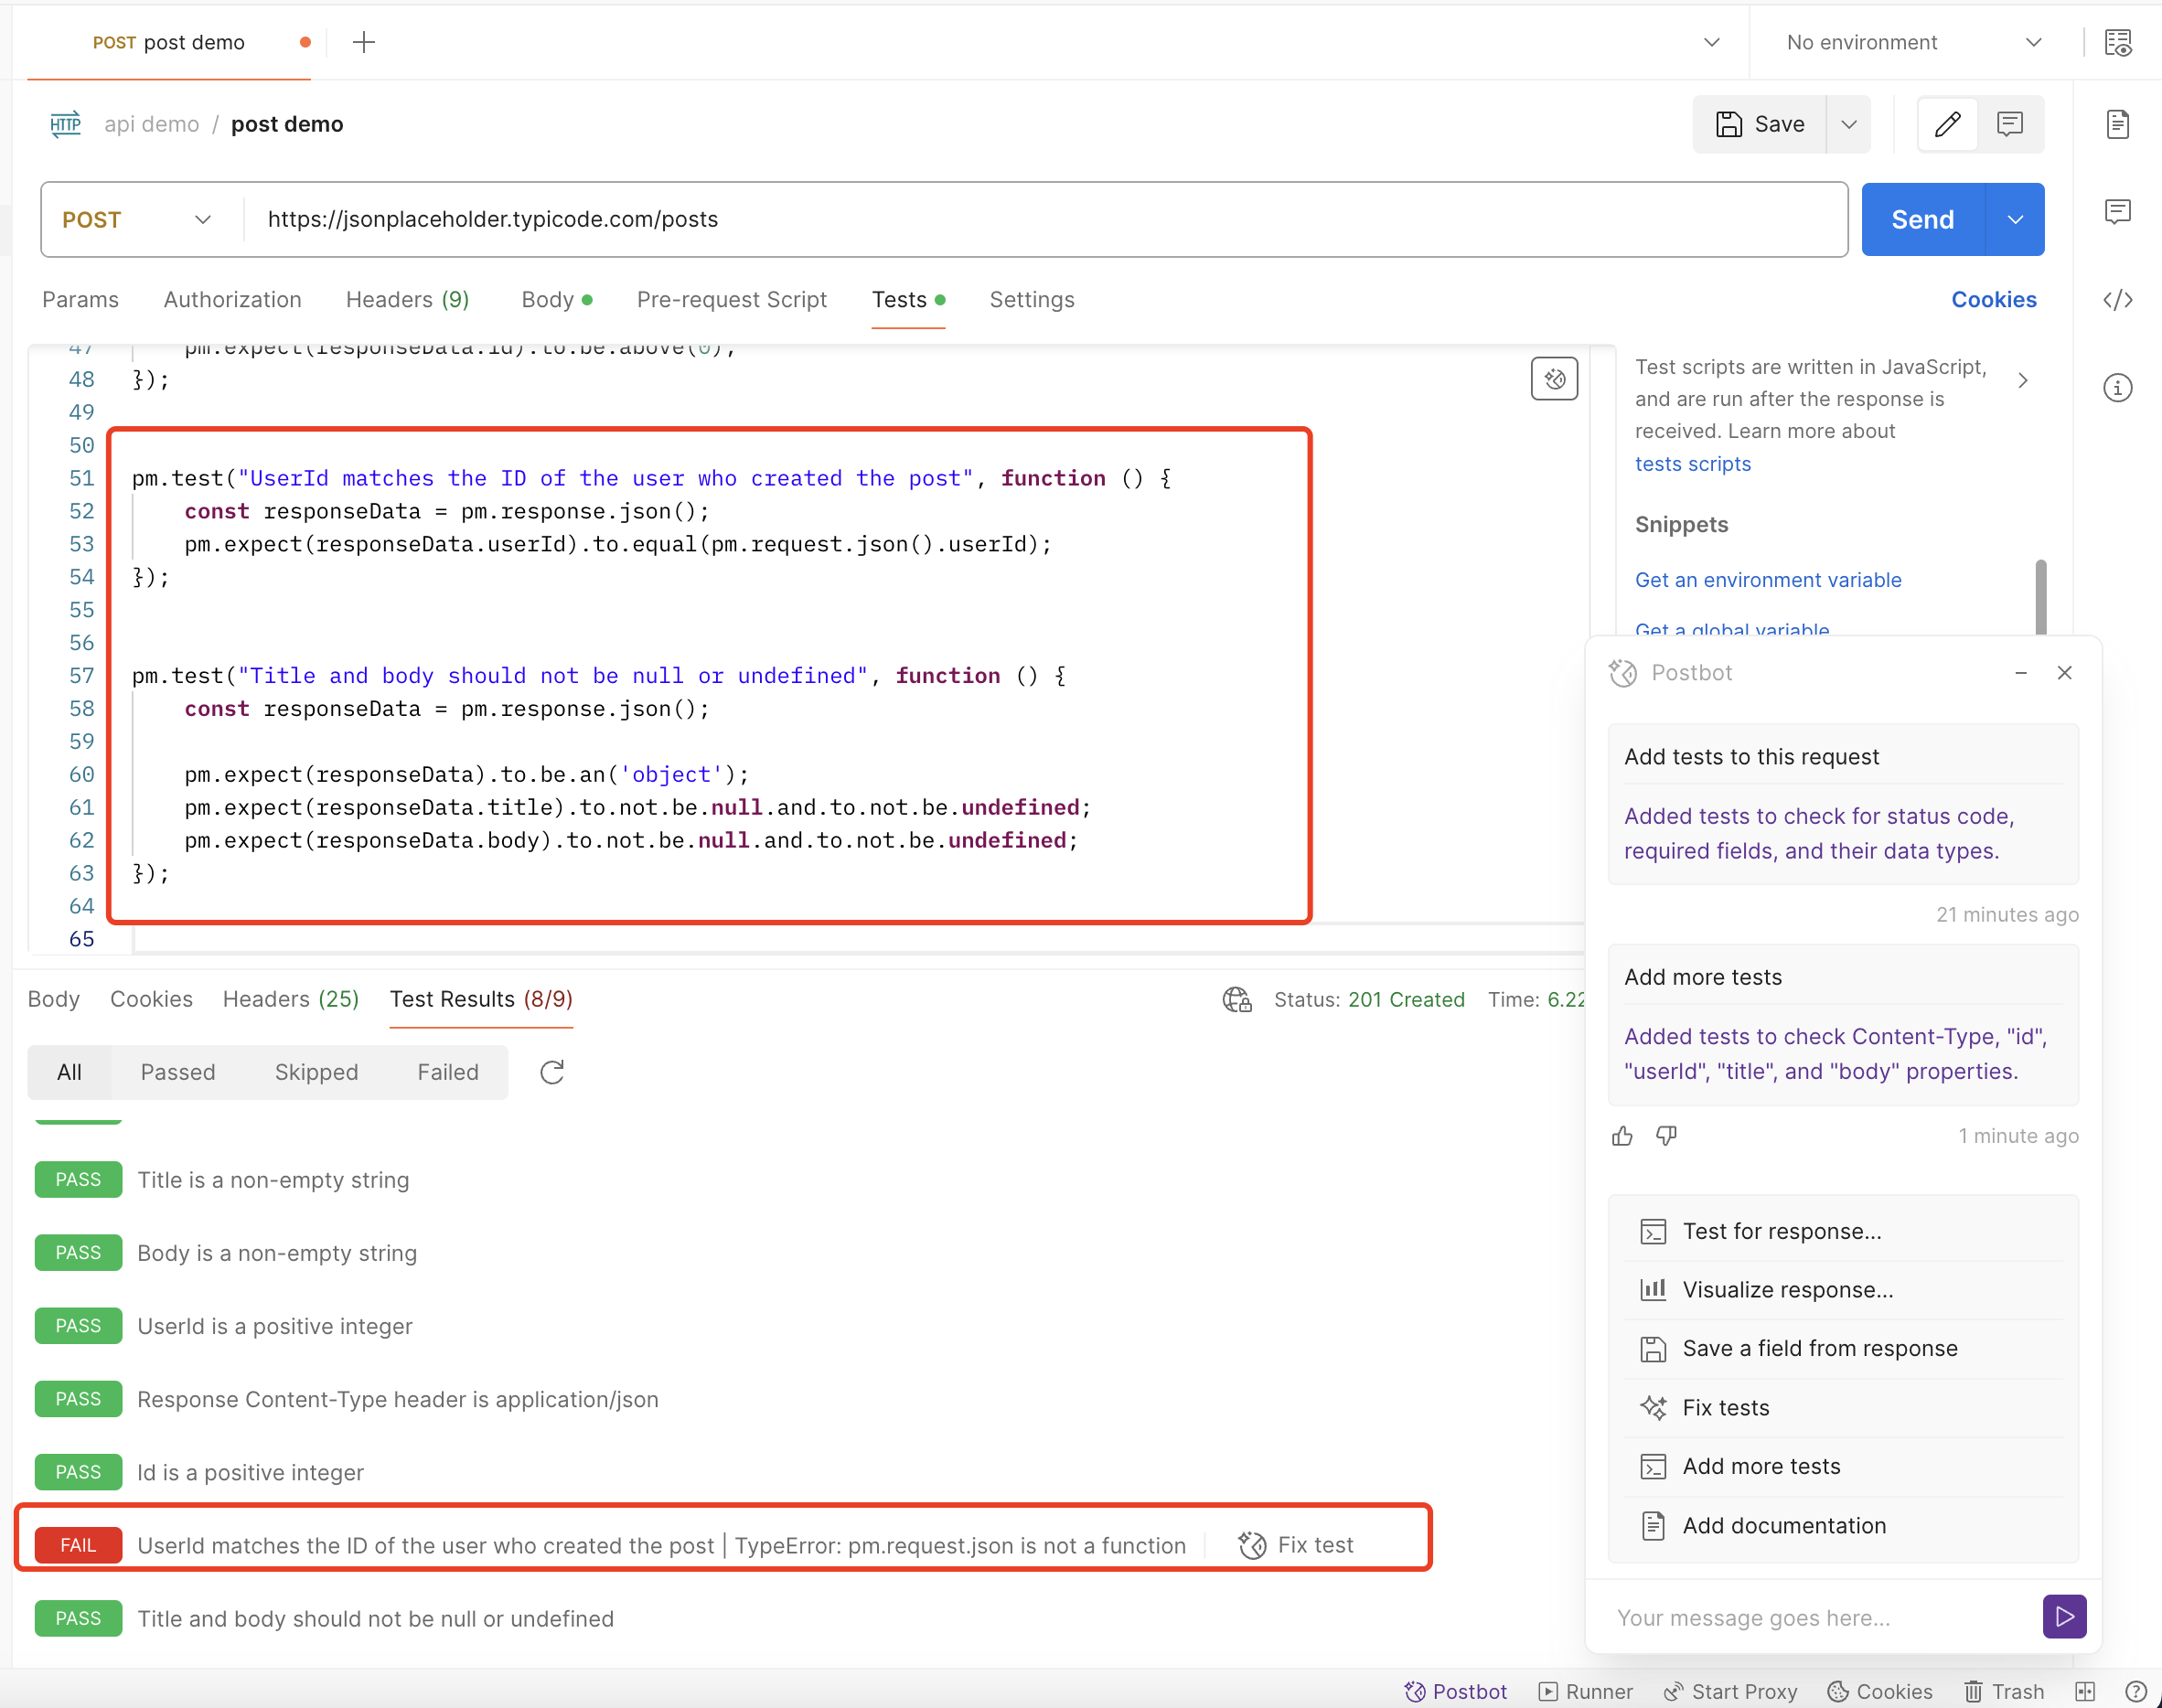
但是有趣的是,有一个测试运行失败了,然后我点击运行“Fix test”尝试让 Postbot 去修复这一条错误的测试
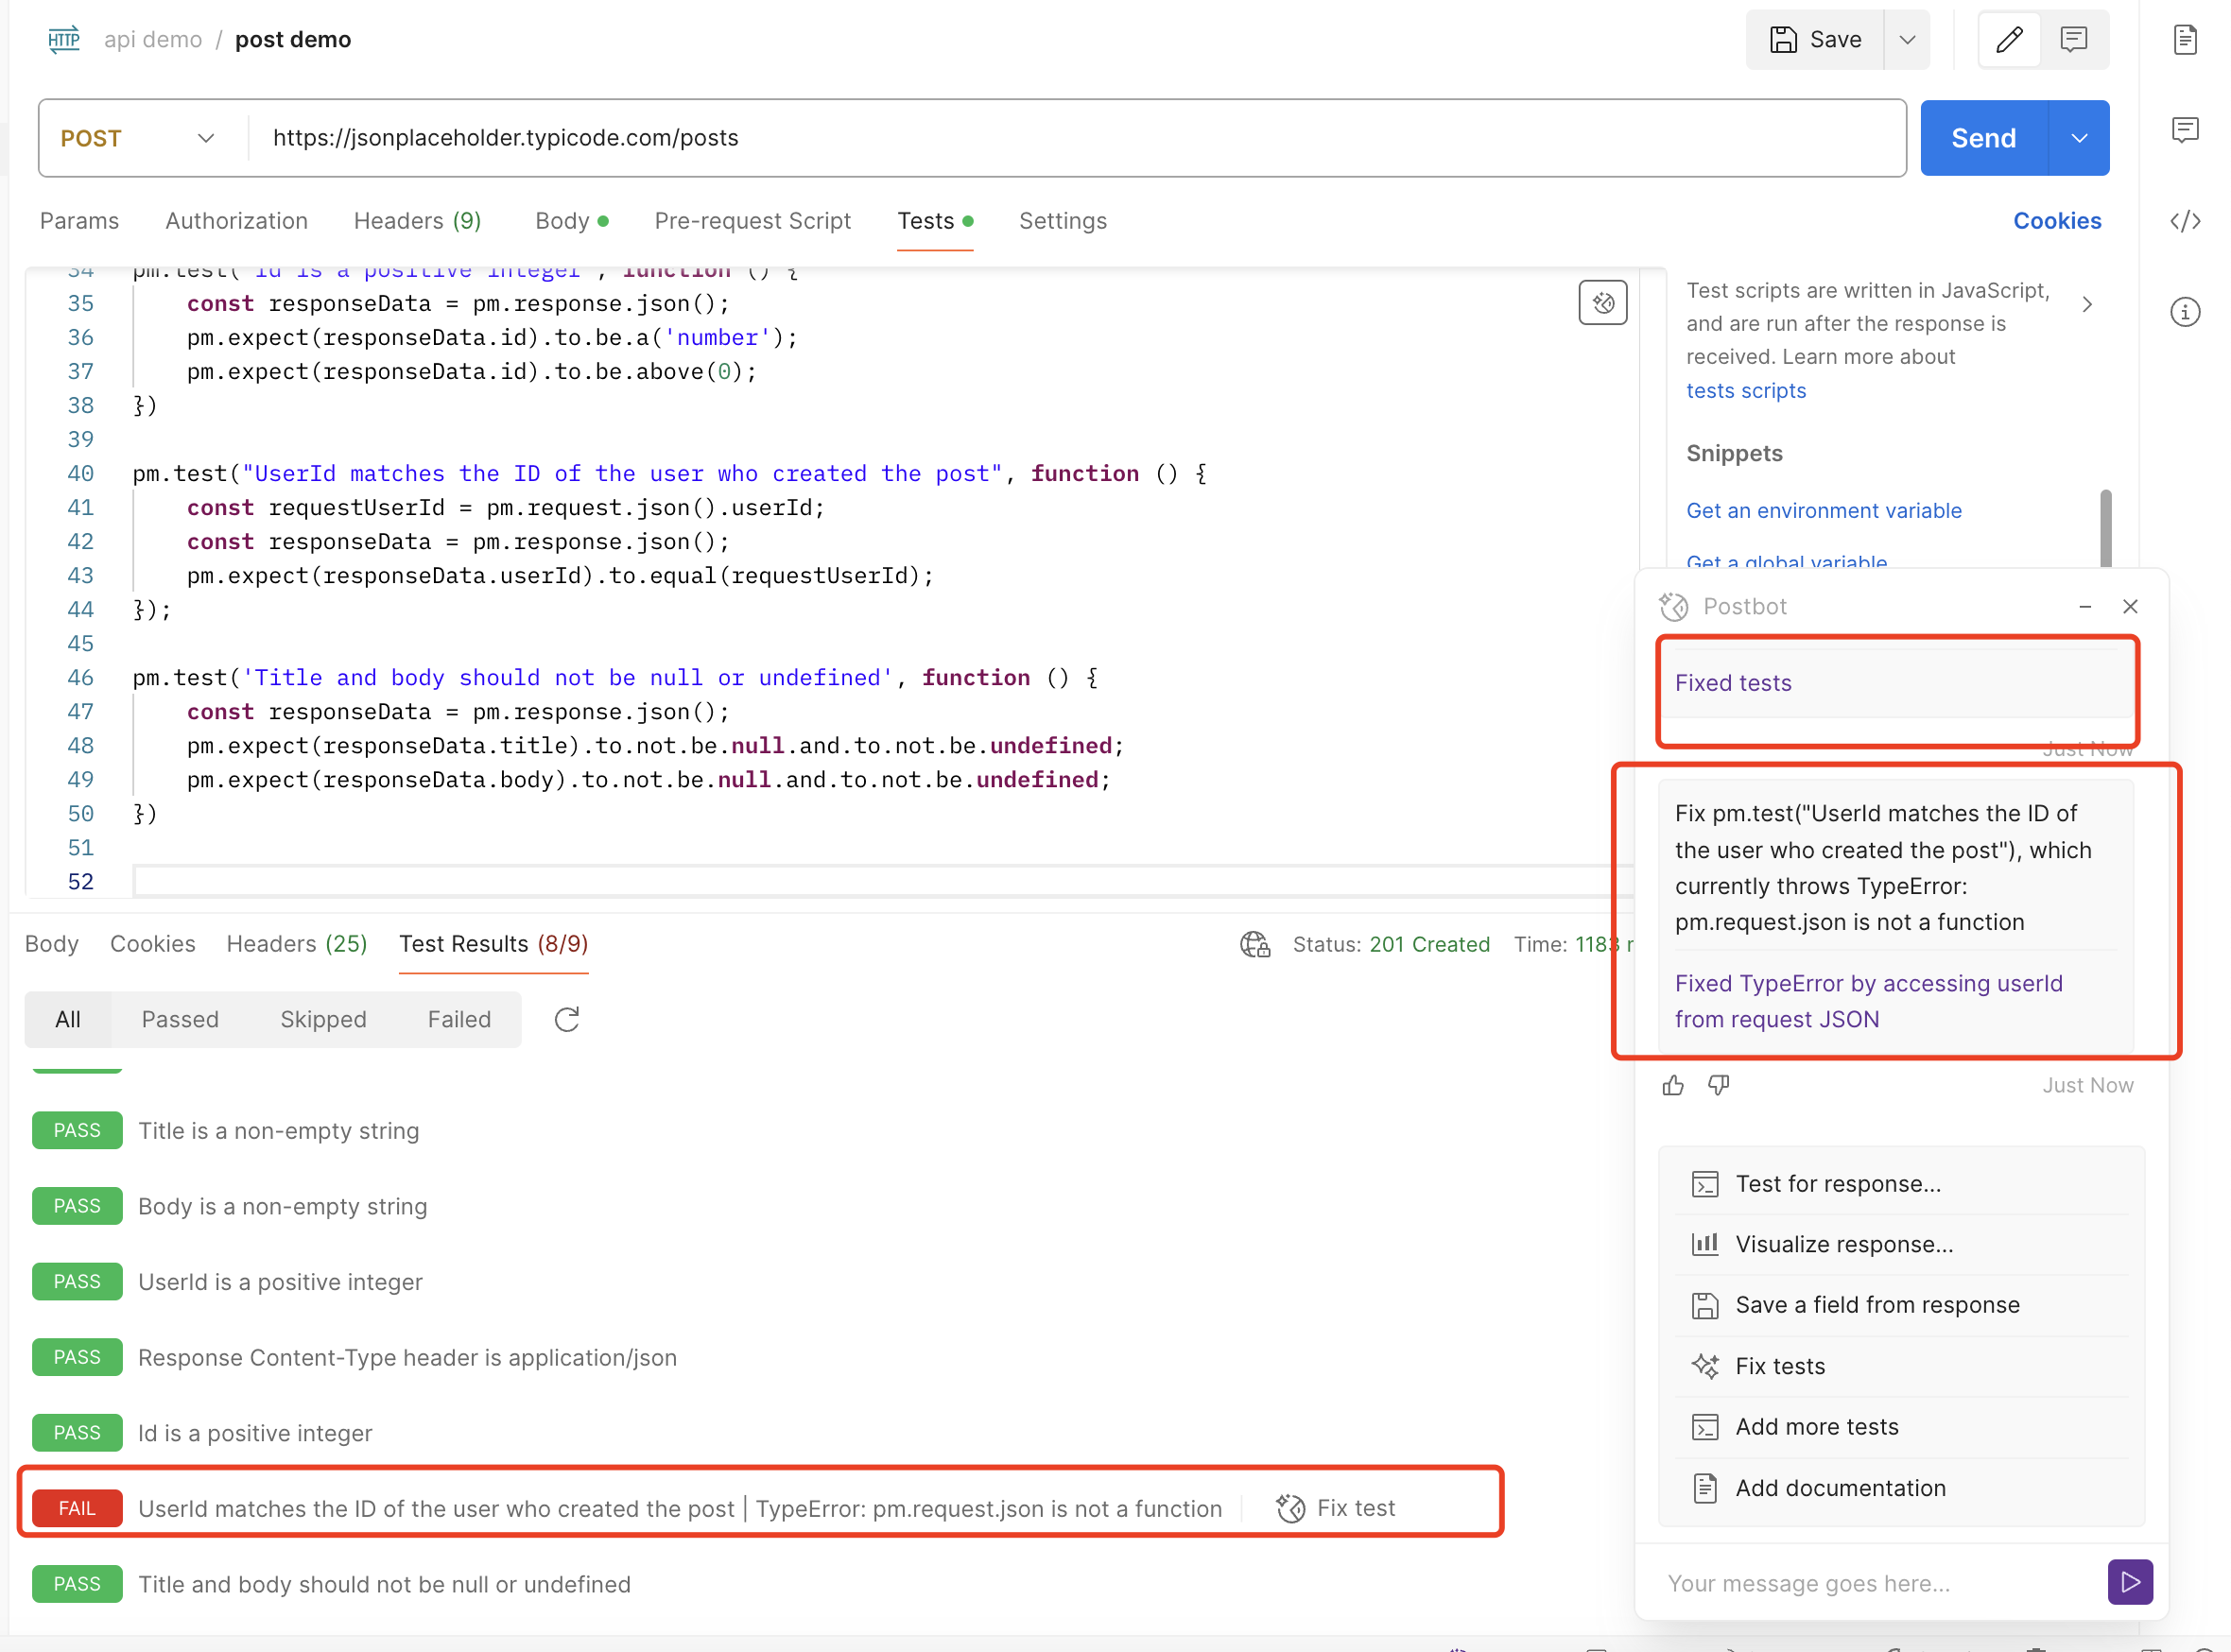
然而 Postbot 并没有修复成功这一条错误的测试用例
这一条错误的用例如下:
pm.test("UserId matches the ID of the user who created the post", function () {
    const requestUserId = pm.request.json().userId;
    const responseData = pm.response.json();
    pm.expect(responseData.userId).to.equal(requestUserId);
});
我只能手动去修复它,修复后的脚本如下
pm.test("UserId matches the ID of the user who created the post", function () {

    const requestUserId = JSON
    .parse(pm.request.body.raw).userId;
    const responseData = pm.response.json();
    pm.expect(responseData.userId).to.equal(requestUserId);
});
脚本错误的原因是因为 request 的 body 为 raw 格式,需要将 request 的 body 解析为 json 对象后在进行进行读取。
试用Test for response
在 Postbot 界面上点击Test for response后,Postbot 会更新之前通过Add tests to this request生成的测试用例,如下图所示:
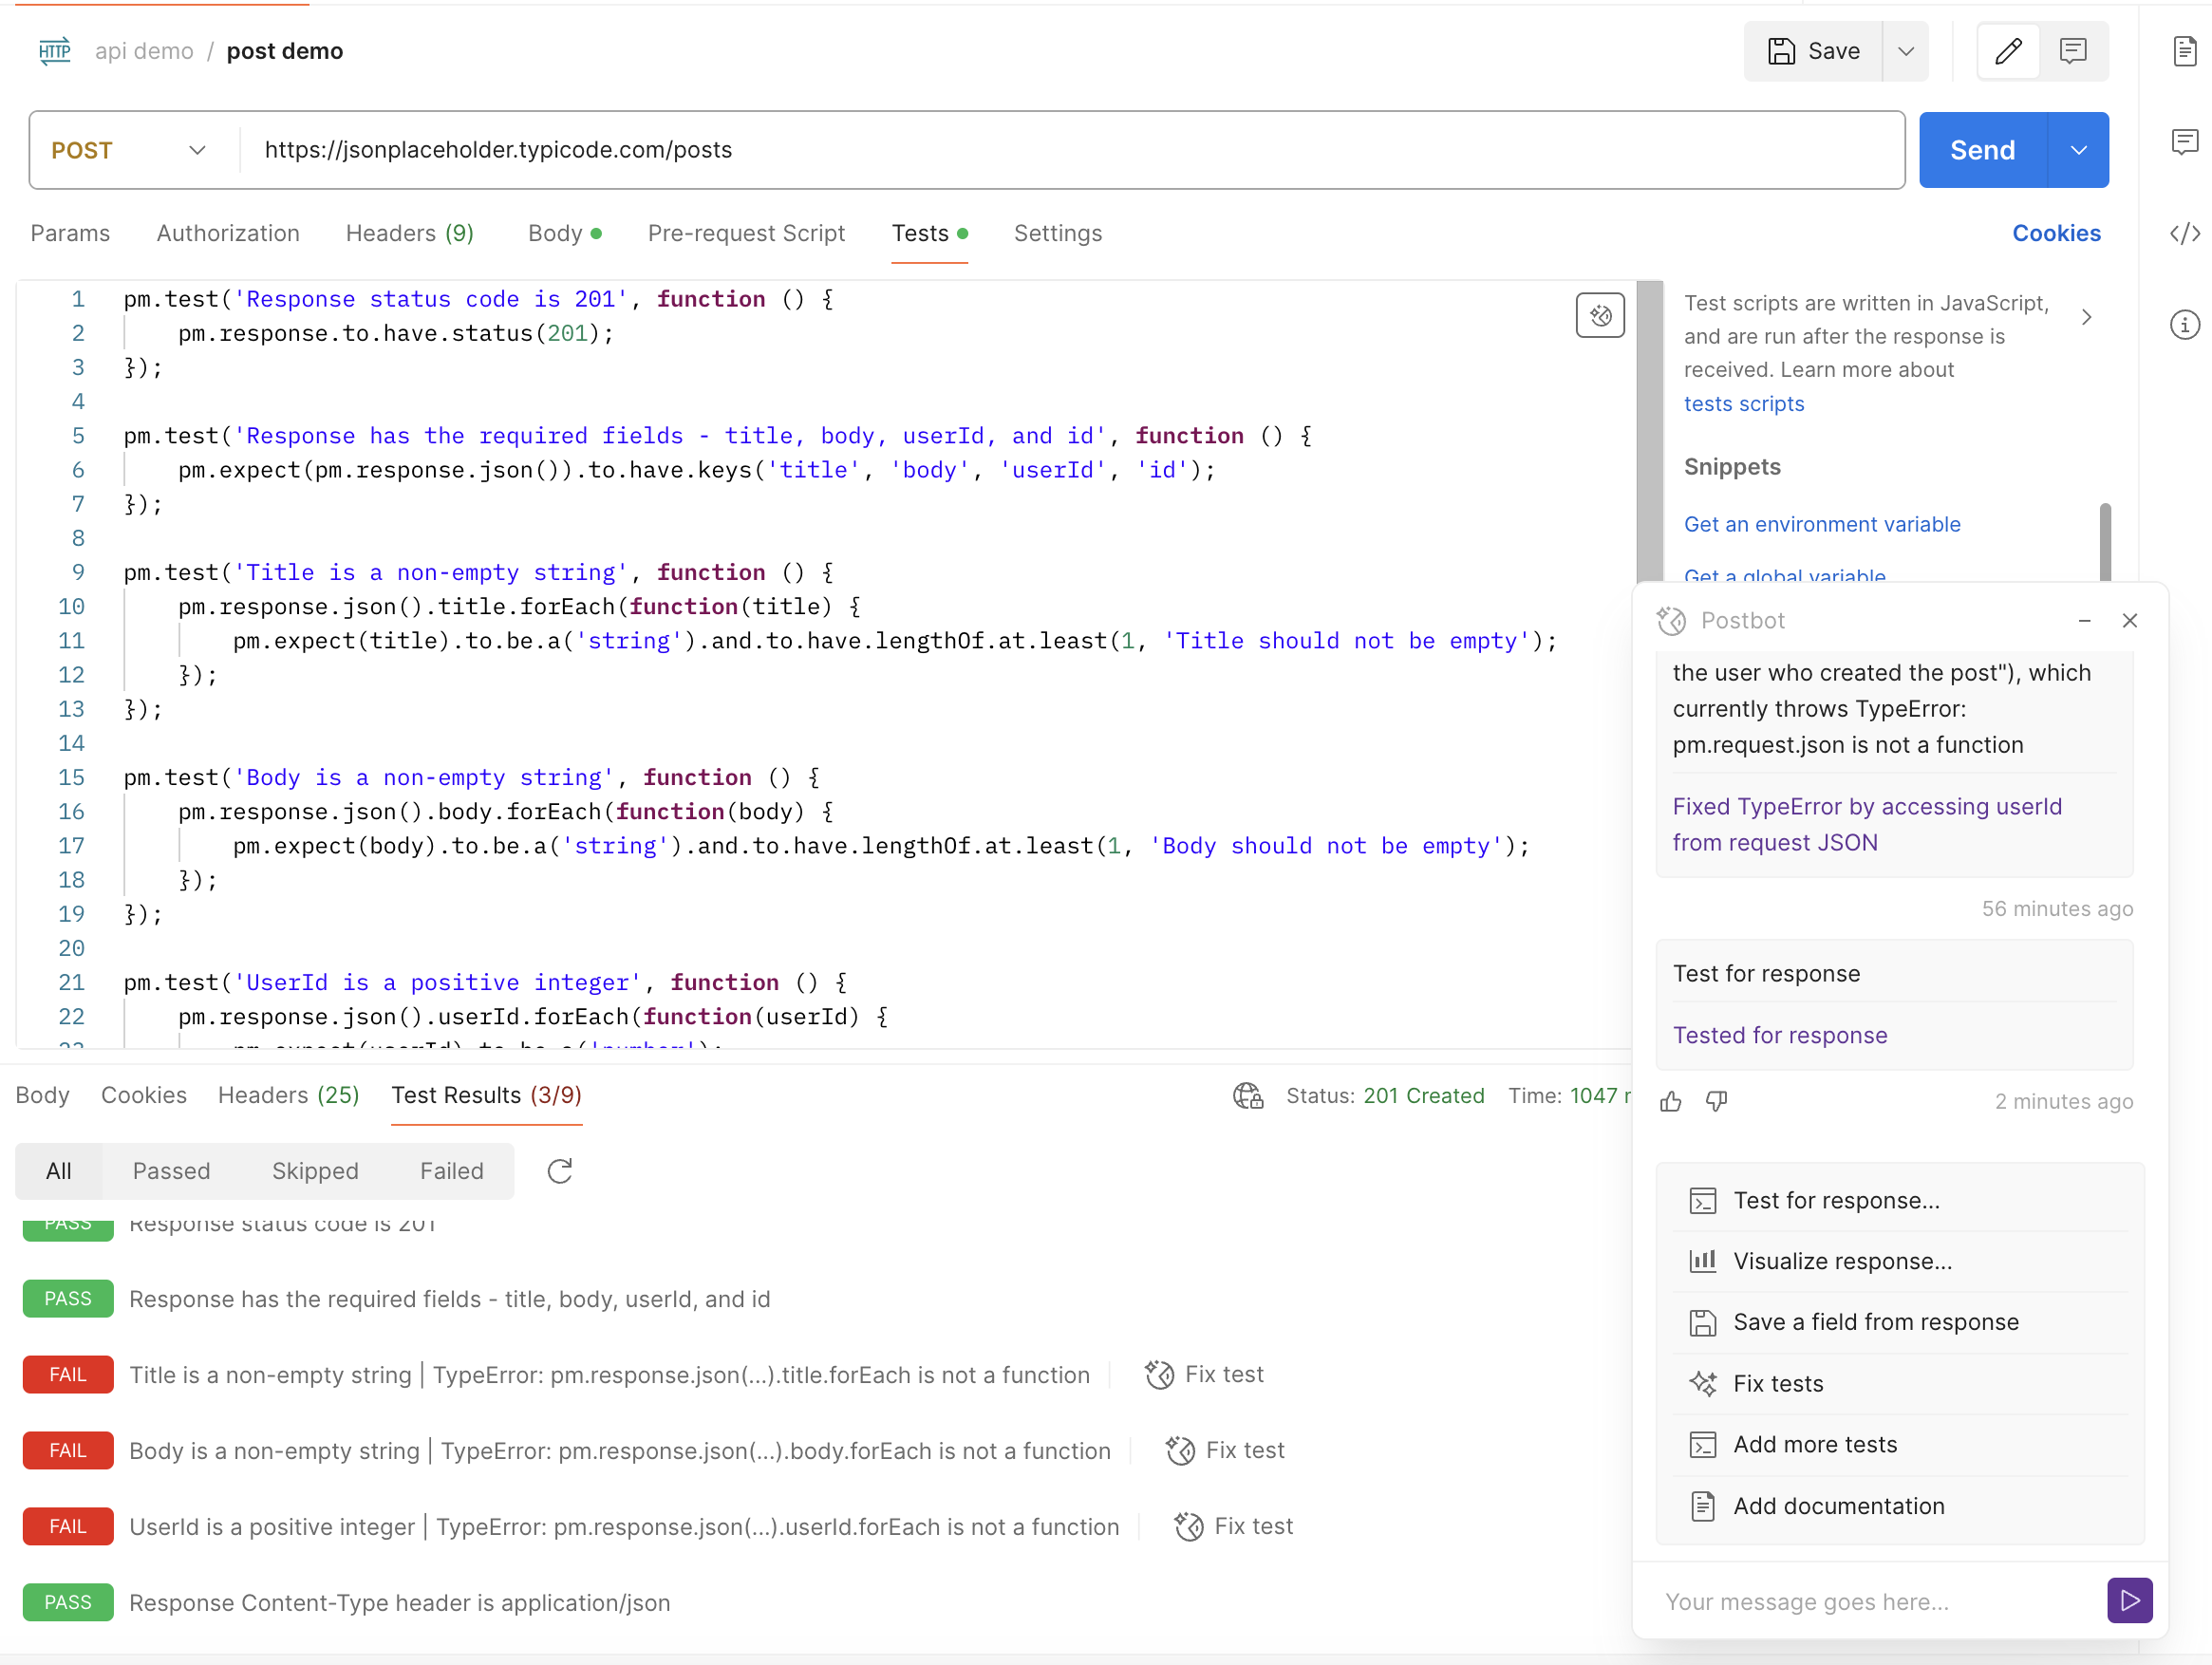
通过查看更新后的测试运行结果发现,更新后的用例大部分用例都没办法运行通过。
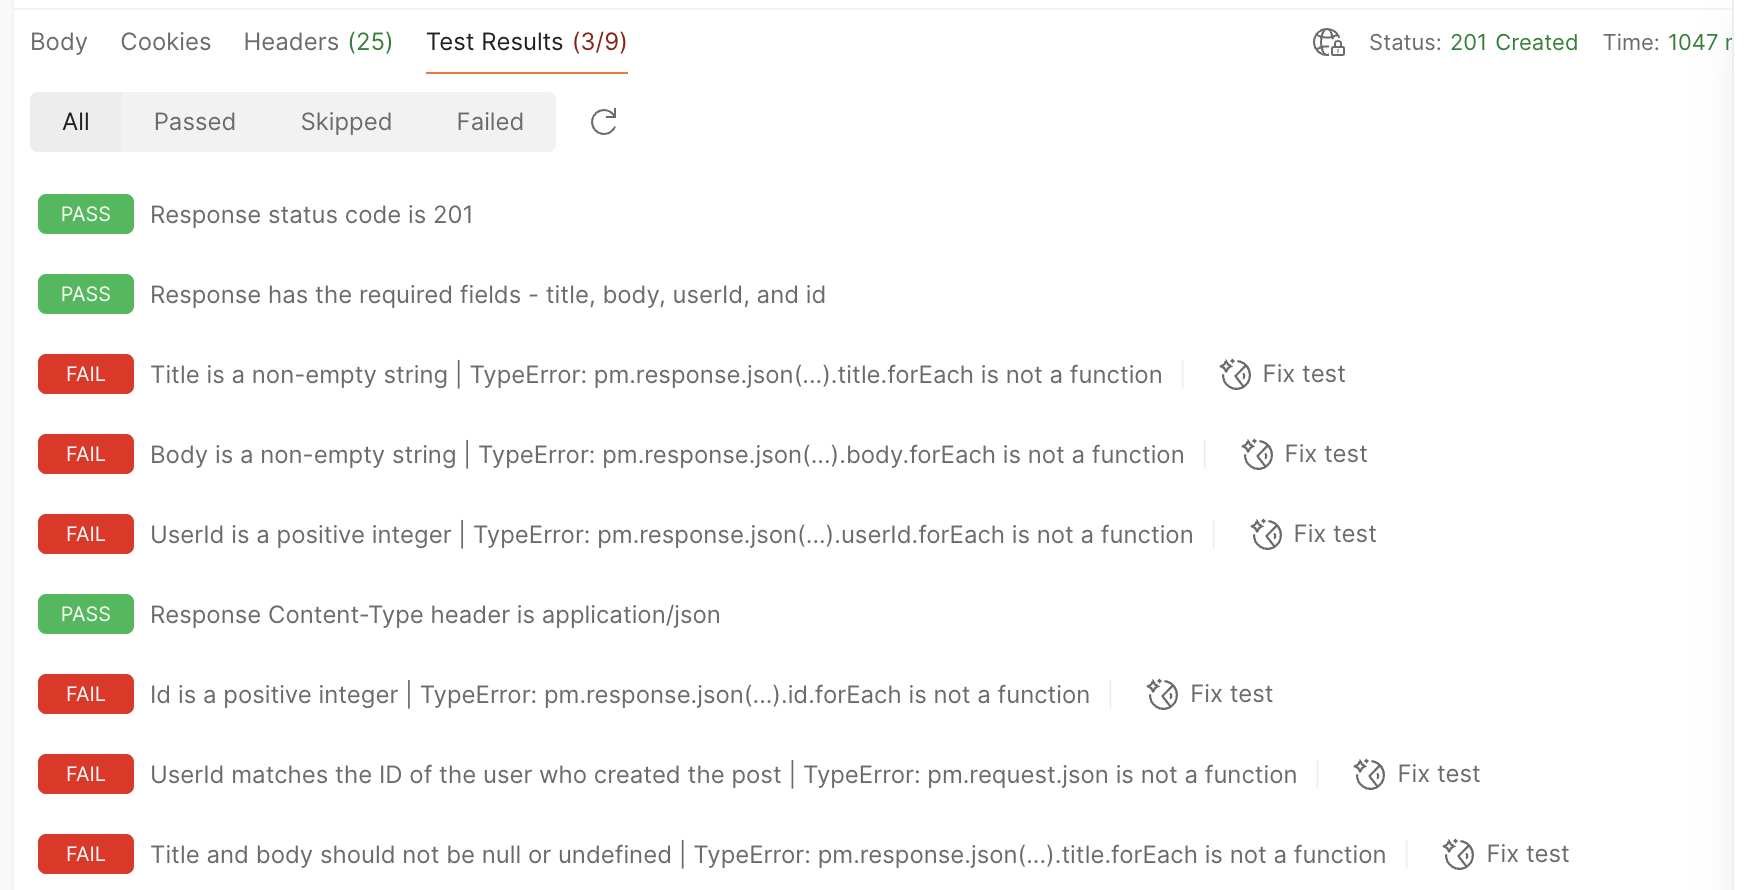
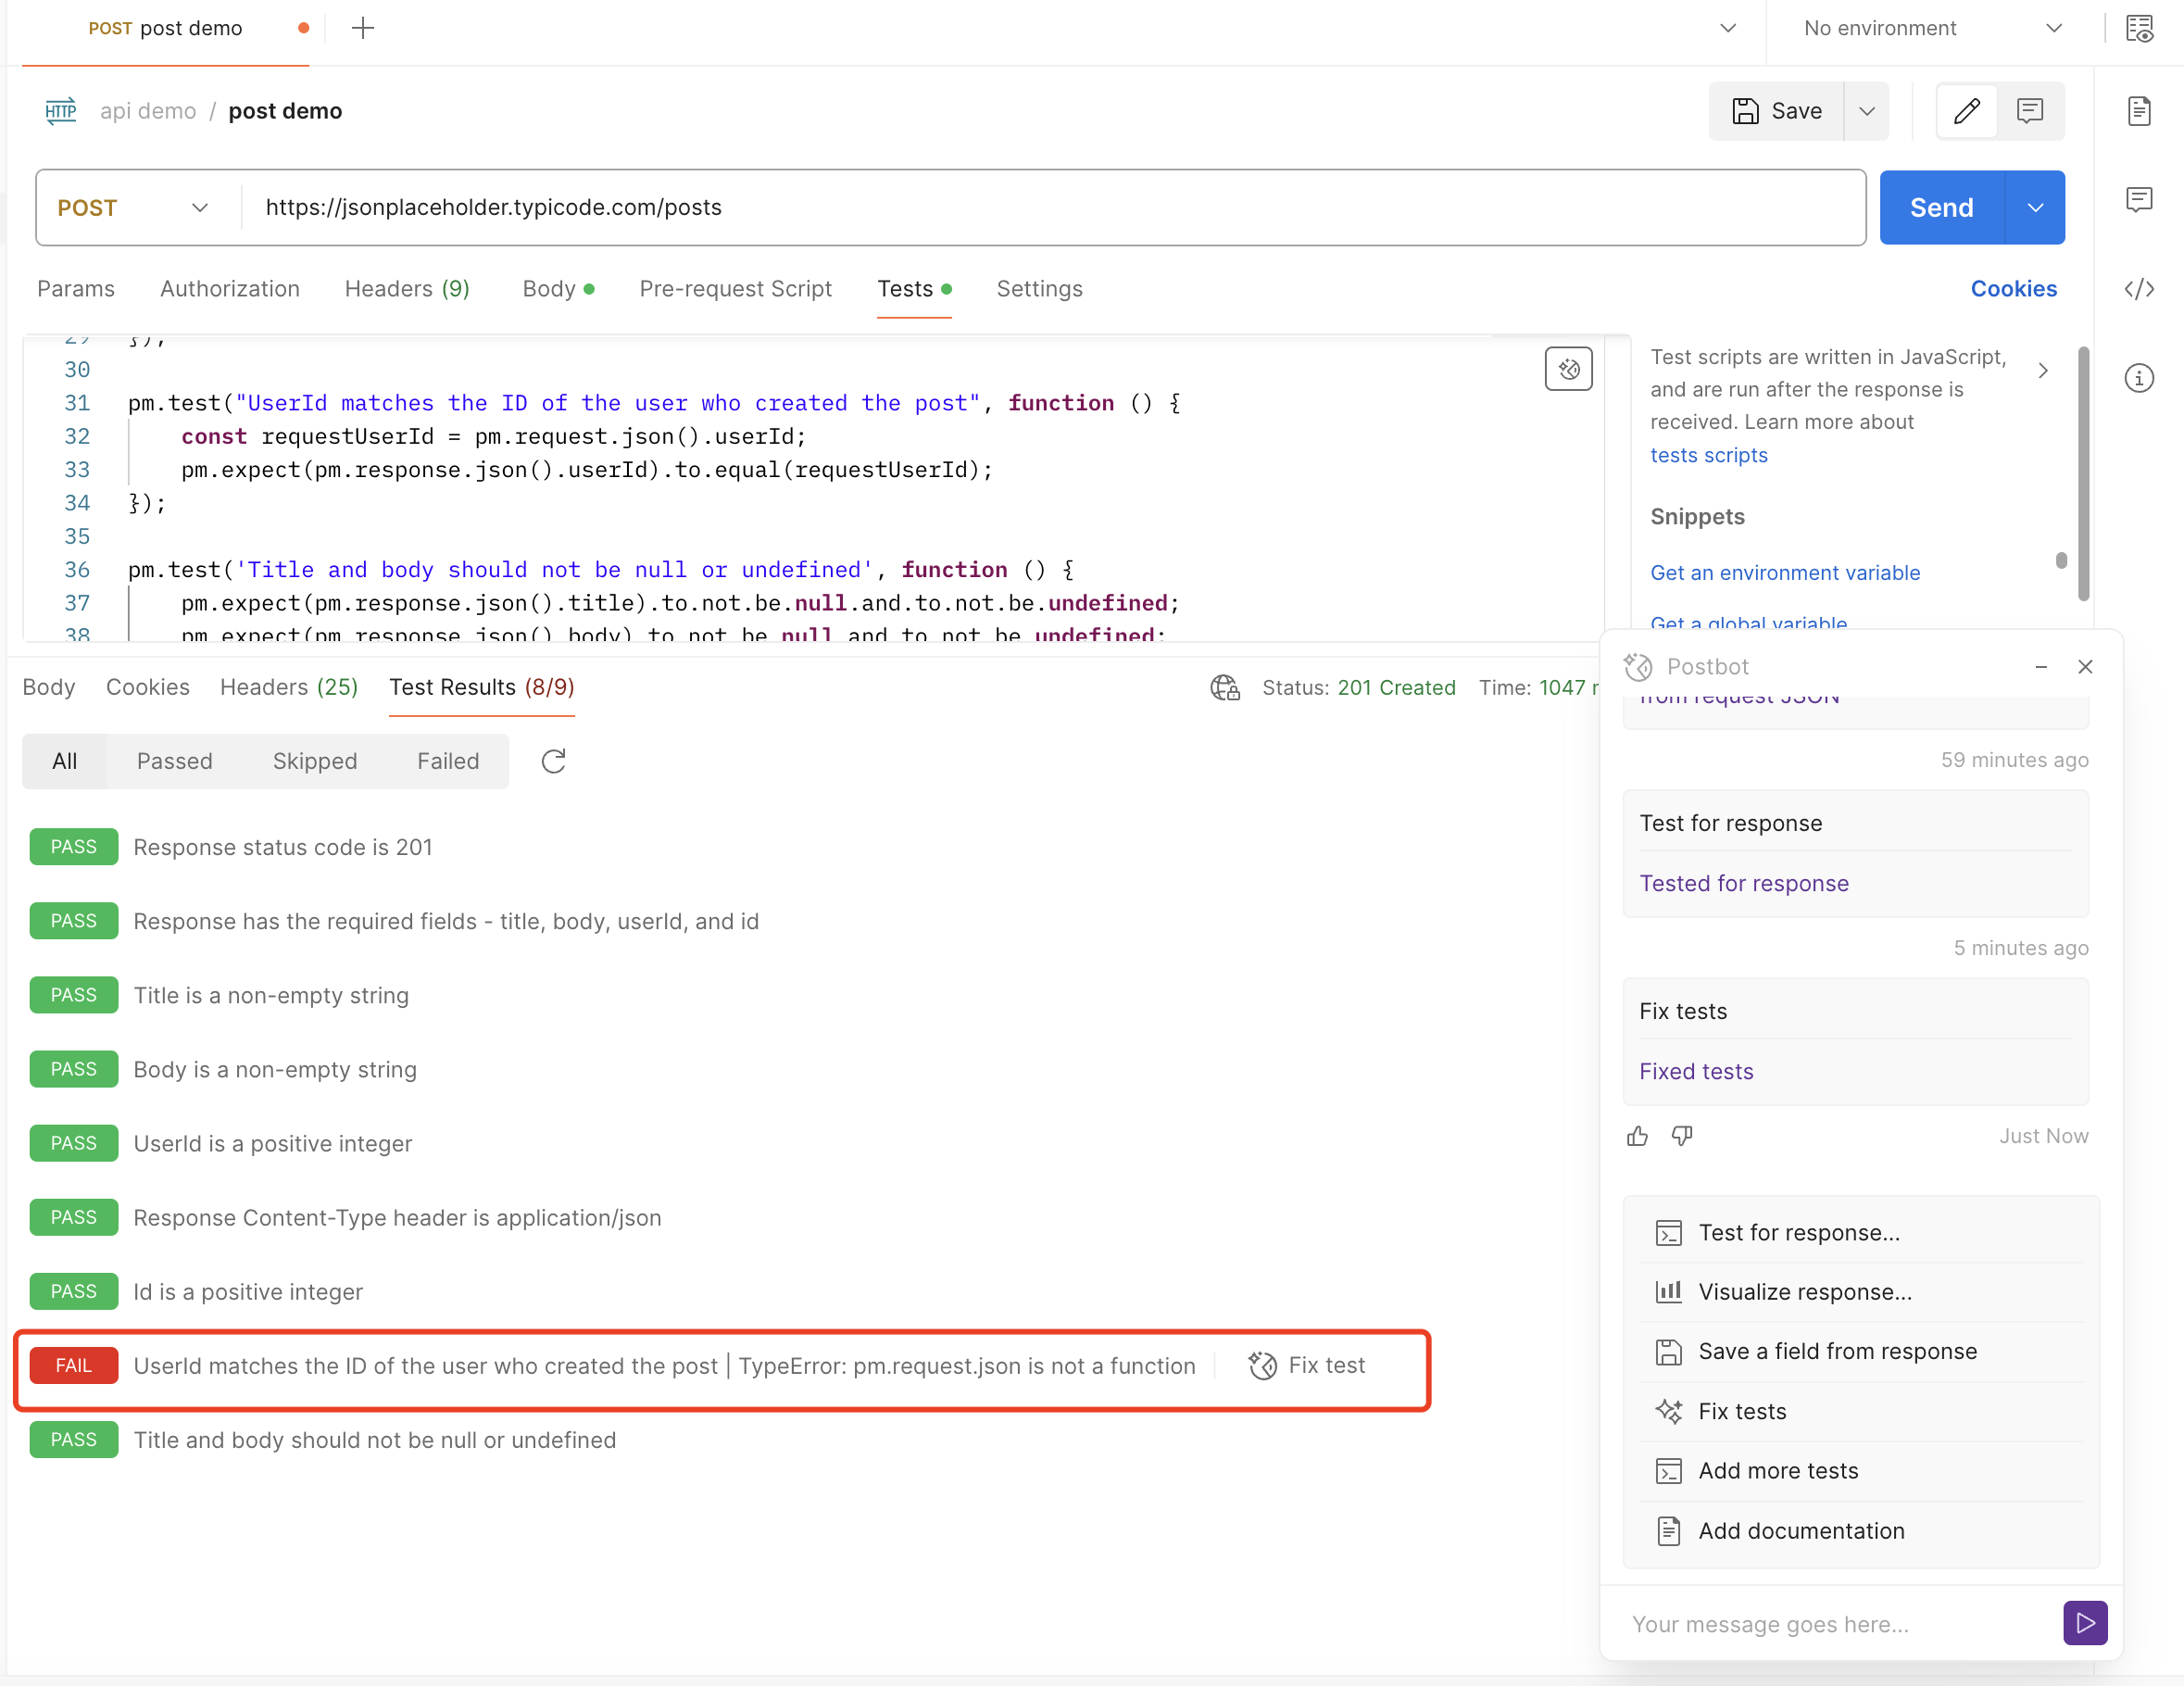
然后我尝试通过 Postbot 的“Fix test”去修复错误的用例,大部分的用例的都能运行通过,但还是出现了之前Add tests to this request指令生成且出现过的错误测试用例。
另外点击 Postbot 的“Fix test”去修复Test for response指令生成的用例是会将大部分用例都更新为Add tests to this request指令生成的测试用例
不知道Add tests to this request和Test for response两个指令的差异在哪里?
试用Visualize response
在 Postbot 界面上点击Visualize response后,需要选择生成的格式,格式可以选择表格/折线图/条形图,我这里选择为表格,然后 Postbot 会在 request 请求之后的结果页面展示 response 的实例化表格样式。
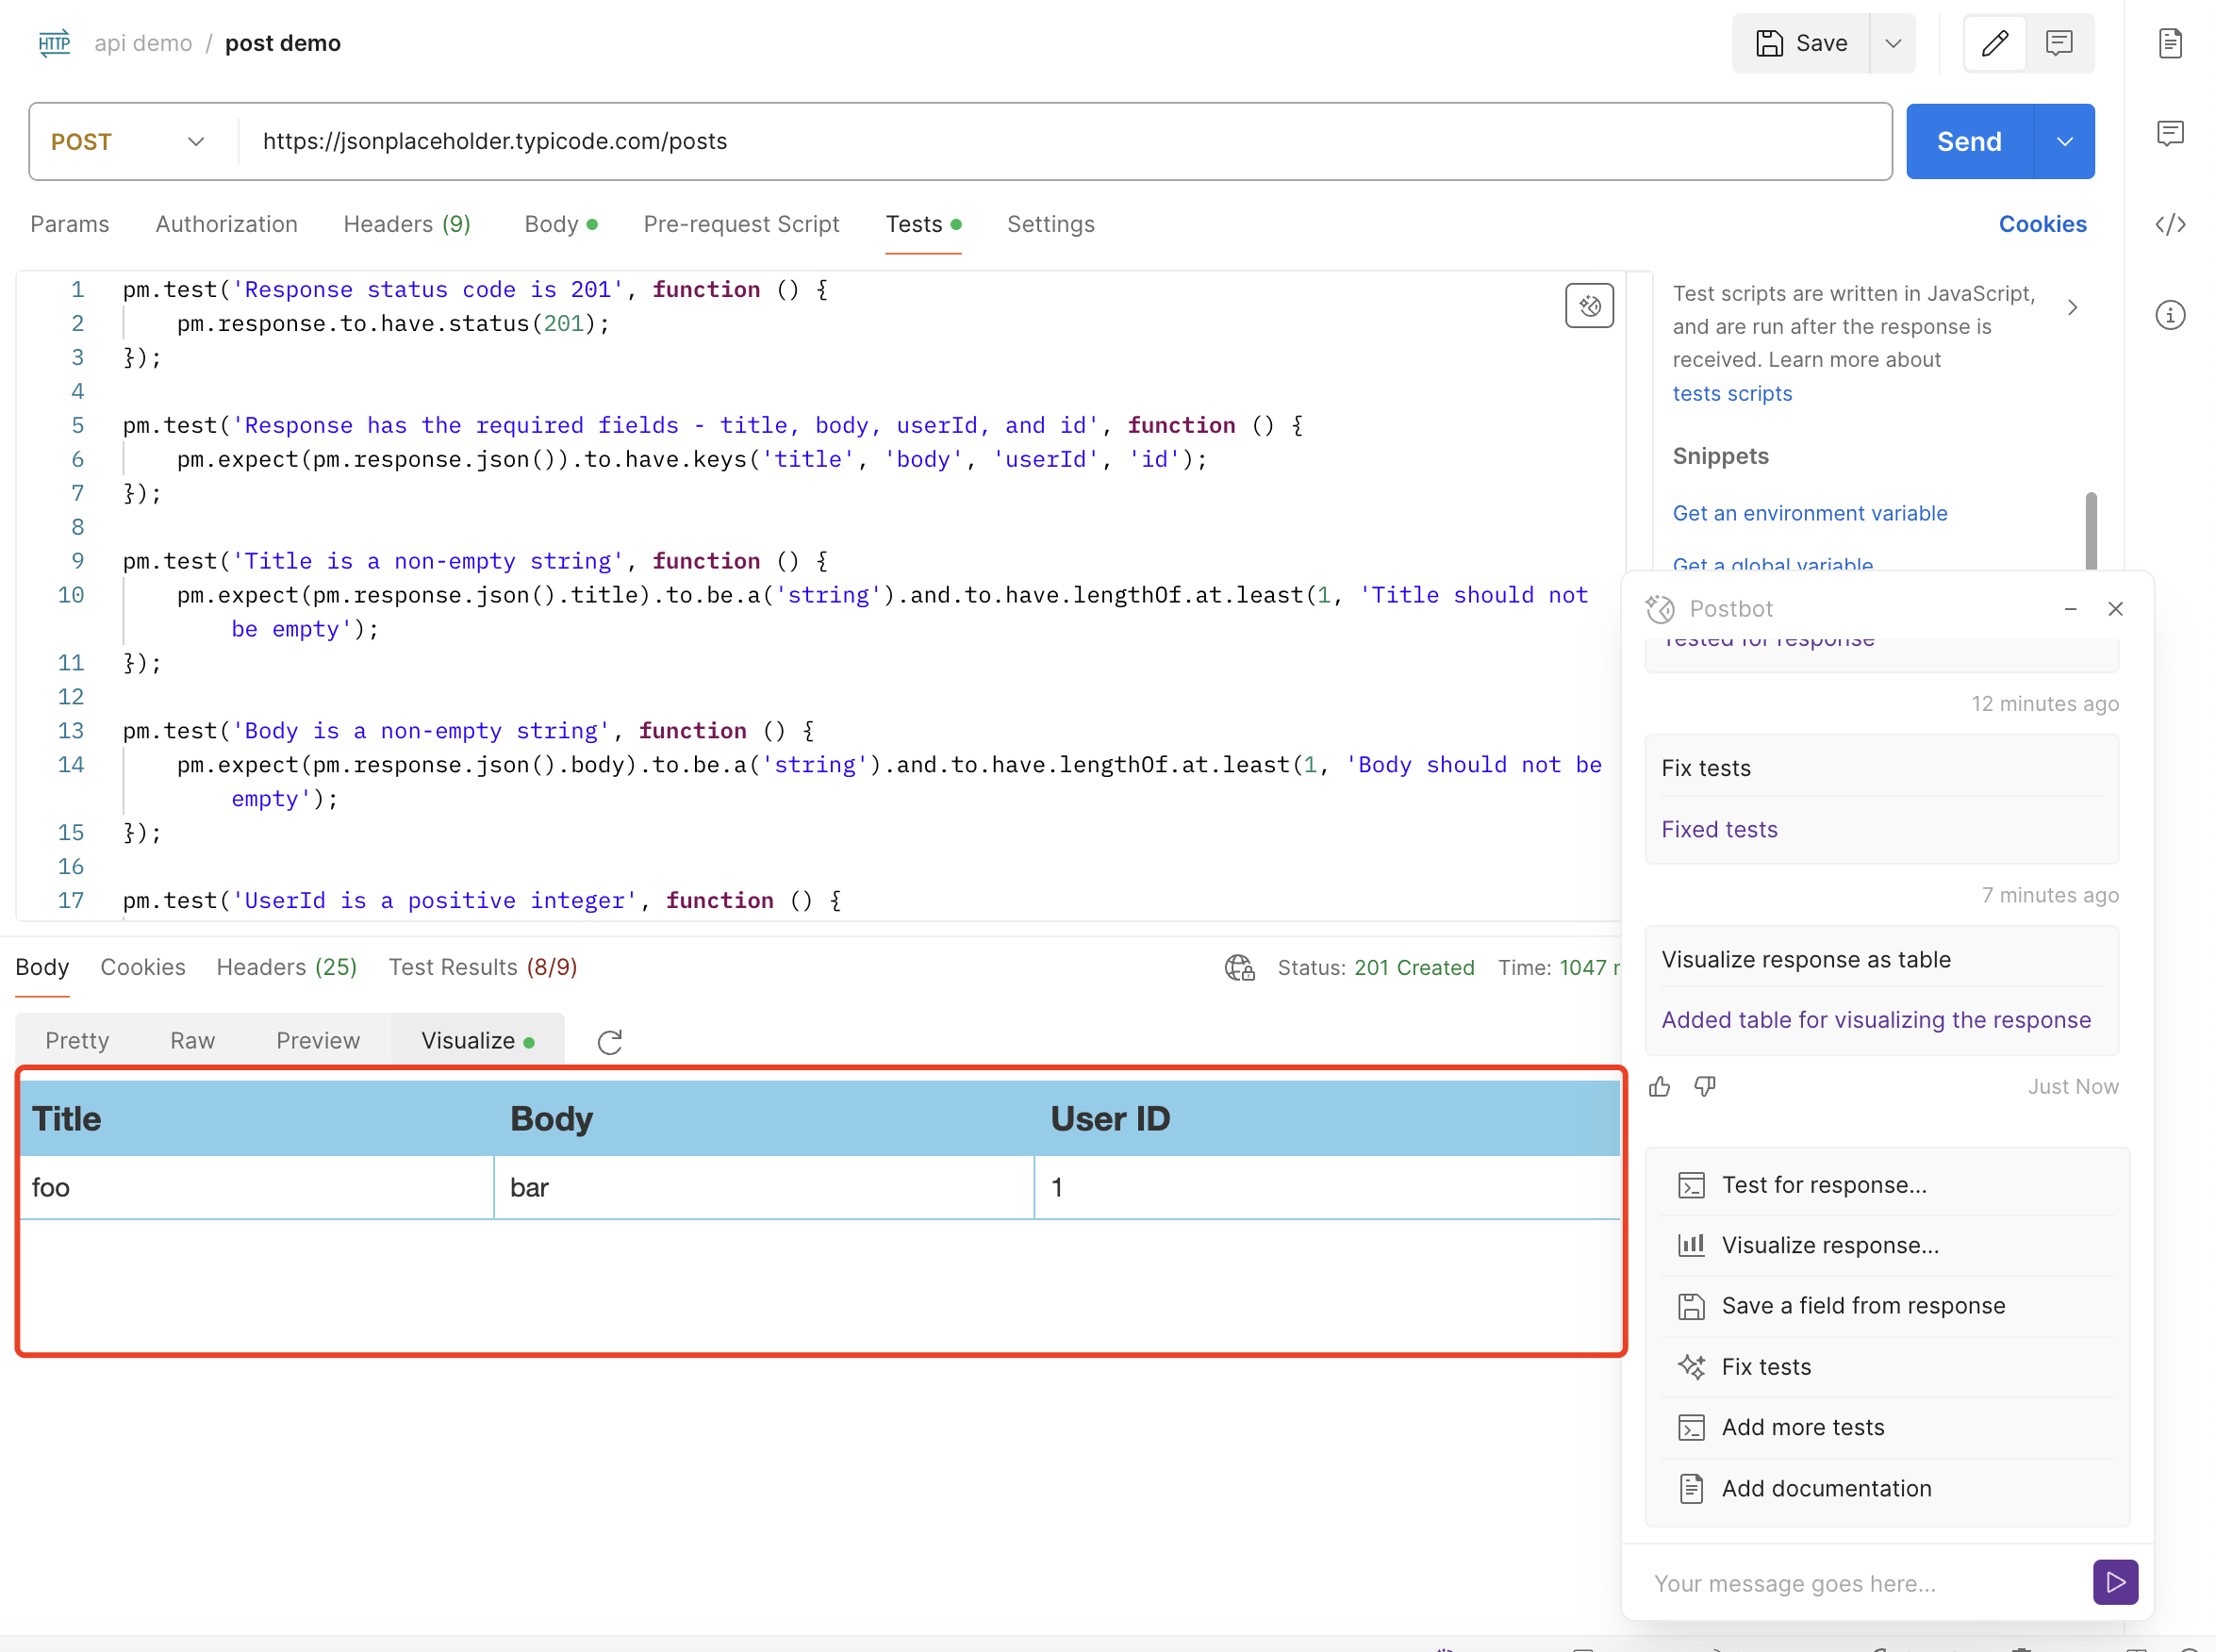
这个 response 的表格实例化展示是通过在 tests 下生成脚本实现的,具体的脚本如下:
var template = `
<style type="text/css">
    .tftable {font-size:14px;color:#333333;width:100%;border-width: 1px;border-color: #87ceeb;border-collapse: collapse;}
    .tftable th {font-size:18px;background-color:#87ceeb;border-width: 1px;padding: 8px;border-style: solid;border-color: #87ceeb;text-align:left;}
    .tftable tr {background-color:#ffffff;}
    .tftable td {font-size:14px;border-width: 1px;padding: 8px;border-style: solid;border-color: #87ceeb;}
    .tftable tr:hover {background-color:#e0ffff;}
</style>

<table class="tftable" border="1">
    <tr>
        <th>Title</th>
        <th>Body</th>
        <th>User ID</th>
        <th>ID</th>
    </tr>
    <tr>
        <td>{{response.title}}</td>
        <td>{{response.body}}</td>
        <td>{{response.userId}}</td>
        <td>{{response.id}}</td>
    </tr>
</table>
`;

function constructVisualizerPayload() {
    return {response: pm.response.json()}
}
pm.visualizer.set(template, constructVisualizerPayload());
目前没发现Visualize response这个功能对 API 测试的帮助在哪里。
使用Save a field from response
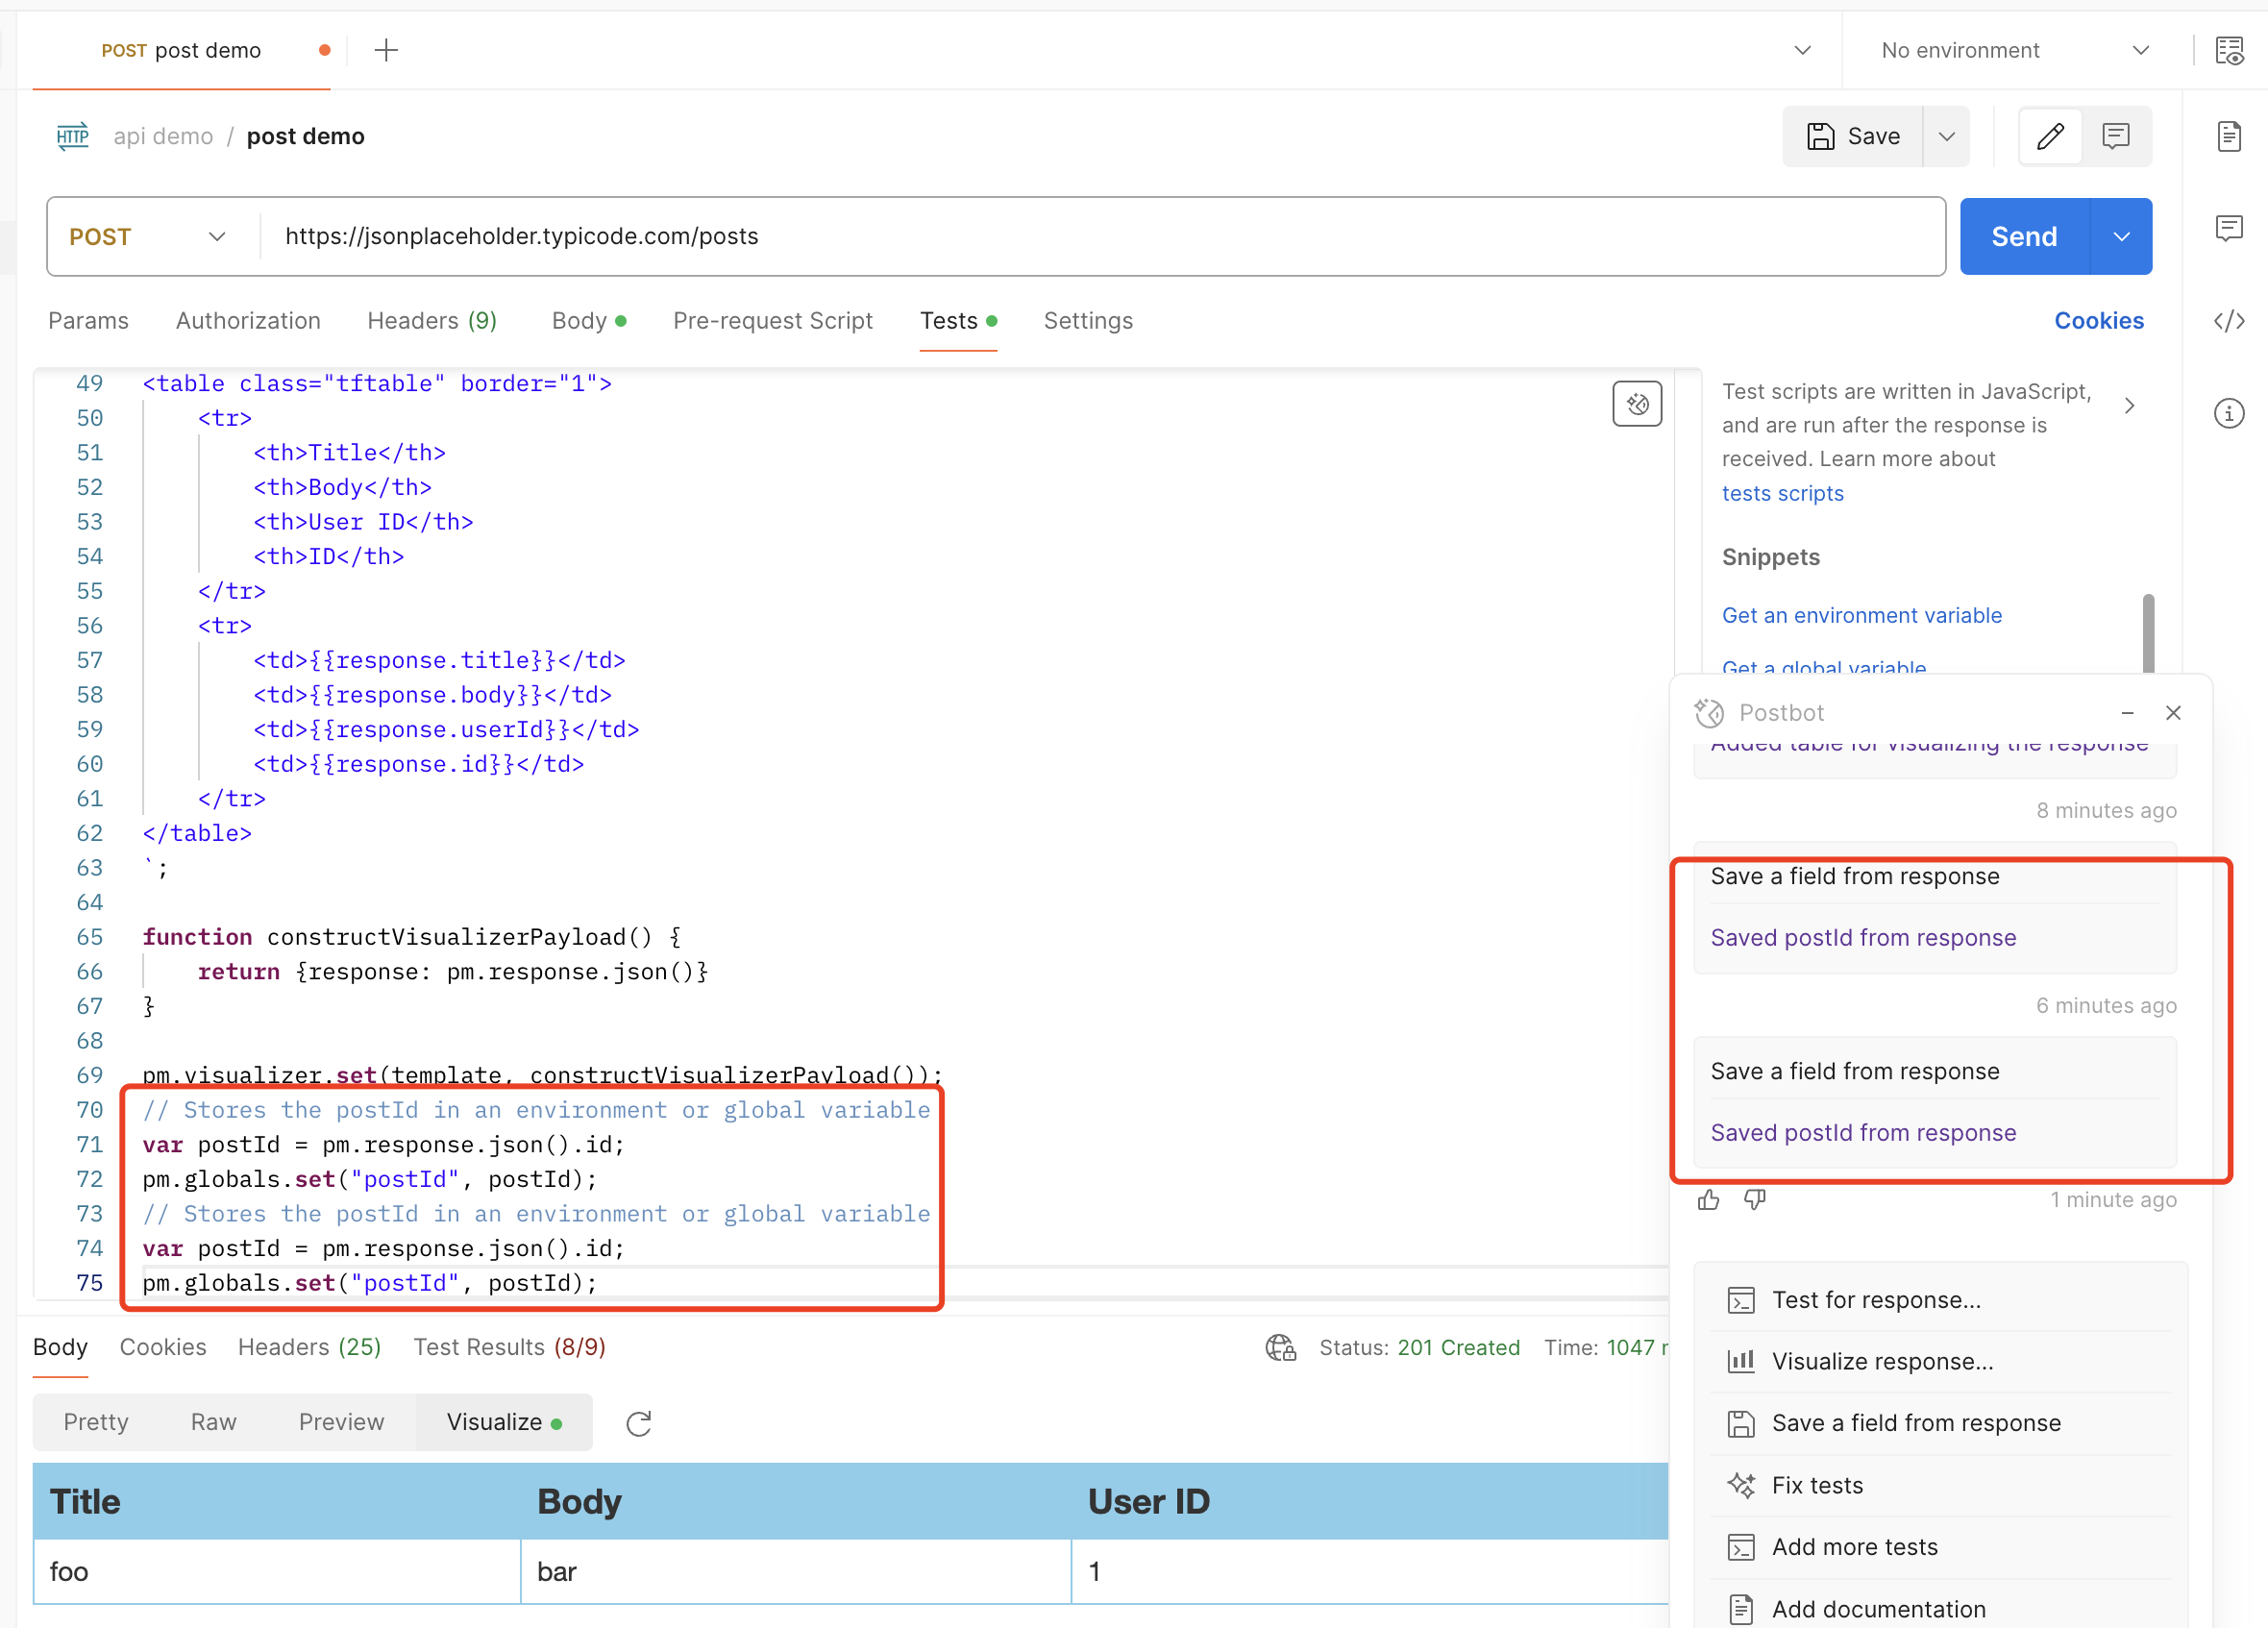
在 Postbot 界面上点击Save a field from response后,Postbot 会生成一个测试脚本脚本来将 response 中的 id 存储为环境变量,具体生成代码如下:
// Stores the postId in an environment or global variable
var postId = pm.response.json().id;
pm.globals.set("postId", postId);
然后我再次点击 Postbot 的Save a field from response指令,发现 Postbot 还是会生成将 response 中的 id 存储为环境变量的测试脚本,而不是生成存储 response 中的 其他字段存储为环境变量的测试脚本
试用Add documentation
在 Postbot 界面上点击使用Add documentation指令后,Postbot 会在 postman 界面右侧生成一个非常详细的接口文档,如下图所示
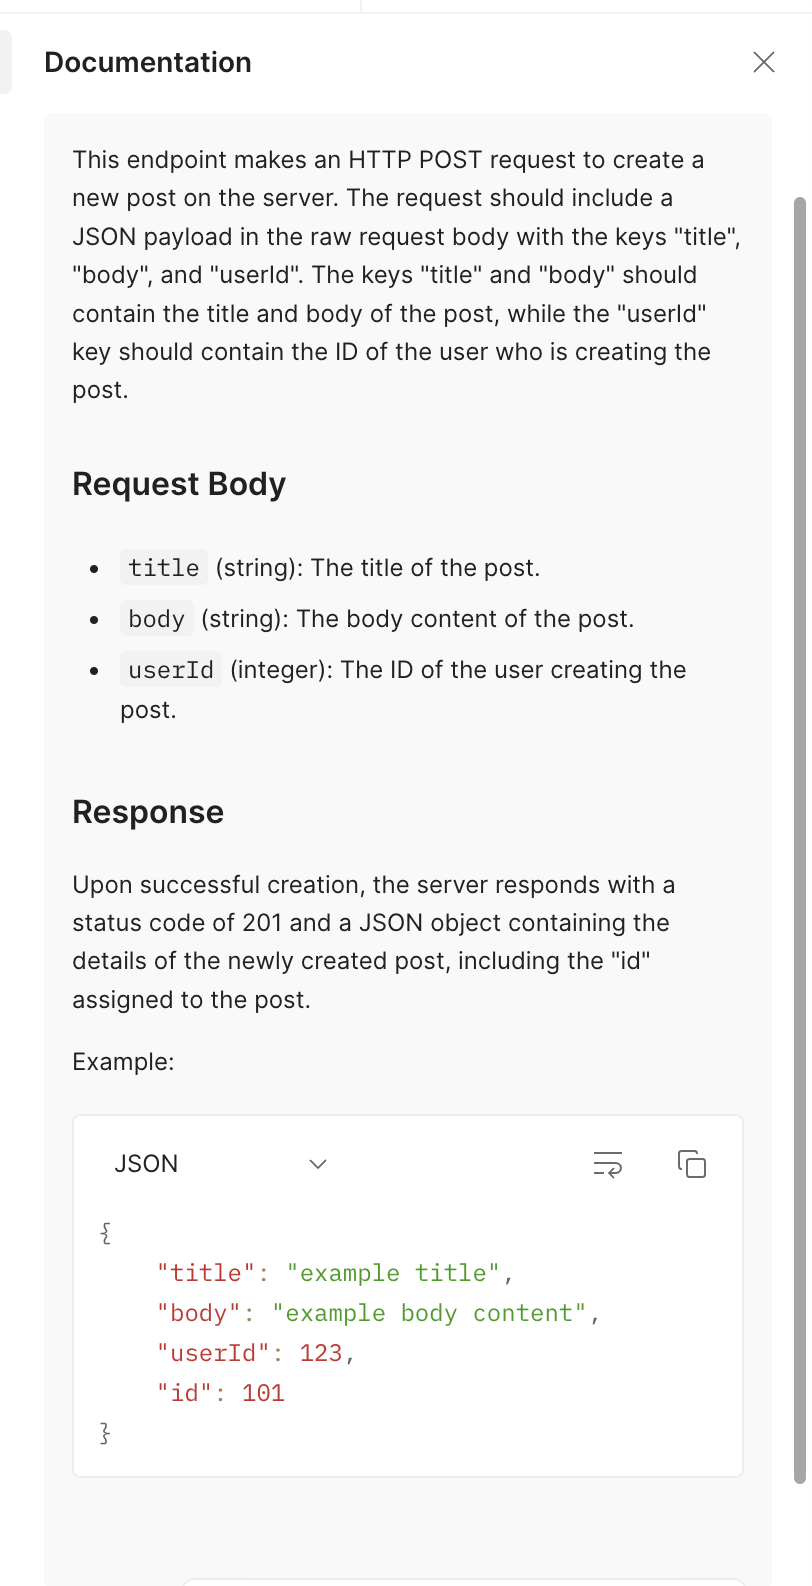
接口文档上描述了接口的请求信息,request 字段定义,response 返回示例等非常详细的接口相关信息。
3.关于分享我的想法
通过试用 postman 提供的 AI Assistant Postbot 工具,Postbot 提供的针对 request 和 response 添加测试用例功能还是比较方便的,能快速生成大部分部分可用的接口 response 验证测试脚本,测试脚本覆盖率也比较高,虽然生成的测试脚本中出现的错误的脚本,也需要人工进行修复,但是通过 Postbot 能快速生成测试脚本也能提升接口测试的效率。
另外 Postbot 的接口文档生成也比较使用,开发人员在 postman 添加好 request 后,通过 Postbot 能快速生成比较详细的接口文档,一定程度上能提升研发效率和接口文档质量。
但是 Postbot 目前好像还不支持自定义指令,我想尝试通过 Postbot 针对 demo 接口输出不同类型的测试用例,如空 request body 接口测试用例,不合法 request body 接口测试用例等,Postbot 没办法给出正确响应。
关于活动
30 天 AI 测试挑战活动是 Ministry 测试社区发起的活动,上一次我了解这个社区是关于他们发起的 30 天敏捷测试的活动。
社区官网:https://www.ministryoftesting.com
活动链接:https://www.ministryoftesting.com/events/30-days-of-ai-in-testing
挑战:
- 第一天:介绍你自己以及你对人工智能的兴趣
- 第二天:阅读有关测试中的人工智能的介绍性文章并分享
- 第三天:AI 在测试中的多种应用方式
- 第四天:观看有关测试中人工智能的任何问题视频并分享主要收获
- 第五天:确定一个测试中的人工智能案例研究,并分享你的发现
- 第六天:探索并分享对 AI 测试工具的见解
- 第七天:研究并分享提示词工程技术
- 第八天:制作详细的 Prompt 来支持测试活动
- 第九天:评估提示词质量并努力加以改进
- 第十天:批判性分析人工智能生成的测试
- 第十一天:使用 AI 生成测试数据并评估其功效
- 第十二天:评估你是否信任 AI 支持测试并分享你的想法
- 第十三天:开发你的测试方法并成为 AI 测试的先行者
推荐阅读
- 使用 Bruno 进行接口自动化测试快速开启教程系列
- 使用 Postman 进行接口自动化测试快速开启教程系列
- 使用 Pytest 进行接口自动化测试快速开启教程系列
- 使用 SuperTest 进行接口自动化测试快速开启教程系列
- 使用 Rest Assured 进行接口自动化测试快速开启教程系列
- 使用 Galting 进行性能测试快速开启教程系列
- 使用 K6 进行性能测试快速开启教程系列
欢迎关注软件测试同学的公众号“软件测试同学”,原创 QA 技术文章第一时间推送。