输出 html 报告
通过之前的 K6 的默认测试报告来看,K6 本身只能输出命令行的报告,没有图形化界面的测试报告。
如果我们想要生成图形化界面的测试报告,可以使用第三方提供的 K6 HTML Report Exporter v2 插件来生成 html 报告。
下面是使用 K6 HTML Report Exporter v2 插件来生成 html 报告的步骤:
- 在测试脚本中引入 K6 HTML Report Exporter v2 插件
import { htmlReport } from "https://raw.githubusercontent.com/benc-uk/k6-reporter/main/dist/bundle.js";
- 在测试脚本中配置 K6 HTML Report Exporter v2 插件
export function handleSummary(data) {
  return {
    "summary.html": htmlReport(data),
  };
}
- 完整的测试脚本示例
import { check } from 'k6';
import http from 'k6/http';
import { htmlReport } from "https://raw.githubusercontent.com/benc-uk/k6-reporter/main/dist/bundle.js";


export default function () {
  const res = http.get('https://httpbin.test.k6.io');
  check(res, {
    'HTTP response code is status 200': (r) => r.status === 200,
  });
}

export function handleSummary(data) {
  return {
    "summary.html": htmlReport(data),
  };
}
- 使用 k6 运行测试脚本即可在项目根目录生成名称为 summary.html 的 html 报告
- 打开 summary.html 报告即可查看 html 报告。
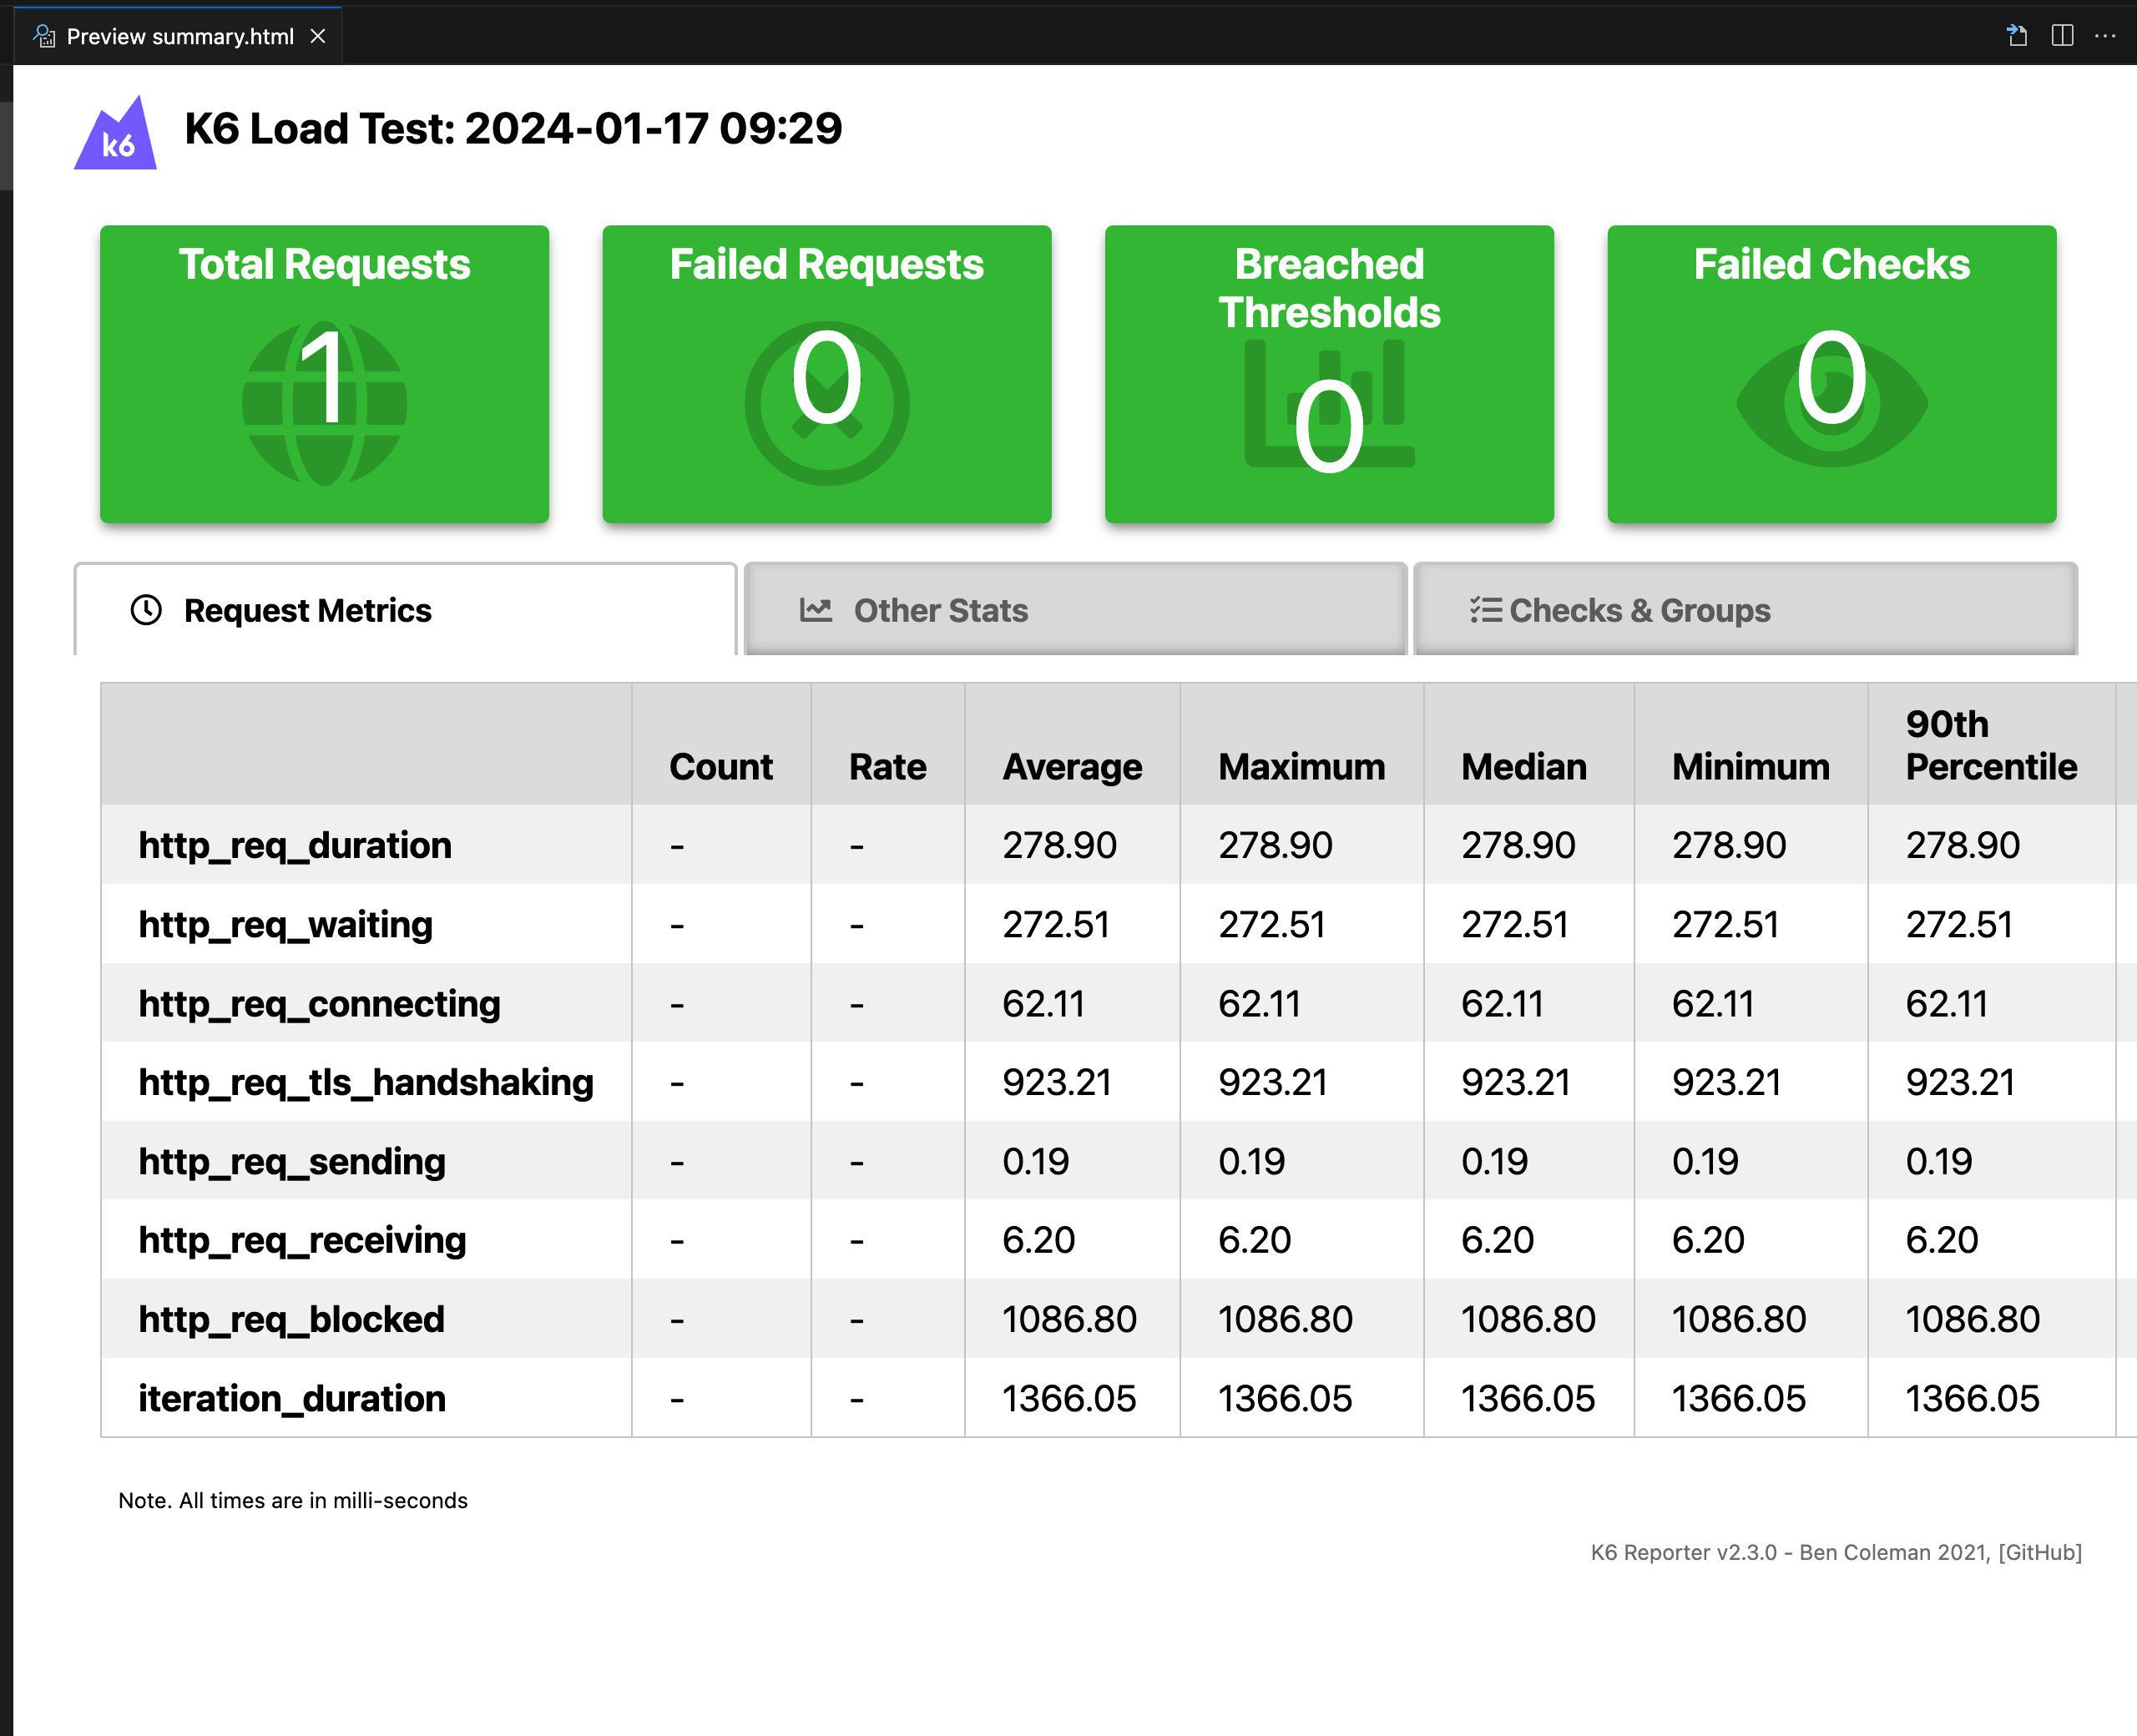
- 打开 summary.html 报告即可查看 html 报告。
更多关于 K6 HTML Report Exporter v2 插件的用法,请参考官方文档 https://github.com/benc-uk/k6-reporter[https://github.com/benc-uk/k6-reporter]
持续集成
接入 github action
以 github action 为例,其他 CI 工具类似
创建.github/workflows 目录:在你的 GitHub 仓库中,创建一个名为 .github/workflows 的目录。这将是存放 GitHub Actions 工作流程文件的地方。
创建工作流程文件:在.github/workflows 目录中创建一个 YAML 格式的工作流程文件,例如 k6.yml。
编辑 k6.yml 文件:将以下内容复制到文件中
name: K6 Performance Test
on: [push]
jobs:
  build:
    name: Run k6 test
    runs-on: ubuntu-latest
    steps:
      - name: Checkout
        uses: actions/checkout@v4
      - name: Run k6 local test
        uses: grafana/[email protected]
        with:
          filename: demo.js
          flags: --vus 50 --duration 10s
提交代码:将 k6.yml 文件添加到仓库中并提交。
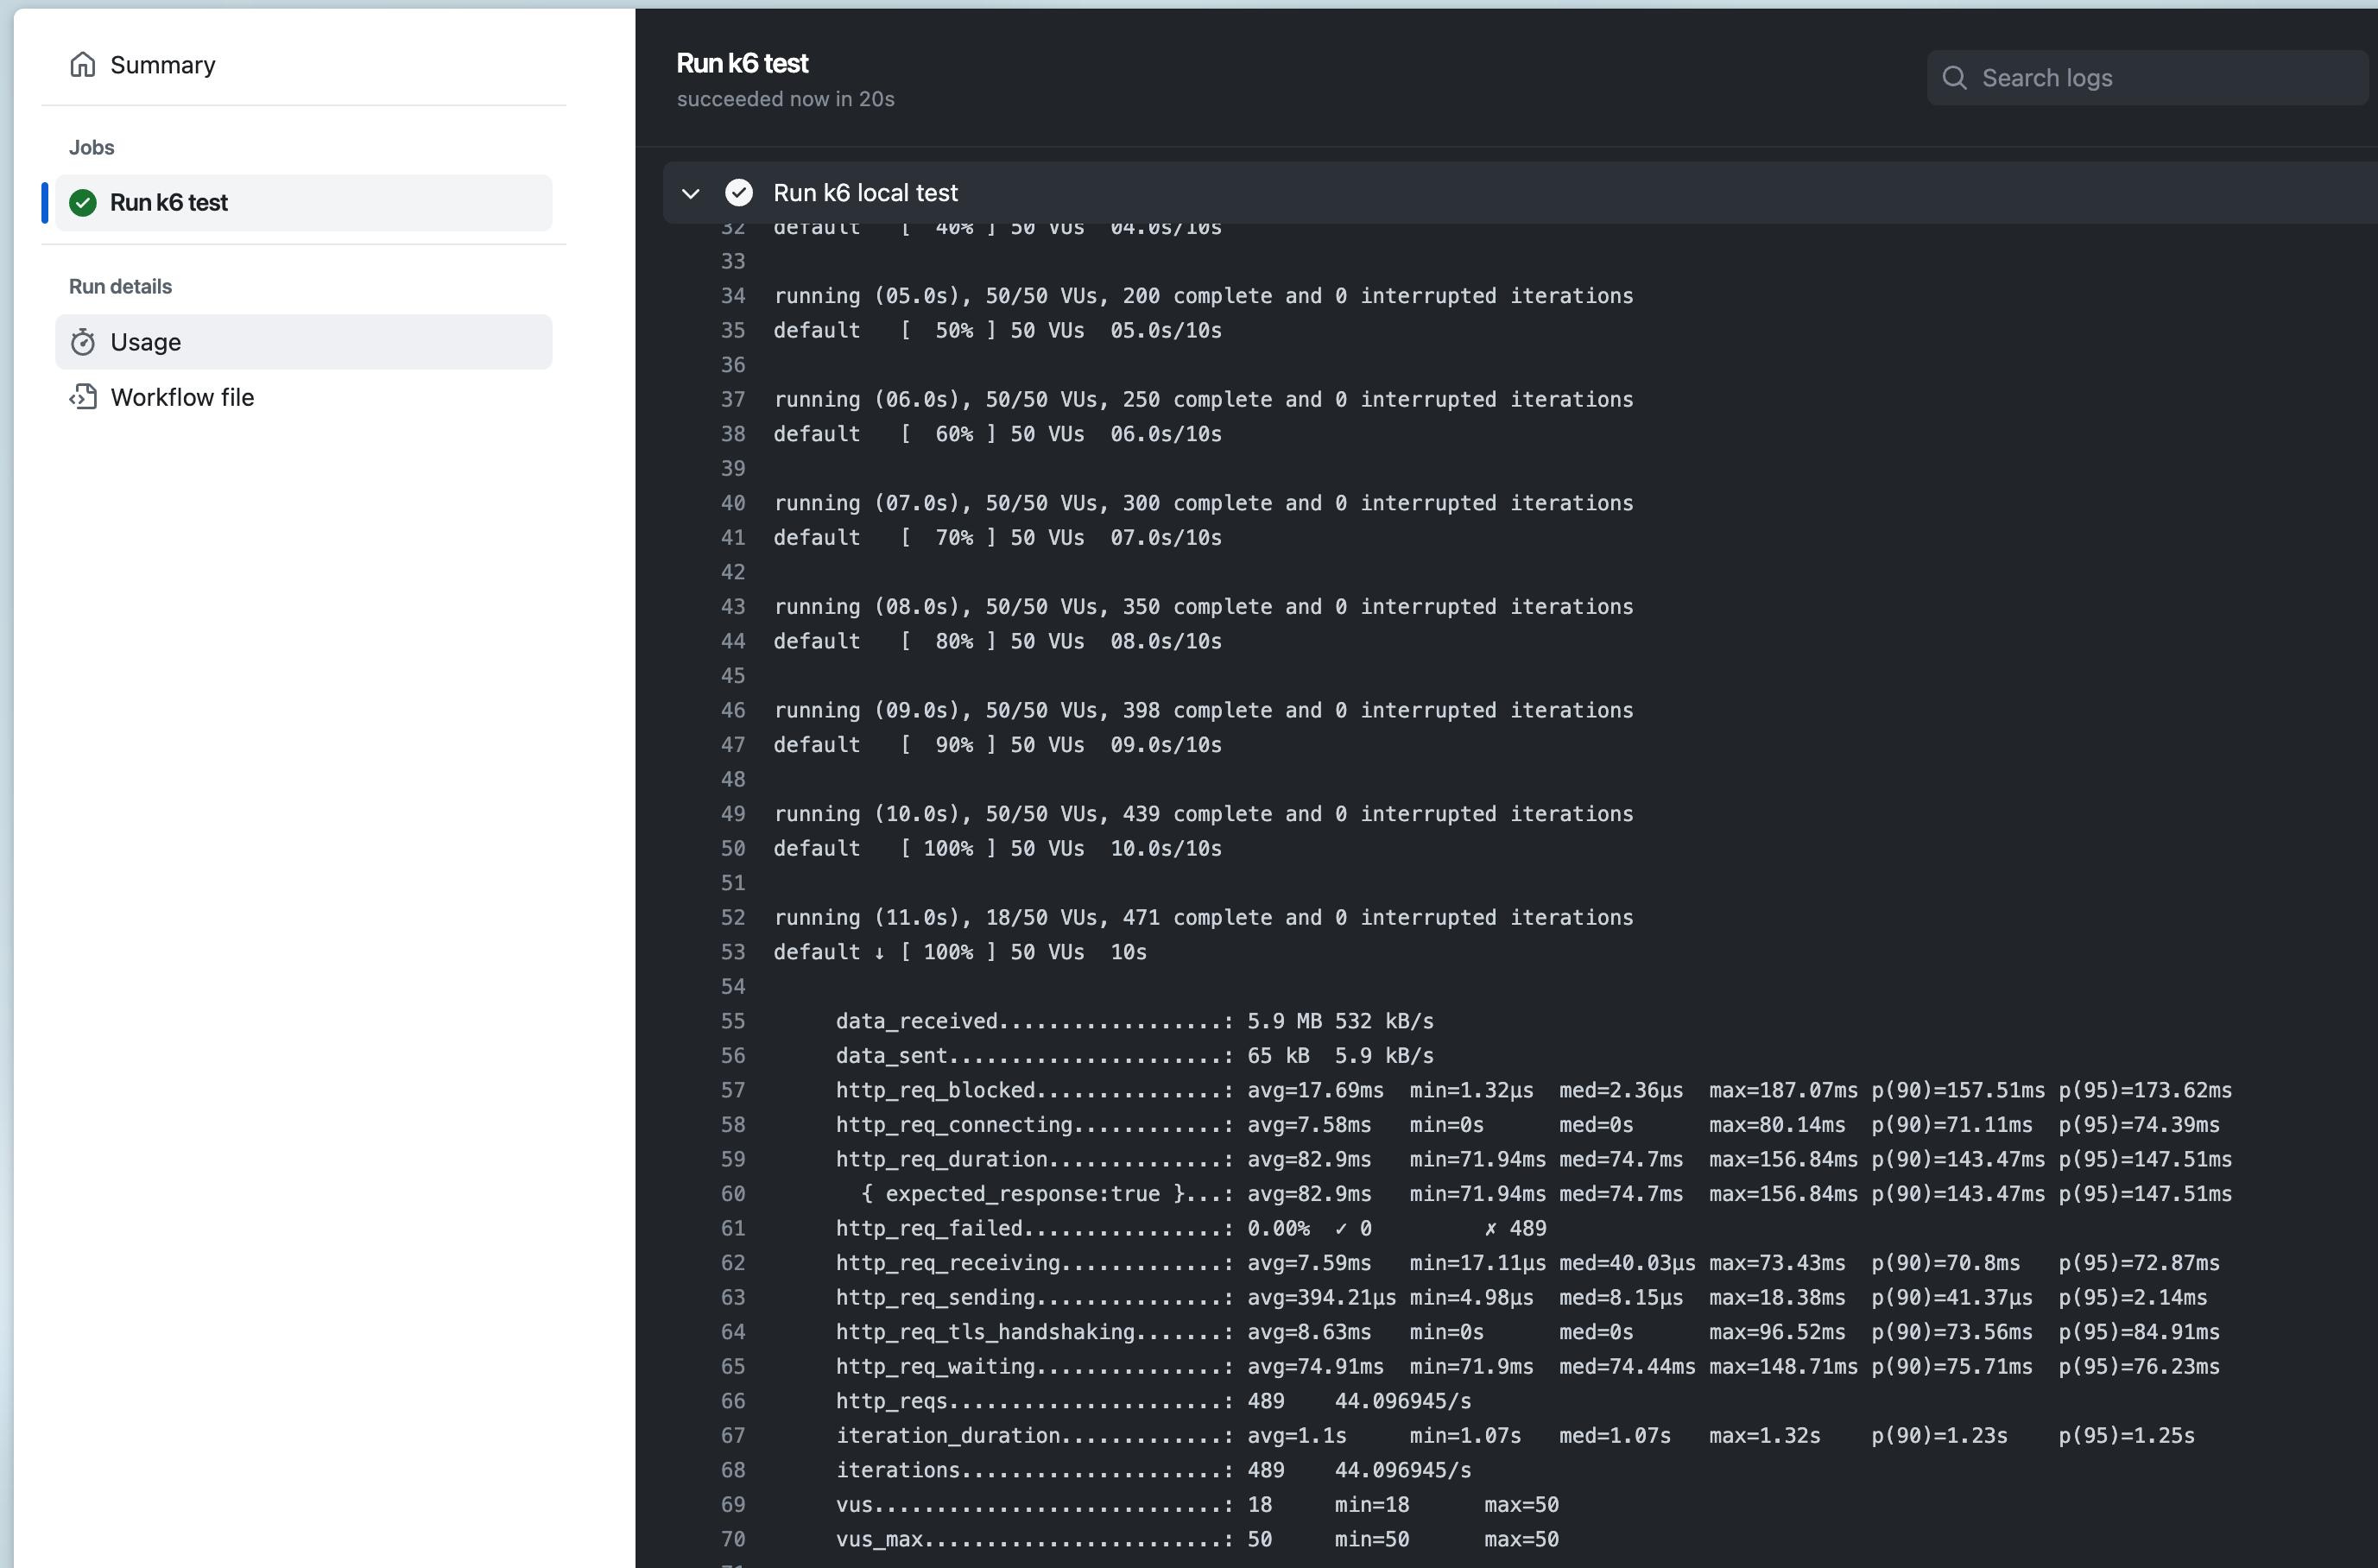
查看测试报告:在 GitHub 中,导航到你的仓库。单击上方的 Actions 选项卡,然后单击左侧的 K6 Performance Test 工作流。你应该会看到工作流正在运行,等待执行完成,就可以查看结果。
我们也通过 github action 输出 html 报告,先调整一下 k6.yml 文件
name: K6 Performance Test
on: [push]
jobs:
  build:
    name: Run k6 performance test
    runs-on: ubuntu-latest
    steps:
      - name: Checkout
        uses: actions/checkout@v4
      - name: Run k6 local test
        uses: grafana/[email protected]
        with:
          filename: demo.js
          flags: --vus 50 --duration 10s
      - name: Archive K6 performance test report
        uses: actions/upload-artifact@v3
        with:
          name: K6-performance-test-report
          path: summary.html
      - name: Upload K6 performance test report to GitHub
        uses: actions/upload-artifact@v3
        with:
          name: K6-performance-test-report
          path: summary.html
- 提交代码:将 k6.yml 文件添加到仓库中并提交。
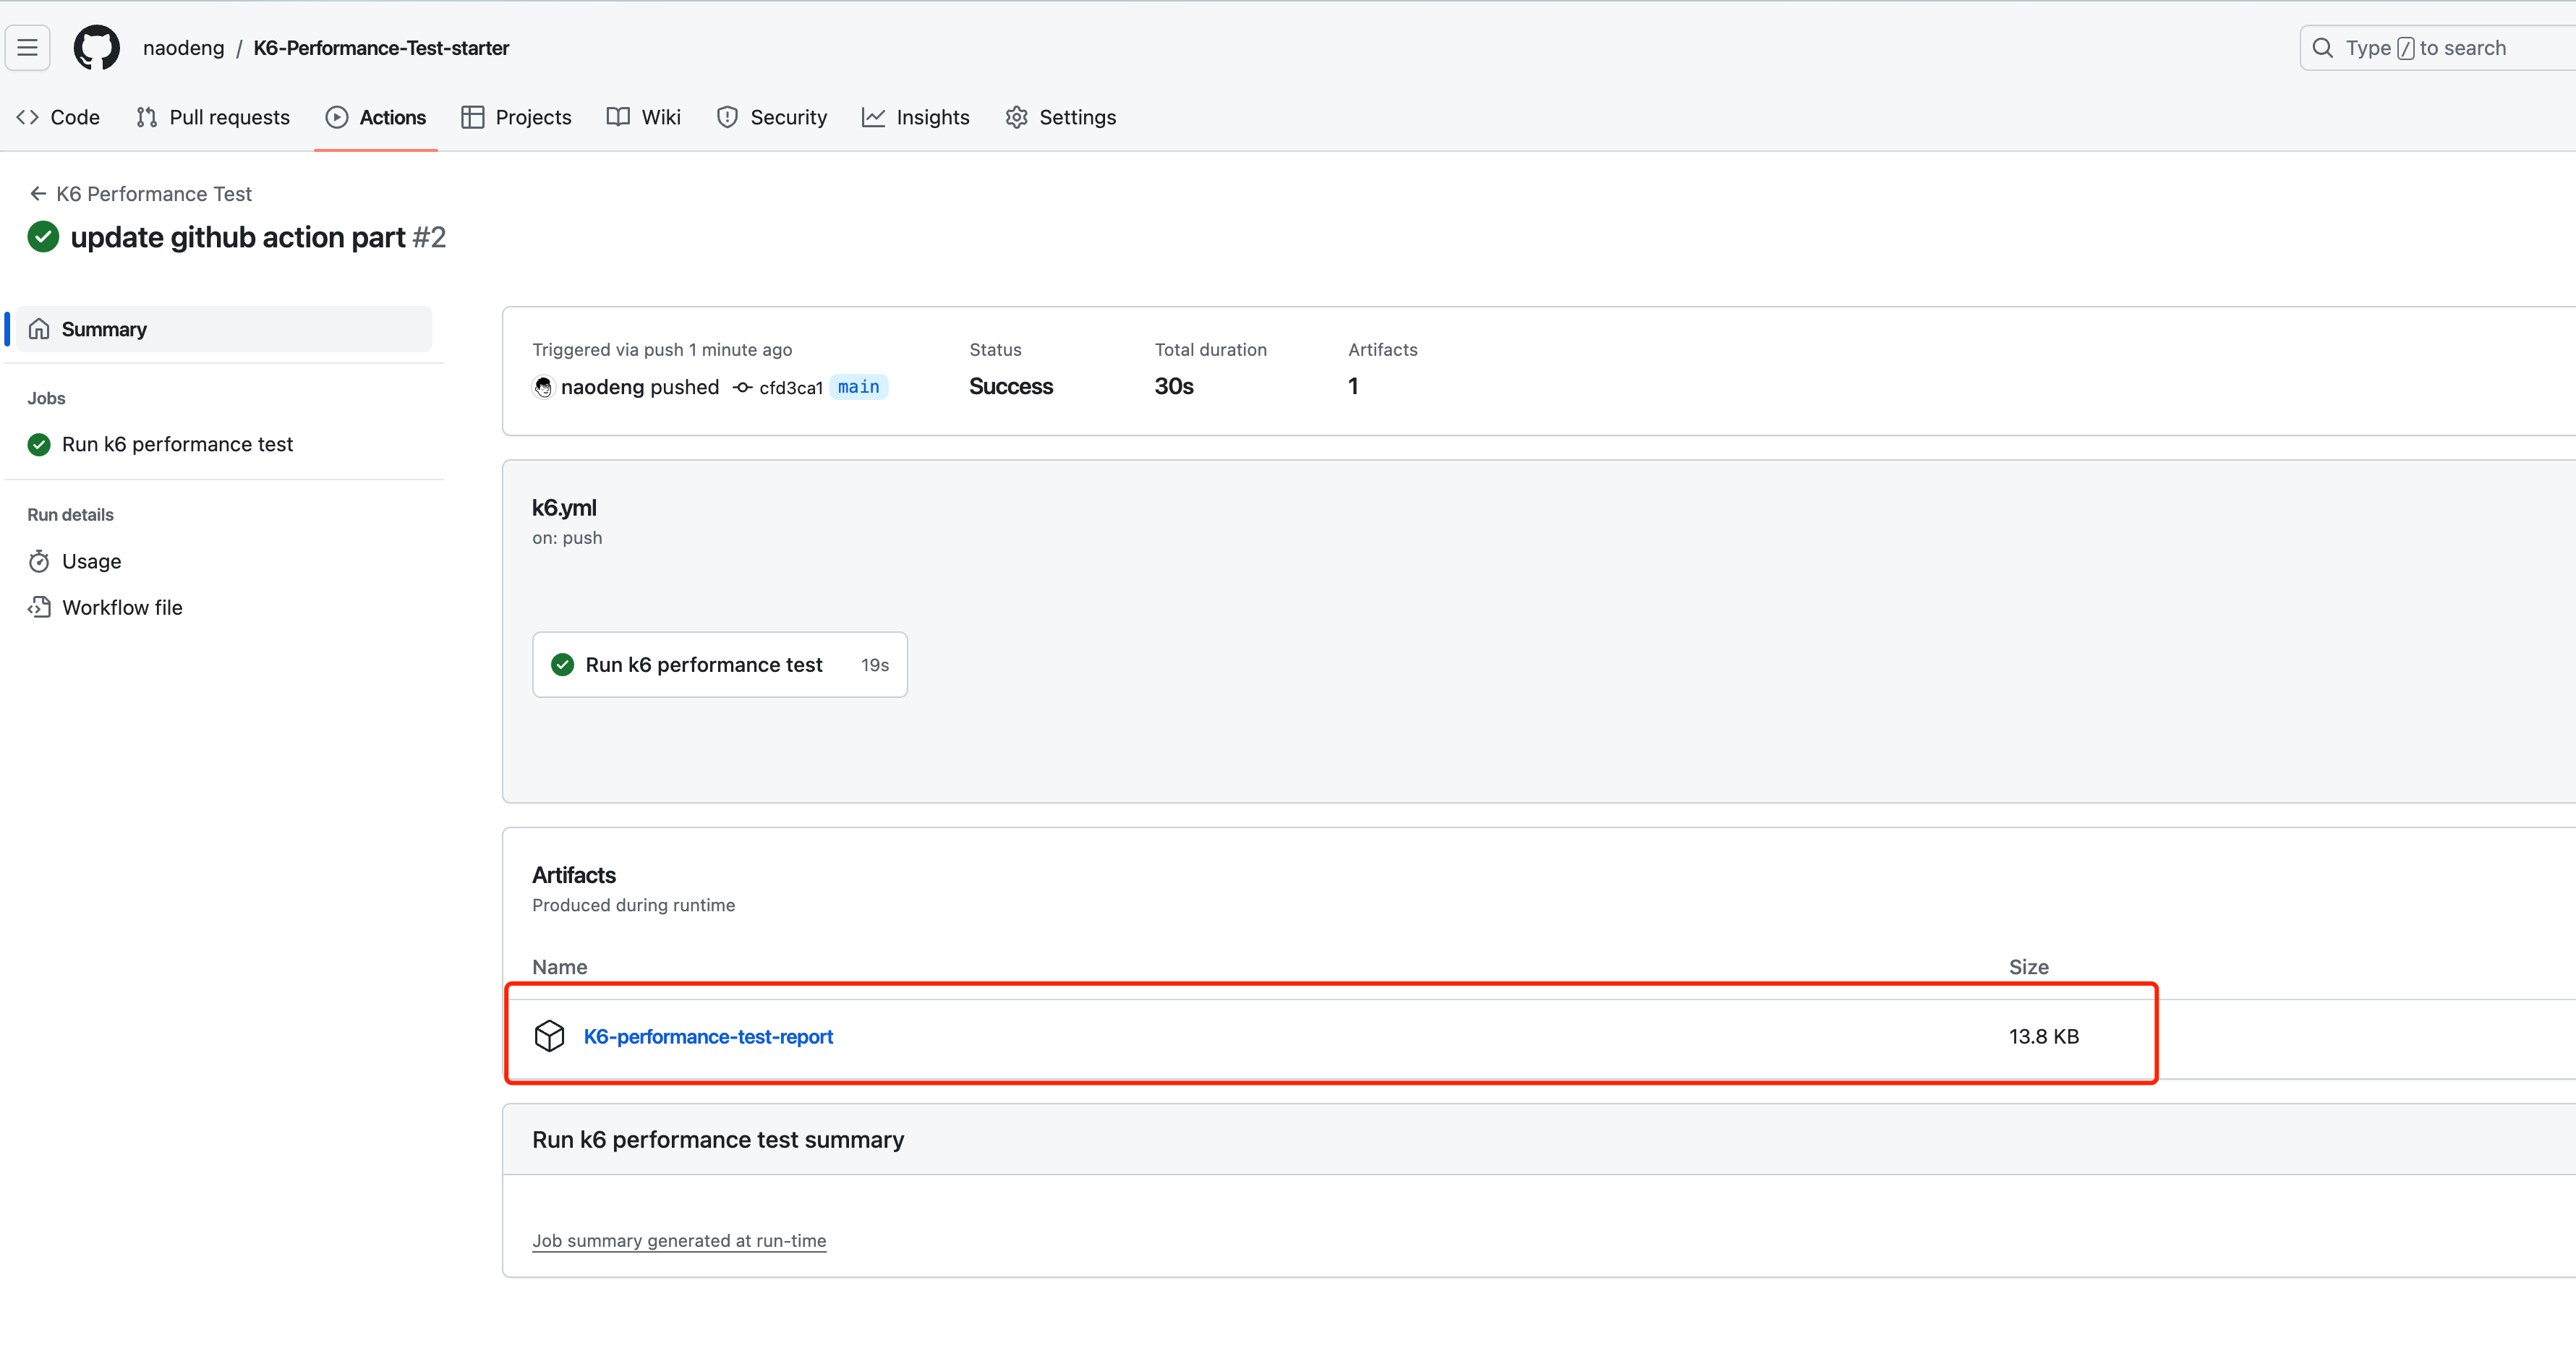
- 查看测试报告:在 GitHub 中,导航到你的仓库。单击上方的 Actions 选项卡,然后单击左侧的 K6 Performance Test 工作流。你应该会看到工作流正在运行,等待执行完成,就可以查看结果和测试报告附件。
参考文档
- K6 文档:https://k6.io/docs/
- k6 官方网站:https://k6.io/
- K6 性能测试快速启动项目:https://github.com/Automation-Test-Starter/K6-Performance-Test-starter/
欢迎关注软件测试同学的公众号“软件测试同学”,原创 QA 技术文章第一时间推送。