什么是 K6
k6 是一款用于性能测试和负载测试的开源工具,主要用于评估和验证应用程序的性能和稳定性。以下是关于 k6 的一些主要特点和信息:
开源性: k6 是一款完全开源的性能测试工具,代码存储在 GitHub 上。这意味着用户可以自由访问、使用和修改工具的源代码。
JavaScript 编写脚本: k6 使用 JavaScript 语言编写测试脚本,这使得编写测试用例相对简单,并且对于开发人员而言更加友好。脚本可以包含 HTTP 请求、WebSocket 连接、脚本执行逻辑等。
支持多种协议: k6 支持多种常见的协议,包括 HTTP、WebSocket、Socket.IO、gRPC 等,使其可以广泛应用于各种类型的应用程序。
分布式测试: k6 具有分布式测试的能力,允许在多个节点上运行测试,从而模拟更真实的生产环境负载。
实时结果和报告: k6 提供实时结果,包括请求响应时间、吞吐量等,并能够生成详细的 HTML 报告,帮助用户更好地理解应用程序的性能状况。
容器化支持: k6 适应容器化环境,可以轻松集成到 CI/CD 流水线中,并与常见的容器编排工具(如 Kubernetes)配合使用。
插件生态系统: k6 支持插件,用户可以通过插件扩展其功能,满足特定需求。
活跃的社区: 由于 k6 是一个开源项目,拥有一个积极的社区,提供支持、文档和示例,使用户更容易上手和解决问题。
总体而言,k6 是一个灵活、强大且易于使用的性能测试工具,适用于各种规模的应用程序和系统。
官方网站及文档
安装
Mac 系统安装
Mac 系统可以通过 Homebrew 安装 k6:
brew install k6
Windows 系统安装
Windows 系统可以通过 Chocolatey 安装 k6:
choco install k6
或者通过 winget 安装 k6:
winget install k6
Docker 安装
k6 也可以通过 Docker 安装:
docker pull grafana/k6
其他系统安装
K6 除了支持上述系统外,还支持 Linux(Debian/Ubuntu/Fedora/CentOS),也支持下载 K6 二进制文件和 K6 扩展进行安装,具体安装方式请参考官方文档。
确认 K6 安装成功
安装完成后,可以通过以下命令确认 k6 是否安装成功:
k6 version
如果安装成功,会显示 k6 的版本信息:

第一个 K6 测试脚本
编写第一个测试脚本
新建一个 K6 性能测试项目目录并进入
mkdir k6-demo
cd k6-demo
创建一个名为 demo.js 的文件,用于编写测试脚本
- 可以通过
k6 new命令创建一个测试脚本文件:
k6 new demo.js
- 也可以直接创建一个名为 demo.js 的测试脚本文件
touch demo.js
编辑测试脚本
如果是通过 k6 new 命令创建的测试脚本文件,会自动生成一个简单的测试脚本,如下所示:
import http from 'k6/http';
import { sleep } from 'k6';

export const options = {
  // A number specifying the number of VUs to run concurrently.
  vus: 10,
  // A string specifying the total duration of the test run.
  duration: '30s',

  // The following section contains configuration options for execution of this
  // test script in Grafana Cloud.
  //
  // See https://grafana.com/docs/grafana-cloud/k6/get-started/run-cloud-tests-from-the-cli/
  // to learn about authoring and running k6 test scripts in Grafana k6 Cloud.
  //
  // ext: {
  //   loadimpact: {
  //     // The ID of the project to which the test is assigned in the k6 Cloud UI.
  //     // By default tests are executed in default project.
  //     projectID: "",
  //     // The name of the test in the k6 Cloud UI.
  //     // Test runs with the same name will be grouped.
  //     name: "demo.js"
  //   }
  // },

  // Uncomment this section to enable the use of Browser API in your tests.
  //
  // See https://grafana.com/docs/k6/latest/using-k6-browser/running-browser-tests/ to learn more
  // about using Browser API in your test scripts.
  //
  // scenarios: {
  //   // The scenario name appears in the result summary, tags, and so on.
  //   // You can give the scenario any name, as long as each name in the script is unique.
  //   ui: {
  //     // Executor is a mandatory parameter for browser-based tests.
  //     // Shared iterations in this case tells k6 to reuse VUs to execute iterations.
  //     //
  //     // See https://grafana.com/docs/k6/latest/using-k6/scenarios/executors/ for other executor types.
  //     executor: 'shared-iterations',
  //     options: {
  //       browser: {
  //         // This is a mandatory parameter that instructs k6 to launch and
  //         // connect to a chromium-based browser, and use it to run UI-based
  //         // tests.
  //         type: 'chromium',
  //       },
  //     },
  //   },
  // }
};

// The function that defines VU logic.
//
// See https://grafana.com/docs/k6/latest/examples/get-started-with-k6/ to learn more
// about authoring k6 scripts.
//
export default function() {
  http.get('https://test.k6.io');
  sleep(1);
}
如果是直接创建的测试脚本文件,可以将上述内容复制到 demo.js 文件中。
运行测试脚本
在 demo.js 文件所在目录下,运行以下命令:
k6 run demo.js
查看测试结果
如果一切正常,会看到类似如下的输出:
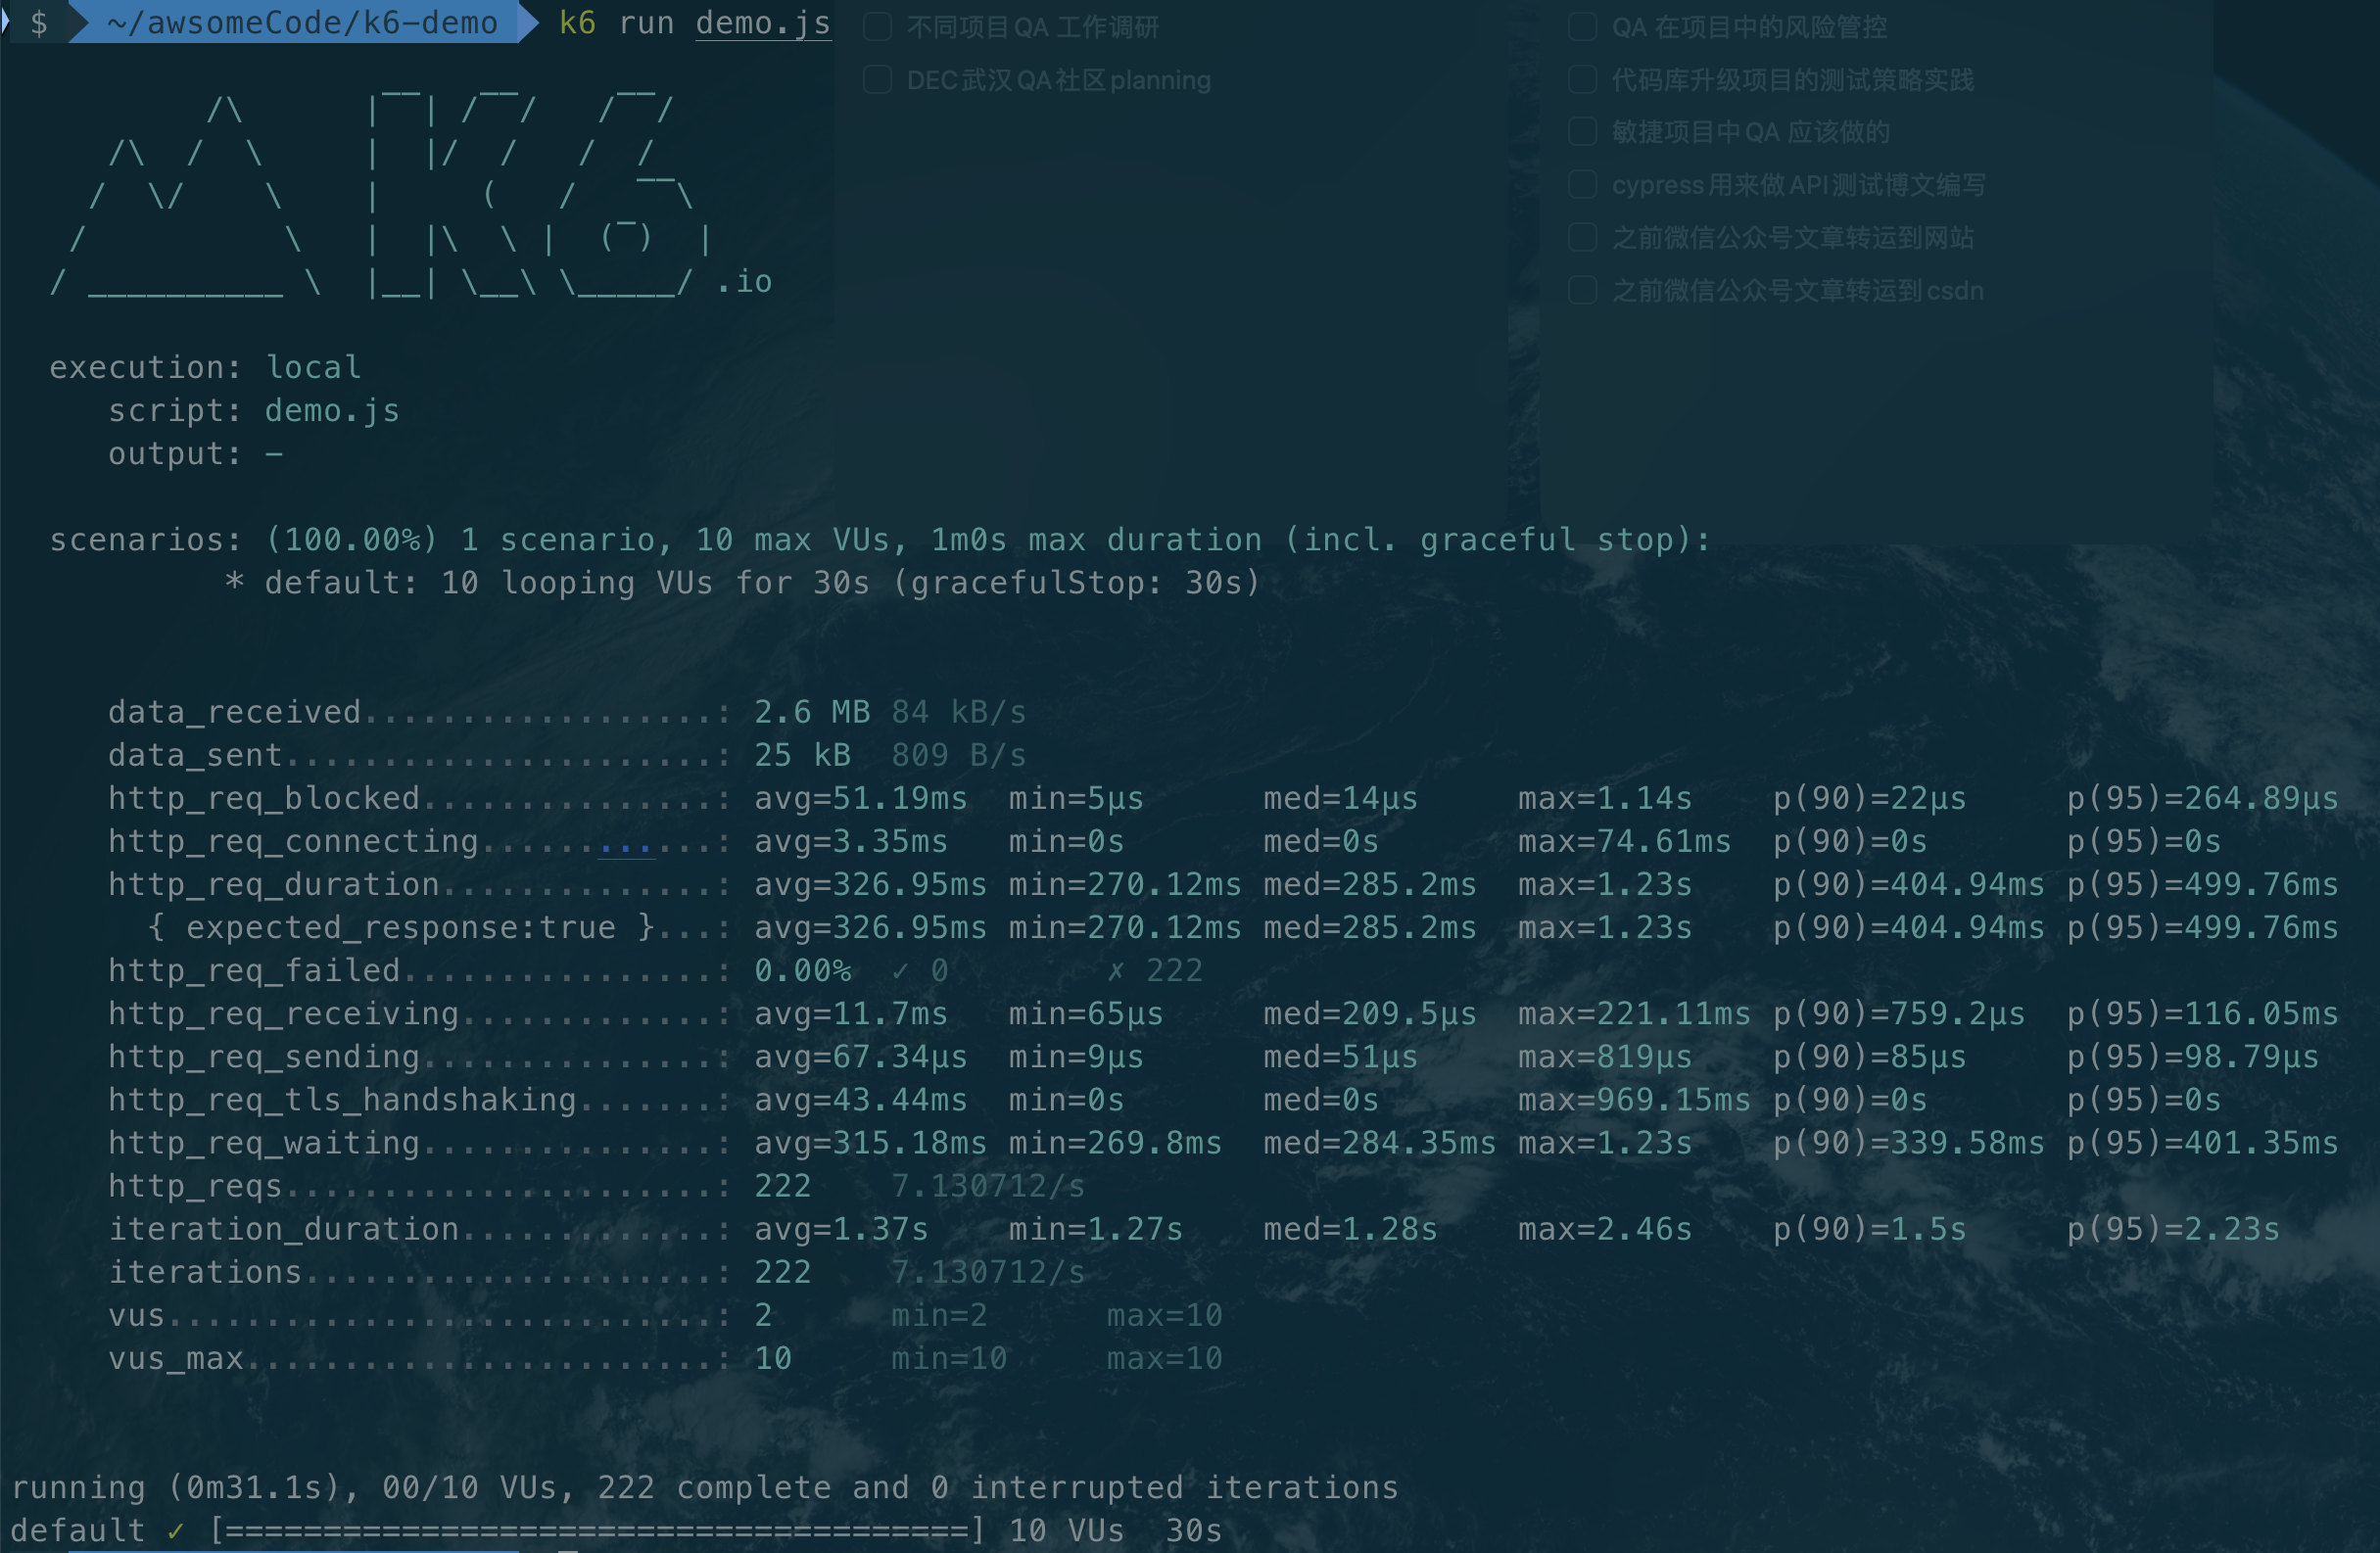
包含以下信息:
- execution: 执行信息,包括开始时间、结束时间、持续时间、VU 数量、迭代次数等。
- scenarios: 场景信息,包括场景名称、VU 数量、迭代次数、持续时间、平均响应时间、吞吐量等。
- http_reqs: HTTP 请求信息,包括请求名称、请求数量、失败数量、平均响应时间、吞吐量等。
解析 demo 测试脚本
import http from 'k6/http';:导入 k6 的 HTTP 模块,用于发送 HTTP 请求。import { sleep } from 'k6';:导入 k6 的 sleep 方法,用于执行脚本等待。export const options = { ... }:定义测试脚本的配置项,包括 VU 数量、持续时间等。vus: 10,:定义 VU 数量为 10(指定并发运行的 VU 数量)。duration: '30s',:定义持续时间为 30 秒(指定测试运行总持续时间)。export default function() { ... }:定义测试脚本的逻辑,包括发送 HTTP 请求、执行等待等。http.get('https://test.k6.io');:发送一个 GET 请求到https://test.k6.io。sleep(1);:执行等待 1 秒。
其他注释内容可以忽略,这些内容是关于 k6 的一些高级功能,后续会介绍。
参考文档
- K6 文档:https://k6.io/docs/
- k6 官方网站:https://k6.io/
- K6 性能测试快速启动项目:https://github.com/Automation-Test-Starter/K6-Performance-Test-starter/
欢迎关注软件测试同学的公众号“软件测试同学”,原创 QA 技术文章第一时间推送。